You are using an out of date browser. It may not display this or other websites correctly.
You should upgrade or use an alternative browser.
You should upgrade or use an alternative browser.
Klarstein Mundschenk
- Thread starter Eight Ace
- Start date


Help Support The Homebrew Forum:
This site may earn a commission from merchant affiliate
links, including eBay, Amazon, and others.
It's 348mm, the size is shown on this false bottom for the Brewdevil version.
You would need to sink it in after the mash so it doesn't prevent recirculation of grain particles that fall through the bottom of malt pipe.
You would need to sink it in after the mash so it doesn't prevent recirculation of grain particles that fall through the bottom of malt pipe.
clib
Landlord.
- Joined
- Apr 28, 2021
- Messages
- 787
- Reaction score
- 672
How do we know it's the same size as the Brewdevil? Not doubting you, i just saw 40cm on the Mundschenk specs.It's 348mm, the size is shown on this false bottom for the Brewdevil version.
You would need to sink it in after the mash so it doesn't prevent recirculation of grain particles that fall through the bottom of malt pipe.
Do machines that have a false bottom not also suffer from the grain particle thing then? If not why not? Sorry....
And thanks.
I just went and measured mine and 348mm looks like a good fit. I did however noticed there is a couple mm less space needed to fit past the the bar that the malt pipe hooks on to but it the false bottom is a flexible it could bend past that. The Brewdevil false bottom design probably has taken this into account.
I think the 40cm in the specs includes the ball valve.
The grain thing is a big design challenge. Some machines decided to make the mesh on the malt finer to prevent anything getting through which slows down the recirc too much. Other machines went with bigger holes but now have had to add second false bottom to help with heating up the faster flowing recirc. I think a redesign will come, e.g. where you can switch pump inlet between no filter for mash and filtered for transfer.
Last edited:
Cheshire Cat
Landlord.
My pump won’t work for whirlpool despite using a hop spider. I’m going to see if the splash guard minus the handle fits.
I don't think a spash (splatter) guard will work because the surface area over the inlet is so small it'll just get blocked immiedately. Check out this inlet filter that Brewster Beacon came up with, much larger surface area:
https://www.brewing.hu/en/spd/500080/Brewster-Beacon-40-70-Bottom-Filter
I think it's a repurposed "foot strainer" with some silicone pipe to make it fit (however that might restrict the flow into the pump).
https://www.brewing.hu/en/spd/500080/Brewster-Beacon-40-70-Bottom-Filter
I think it's a repurposed "foot strainer" with some silicone pipe to make it fit (however that might restrict the flow into the pump).
Last edited:


£6.59 (£235.36 / kg)
2X Bulldog Mead Yeast & Nutrient High Alcohol 28g for 20-25L
Virtuoso (VAT Registered)

£23.75 (£25.45 / 75 cl)
Kinsale Mead Co. Atlantic Dry Mead 70cl, Light, Off Dry, Refreshingly Different Award-Winning Honey Mead, 12% ABV
Amazon.co.uk


£10.49 (£349.67 / kg)
£11.96 (£398.67 / kg)
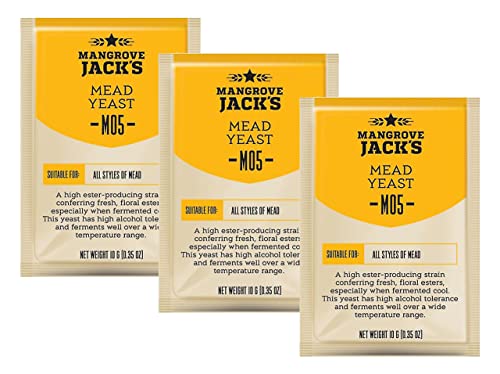
Mangrove Jack 3X ’s Craft Series Mead Yeast M05 (10g)
Almost Off Grid


£73.98
Sanitary clamp 2" (51mm) OD64mm Sanitary Tri-Clamp 90-Degree Pipe With Nipple And Electronic Thermometer, Stainless Steel 304 Home brewing(Without Thermometer)
DAN CHENG XIAN PENG SHI DA SHANG MAO DIAN


£5.42 (£0.02 / 100 ml)
Elderflower Sparkling Wine Yeast 5-25L Homebrew Wine, Mead, Cider, Ginger Beer
247 Homebrew


£14.76
Digital Temperature Watch Heating Thermometer Home Brewing Tools for Wine Bottle
B&D DIRECT STORE

£437.77
HMCOCOOFM 4L 4" OD119mm * 1.5" OD50.5mm Copper Onion Head For Homebrewing,Thickness 1.5mm (With Thermometer)
weifangguanhuawangluokejiyouxiangongsi


- Joined
- Jun 9, 2022
- Messages
- 266
- Reaction score
- 145
The one and only time I've used the kettle so far was for a NEIPA which required the first hop addition at flameout. Whirlpool worked fine but I don't know if stuff went in during the boil that would change things.
My spider is quite fine though.
I made sure I kept the top on the grain pipe which stopped the grain going down the overflow.
My previous converted kettle used to struggle if grains went over the side of the grain pipe. My experience of that was that grains blocked worse than hops.
Next brew will be a usual brew with hops during the boil so will see how that goes.
clib
Landlord.
- Joined
- Apr 28, 2021
- Messages
- 787
- Reaction score
- 672
Really helpful thanks.I just went and measured mine and 348mm looks like a good fit. I did however noticed there is a couple mm less space needed to fit past the the bar that the malt pipe hooks on to but it the false bottom is a flexible it could bend past that. The Brewdevil false bottom design probably has taken this into account.
I think the 40cm in the specs includes the ball valve.
The grain thing is a big design challenge. Some machines decided to make the mesh on the malt finer to prevent anything getting through which slows down the recirc too much. Other machines went with bigger holes but now have had to add second false bottom to help with heating up the faster flowing recirc. I think a redesign will come, e.g. where you can switch pump inlet between no filter for mash and filtered for transfer.

- Joined
- Jun 9, 2022
- Messages
- 266
- Reaction score
- 145
Another option.
I bought a whirlpool arm for my BZ and it is pants totally useless, what i do is after the boil i leave the paddle in remove the chiller and whirlpool by hand, works a treat
- Joined
- Jun 9, 2022
- Messages
- 266
- Reaction score
- 145
Duck bill the end with a big pair of grips, it makes a huge difference.
Cheshire Cat
Landlord.
I think you are right about the overflow pipe. On my first brew I mistakenly left the white plastic cap on the pipe and my pump worked for whirlpool.The one and only time I've used the kettle so far was for a NEIPA which required the first hop addition at flameout. Whirlpool worked fine but I don't know if stuff went in during the boil that would change things.
My spider is quite fine though.
I made sure I kept the top on the grain pipe which stopped the grain going down the overflow.
My previous converted kettle used to struggle if grains went over the side of the grain pipe. My experience of that was that grains blocked worse than hops.
Next brew will be a usual brew with hops during the boil so will see how that goes.
The tubing I ordered for the tap arrived, very snug fit on the tap, easyish to fit on just takes a couple seconds to wiggle it on. FYI the tap hose connector measures 11.5mm OD with the calipers so I went with 10mm ID. I believe it's designed for 3\8" tubing which would be 9.5mm which is hard to find and I think 9mm ID would be too narrow.
Food Grade Clear Translucent Silicone Tube Beer Milk Hose Pipe Soft Rubber
£5.89
Item number:255169437014
10mm ID x 14mm OD ⋅ 1 Metre
It also fits nice and tight on the recirc arm which is 12.1mm OD. I also plan to use it to extend the the brewmonk whirlpool arm (maltmiller £9.99) which is a bit short for my 10L batch size, it reaches down to about 12L.
Got this deal delivered last week but so far have resisted the temptation to mess with it too much beyond checking it heats and pumps
I have only completed one extract kit so far (second one is in the fv) and kinda jumped in without much investigation as I felt the price was too good to resist.
I'm not sure what to do about sparge can I just use a kettle and tap water
"Whirlpool" I'm totally lost what is it? when do I do it? do I need to do it?
Links to articles threads or videos will be helpful.
I will be making a diy counterflow chiller with a bit of help at work
I hope to order an all grain kit or two soon do they come with idiot proof instructions or is it kinda a wing it and hope it turns out OK
Hopefully this makes sense I'm 3 bottles into my first every brew and ready for a few more
Any help will be greatly appreciated
Have a great Saturday night
clib
Landlord.
- Joined
- Apr 28, 2021
- Messages
- 787
- Reaction score
- 672
Whirlpooling is optional and is just stirring the wort after the boil. There's a gadget you can buy to do it, or you can just stir it.
Even sparging is optional. But you just heat up water in a pan or something and trickle it through the grains after you've lifted the grain basket.
You'll suss it. Mash. Sparge. Boil. Transfer to FV.
Even sparging is optional. But you just heat up water in a pan or something and trickle it through the grains after you've lifted the grain basket.
You'll suss it. Mash. Sparge. Boil. Transfer to FV.
Last edited:
I'd say whirl-pooling is an advanced debris filtering technique that removes the need for a hop spider or hop bazooka.
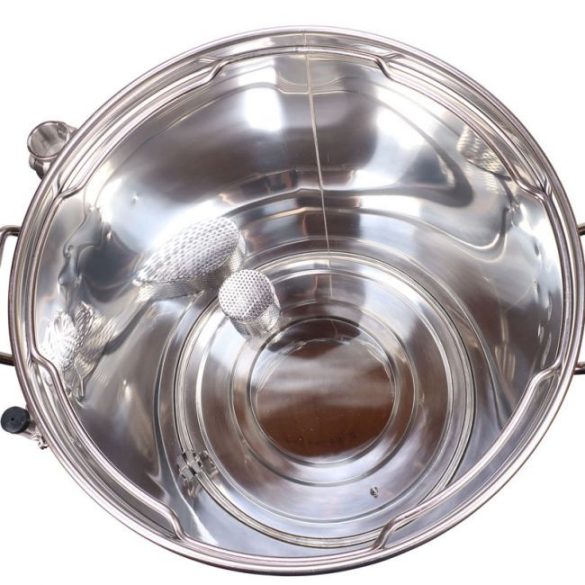
I had a really enjoyable first brew today with mine, still can't believe we got such a great deal. I took a gamble and didn't install the bazooka a filter on the tap outlet and it paid off. The grain recirc needed some intervention but the whirlpool and pump transfer worked unbelievably well.
Recirc
The recirc didn't get all the grain that slipped through the malt pipe sieve back to the top so I had to stir and run the pump through a sieve before boiling and I collected a fair amount of grain (see first image below). I also dipped the sieve a few times to get even more of the finer stuff. I believe if I hadn't go all this grain out it could have scorched the element during the boil, darkened the wort or tasted bad.
Blocked pump
I did get a pump blockage - when I dropped in the whirlpool hops the pump was running and it seems a pellet was sucked into the pump inlet and blocked it. But I just took a piece of tubing and placed it on the camlock and blew which unblocked it in reverse. I think next time I will stir the hop pellets before running the pump.
Whirlpool and pump transfer
The brewmonk whirlpool arm is a bit short my volume was up to the 12L line and it was just under the surface. I cut a small bit of tubing and attached it wich took it down to the bottom. After chilling I ran the pump in whirlpool config for 15 min then stopped it and waited 15min. Then swapped over to the recirc arm with tube to fermenter do to a pump transfer and too my suprise was crystal clear wort coming through. I ran through a sieve just to be safe and only a tiny amount of hop debris came through (see second pic). I was amazed, it's the first time I've seen a hop cone in person! (see third pic) So no spider or bazooka needed if you whirlpool, amazing.
Total hops were 40g. 10g boil and 30g whirlpool for batch size targeting 10L.
clib
Landlord.
- Joined
- Apr 28, 2021
- Messages
- 787
- Reaction score
- 672
@malhal how did you do 10 litres? No sparge presumably?
And I what approximately is the smallest batch size that can be made in the Mundschenk?
I'm thinking about how much water you need to get up to a workable mash level, given there's 7 or 8 litres beneath the grain basket before you add whatever water you need for the mash calculations.
So you maybe need 7+(grain x 3) litres in the mash.
Does this make sense?!
Last edited:
I planned to do no sparge and started with 15L. However after I lifted the malt pipe and it drained I tasted the grains and I was a bit annoyed how sweet they still tasted (I even had done a mash out) so I quickly dechlorinated 1L of sparge water and used that. Pre-boil was about 12-13L and I boiled it down to around 10-11L and filled my fermenter to 9.5L with no trub going in. I probably have filled my 10L fermenter too full and the krausen will probably come out the airlock soon! I use the Fermenter Genius 10L (geterbrewed) a repurposed milk jug Fustini demetra from an Italian plastics company.
I measured 7.4L water below the malt pipe. So smallest brew would probably start with 10L and target a 6L batch size maybe with 1.5Kg grain.
Fyi there is also 2.6L below the tap outlet so you will need to empty via the pump inlet.
I measured 7.4L water below the malt pipe. So smallest brew would probably start with 10L and target a 6L batch size maybe with 1.5Kg grain.
Fyi there is also 2.6L below the tap outlet so you will need to empty via the pump inlet.
Last edited:
clib
Landlord.
- Joined
- Apr 28, 2021
- Messages
- 787
- Reaction score
- 672
That's really helpful thanks.I planned to do no sparge and started with 15L. However after I lifted the malt pipe and it drained I tasted the grains and I was a bit annoyed how sweet they still tasted (I even had done a mash out) so I quickly dechlorinated 1L of sparge water and used that. Pre-boil was about 12-13L and I boiled it down to around 10-11L and filled my fermenter to 9.5L with no trub going in. I probably have filled my 10L fermenter too full and the krausen will probably come out the airlock soon! I use the Fermenter Genius 10L (geterbrewed) a repurposed milk jug Fustini demetra from an Italian plastics company.
I measured 7.4L water below the malt pipe. So smallest brew would probably start with 10L and target a 6L batch size maybe with 1.5Kg grain.
Fyi there is also 2.6L below the tap outlet so you will need to empty via the pump inlet.
This started as a limited offer thread in December and has turned into a long discussion about the machine, chillers etc so I have moved it to the equipment forum as members may have missed it in the sales forum - Admin.