Have a go at simple AG

The Homebrew Forum

Help Support The Homebrew Forum:

This site may earn a commission from merchant affiliate links, including eBay, Amazon, and others.
It can actually be quite difficult to cool wort do to pitching temp without a chiller. I've tried a number of things and found no-chilling the easiest

I'm thinking next time, and based on my notes, to chill a few litres of bottled water in the chest freezer so that it goes all slushy without being solid ice. Adding that to the wort might work better at lowering the temps I'm guessing. Also a few litres of water frozen solid in plastic bottles might act as affective ice pack to get the temps down quicker when cooling in the sink.
 
I'm thinking next time, and based on my notes, to chill a few litres of bottled water in the chest freezer so that it goes all slushy without being solid ice. Adding that to the wort might work better at lowering the temps I'm guessing. Also a few litres of water frozen solid in plastic bottles might act as affective ice pack to get the temps down quicker when cooling in the sink.

Do you have star san? You can sanitise some 500ml ice bottles and put them directly in the wort itself. I've done this a number of times, with no ill effect, when my wort hasnt been quite at pitching temp after no chilling(usually in summer when i want my pitching temp below ambient temp). Doing this chills your wort without diluting it
 
Do you have star san? You can sanitise some 500ml ice bottles and put them directly in the wort itself. I've done this a number of times, with no ill effect, when my wort hasnt been quite at pitching temp after no chilling(usually in summer when i want my pitching temp below ambient temp). Doing this chills your wort without diluting it

I think that was part of my problem, the suggested pitching temp was lower than the ambient room temperature. More so when working on the brew in the kitchen all afternoon. I think I'm might just do that, sort some ice pack that can go right in the wort without the need to dilute. As after all, next time with the notes I took I should be better placed to make a much more accurate guess on the volume required at the boil stage to give the right target volume at the cooling stage.
 
So this morning I check the FV, fermentation has started so alls good. And after the brew has settled down I note I in fact have 13 1\2 litres. So based on grain for a 15 litre brew and my about 1052 OG reading I wasn't far off the 1051 it should have been anyway if a 15 litre brew.
 
I never get the full volume in the fermenter based on the batch size in the recipe. I always think the batch size must be based on zero loss in the kettle from trub and dead space, but I usually have around 2ltrs of trub left in the kettle.
 
I never get the full volume in the fermenter based on the batch size in the recipe. I always think the batch size must be based on zero loss in the kettle from trub and dead space, but I usually have around 2ltrs of trub left in the kettle.

The way I see it is by doing AG for the first time, process aside we should be able to compensate with future brews. But how the hell I lost as much volume as I did was puzzling seeing as it wasn't a vigorous boil. Yet I still lost what, a third of my volume in a 100 odd minute boil. Definitely a smaller boil next time as well as a smaller volume in general.

But in saying that, I use stock pots, uncovered so maybe the lid on might have helped save some volume. As its been mentioned, we could also always over compensate on the grain and simply add extra (and chilled) water at the cooling stage to get both the desired volume and temperature for yeast pitching. Practice makes perfect I guess, but sure enjoying what I should never have walked away from near 25 years ago!.

Hi Dave, Yes I loose lots in the boil too but I read somewhere - in here I think - that you should leave the lid OFF during the boil as there are some unwanted nasties driven off in the escaping steam that you don't want to condense on the lid and drip back in to the wort. If you know what your losses are over the time of the boil then you can plug that in to the recipe calculator and it will tell you how to compensate for / replace the lost volume. I'm still tweaking the values here but small amounts either side do not make much of a difference - unless you need to know commercially.
 
I think future such brews will likely be capped at 10 litre brews, was a bit of a pain splitting it to 2 pots for the boil. So in theory I'd be looking at around 13 litres at the boil stage to give a 10 litre brew I think. But in saying that, chilled water to make up the shortfall during the cooling stage is an option and would aid cooling to of cause.
 
Yes leave the lid off during the boil. A compound called DMS Di-Methyl Sulphide is created from the wort as it is heated, as it is volatile it gets driven off with the steam during a vigorous boil. If the pot were covered, it would condense on the lid and drip back into the wort. DMS has a cooked cabbage or sweetcorn like aroma, not nice in a beer.

You said that you did a 100 plus minute boil, 60 - 70 minutes is usually sufficient, although Graham Wheeler recommends 90 minutes for everything.
 
The boil was close to 100 minutes, next time I'll keep it to more like 70 minutes, which in itself aught to save quite a bit of evaporation. But I'm sure I read that after the boil its important to cool the wort as quick as possible. So as well as ice packs, I might purposely try to work out the boil so I can top up with a couple of litres of ice water.
 
One kilo of ice can reduce the temperature of 10 litres of water by 8°C. The best method I used (before making an immersion chiller) was to make as much ice as possible, when boiling has finished, put pan into sink of cold water, keep water moving around sink to maximise heat transfer. When water feels warn, drain and refill. On the third fill, add your ice, this will keep the difference in temperature between the wort and the coolant constantly high, keeping the cooling rate high and gets the wort down to pitching temp.
 
One kilo of ice can reduce the temperature of 10 litres of water by 8°C. The best method I used (before making an immersion chiller) was to make as much ice as possible, when boiling has finished, put pan into sink of cold water, keep water moving around sink to maximise heat transfer. When water feels warn, drain and refill. On the third fill, add your ice, this will keep the difference in temperature between the wort and the coolant constantly high, keeping the cooling rate high and gets the wort down to pitching temp.

Similar to what I did, only I didn't freeze the water quick enough and simply had very cold water after my second sink refill. Barely had time to fill the sink with weather before it got to warm that I had to empty it and refill. I think it took something like 30-35 minutes for me to cool the wort in the end. And even that was after I stuck 2 litres of chilled water to the wort yet still couldn't get the temp below 27c. I think I need to better plan for next time and hoping to half the chill time if possible.
 
Many thanks, for the hints tips and information on this thread. It has all been very helpful.

o7dKoKP.jpg

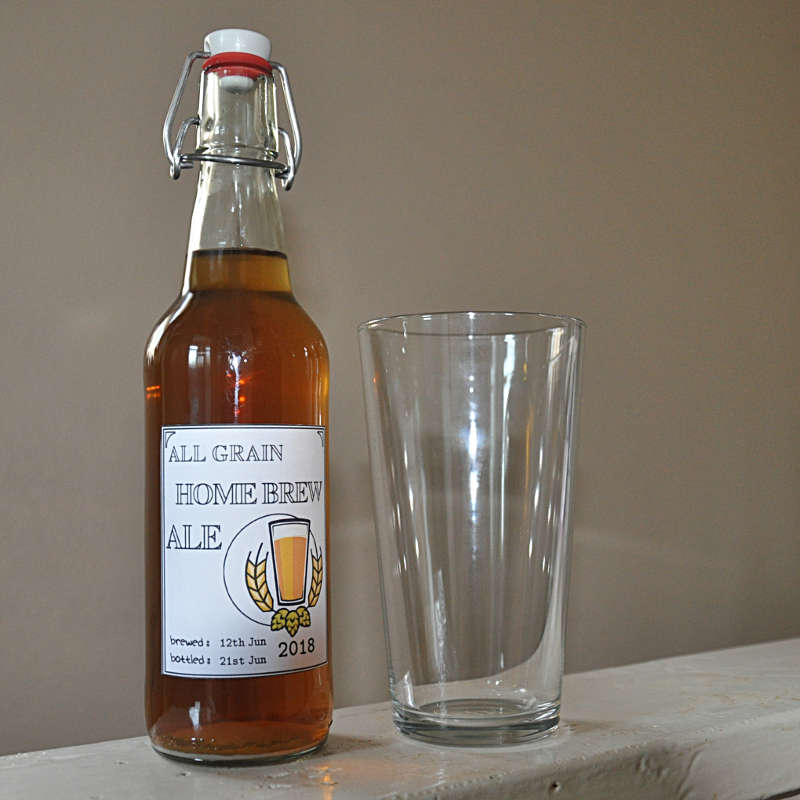
I've just bottled my first AG bitter, 'slightly hoppy', to quote my software of choice, but nevertheless a good looking and very drinkable pint on a lovely sunny afternoon.

I'm now getting a brown ale under way. [I'm an old fella with old tastes, indulge me and keep that nasty lager outta here :laugh8:]

My first brew followed Clibits instructions very much to the letter, although I did use two malts rather than one.
I got myself a bag to mash in from my home brew shop and I'm impressed how tidy it makes the job. It is so easy to use, to clean and dry, so it is win, win, all around. I also recommend a long hop bag so that you can tie the top end to the pot handle and add further hops when required.
Before I started my second brew I bought 10M of 10mm copper microbore [online and delivered £17.34 - about £6 cheaper than in superstore] and made myself a cooling coil by wrapping it around a 5L paint can. I put an inch or two of 10mm syphon tube, as packing, around each end of the coil then put ordinary garden hose over that, fixing with jubilee clips. Wow!! It cools from boiling down to room temp in about 15 mins, no fuss, - that really was a worthwhile investment, - something else I would recommend.

Working from room temperature I found that boiling full kettles of water and pouring them into a 5L steel stock pot lined with my mash bag gave me a temperature about 70-75°C when I had added 3L of water. After adding the grain the temperature dropped below 70°C to more like 65°C, - ideal!! I put the lid on it, wrapped it in a duvet and watched an hours telly with the Missus.
When the hour was up I put the 5L stock pot next to a Wilko 12L pot on the stove top. I started boiling the kettle again, transferring 4L of hot water to the 12L pot, the temperature I was aiming for was 80C. I pulled the mash bag out of the 5L pot and tranferred it to the water in the 12L pot. I stirred the contents and dunked it a few times for ten minutes to persuade the remaining malt to get into solution.
I slowly lifted the bag wearing Marigold gloves [it was very hot] and squeezed it as best I could to get out any goodness that remained. I disposed of the grain and added the wort from the 5L pot to the spargings in the 12L pot. [you can get both pots from Wilko by the way]
Next I fired up the gas on the stove and brought the wort [around 6L of it] in the 12L pot up to boiling. I threw the bittering hops in a hop bag into the pot and went back for another 45 mins of telly with the Missus. Then back to the pot with ¼ of a tab of whirlfloc [unsure how much to use] and flavour hops into the hop-bag, followed by aroma hops 5 minutes before flame out.
Next step, fast cool with the chilling coil and much stirring. Then move 12L pot to a quiet spot, measure specific gravity, throw in yeast, lid it, put a cover over air hole in lid and put a bin bag over the lot.
48 hours later after vigorous fermentation had subsided, I siphon the brew into a demijohn with airlock and again cover with a bin bag [to keep out the light].
Ten to fourteen days later, measure sp.gr. again, if ready, prime with sugar syrup and bottle. Wait, wait, wait 14 days if you can and sample a delectable moreish pint. :D

My first recipe [I WAS flying blind] 1Kg Maris Otter, 50g Crystal Malt, 5g First Gold hops, bittering for 55 mins and 8g First Gold hops, aroma for 5 minutes, yielding 8 pints of very drinkable ale. On hindsight I'd adjust the hopping a little, maybe , but nothing drastic. It looked and tasted okay and will no doubt improve if I can only leave it in the bottle for a while... OG 1047 FG 1004

My second AG, a brown ale, is still processing: 1kg Maris Otter, 100g Crystal Malt, 20g Chocolate Malt and 10g Black Malt, 5g First Gold hops [55Min], 3g Fuggles hops [15min], ¼ tab Whirlfloc [15min] and 2g Fuggles hops [ 5min]
:UKflag:
 
Last edited:
Many thanks, for the hints tips and information on this thread. It has all been very helpful.

I've just bottled my first AG bitter, 'slightly hoppy', to quote my software of choice, but nevertheless a good looking and very drinkable pint on a lovely sunny afternoon.

I'm now getting a brown ale under way. [I'm an old fella with old tastes, indulge me and keep that nasty lager outta here :laugh8:]

My first brew followed Clibits instructions very much to the letter, although I did use two malts rather than one.
I got myself a bag to mash in from my home brew shop and I'm impressed how tidy it makes the job. It is so easy to use, to clean and dry, so it is win, win, all around. I also recommend a long hop bag so that you can tie the top end to the pot handle and add further hops when required.
Before I started my second brew I bought 10M of 10mm copper microbore [online and delivered £17.34 - about £6 cheaper than in superstore] and made myself a cooling coil by wrapping it around a 5L paint can. I put an inch or two of 10mm syphon tube, as packing, around each end of the coil then put ordinary garden hose over that, fixing with jubilee clips. Wow!! It cools from boiling down to room temp in about 15 mins, no fuss, - that really was a worthwhile investment, - something else I would recommend.

Working from room temperature I found that boiling full kettles of water and pouring them into a 5L steel stock pot lined with my mash bag gave me a temperature about 70-75°C when I had added 3L of water. After adding the grain the temperature dropped below 70°C to more like 65°C, - ideal!! I put the lid on it, wrapped it in a duvet and watched an hours telly with the Missus.
When the hour was up I put the 5L stock pot next to a Wilko 12L pot on the stove top. I started boiling the kettle again, transferring 4L of hot water to the 12L pot, the temperature I was aiming for was 80C. I pulled the mash bag out of the 5L pot and tranferred it to the water in the 12L pot. I stirred the contents and dunked it a few times for ten minutes to persuade the remaining malt to get into solution.
I slowly lifted the bag wearing Marigold gloves [it was very hot] and squeezed it as best I could to get out any goodness that remained. I disposed of the grain and added the wort from the 5L pot to the spargings in the 12L pot. [you can get both pots from Wilko by the way]
Next I fired up the gas on the stove and brought the wort [around 6L of it] in the 12L pot up to boiling. I threw the bittering hops in a hop bag into the pot and went back for another 45 mins of telly with the Missus. Then back to the pot with ¼ of a tab of whirlfloc [unsure how much to use] and flavour hops into the hop-bag, followed by aroma hops 5 minutes before flame out.
Next step, fast cool with the chilling coil and much stirring. Then move 12L pot to a quiet spot, measure specific gravity, throw in yeast, lid it, put a cover over air hole in lid and put a bin bag over the lot.
48 hours later after vigorous fermentation had subsided, I siphon the brew into a demijohn with airlock and again cover with a bin bag [to keep out the light].
Ten to fourteen days later, measure sp.gr. again, if ready, prime with sugar syrup and bottle. Wait, wait, wait 14 days if you can and sample a delectable moreish pint. :D

My first recipe [I WAS flying blind] 1Kg Maris Otter, 50g Crystal Malt, 5g First Gold hops, bittering for 55 mins and 8g First Gold hops, aroma for 5 minutes, yielding 8 pints of very drinkable ale. On hindsight I'd adjust the hopping a little, maybe , but nothing drastic. It looked and tasted okay and will no doubt improve if I can only leave it in the bottle for a while... OG 1047 FG 1004

My second AG, a brown ale, is still processing: 1kg Maris Otter, 100g Crystal Malt, 20g Chocolate Malt and 10g Black Malt, 5g First Gold hops [55Min], 3g Fuggles hops [15min], ¼ tab Whirlfloc [15min] and 2g Fuggles hops [ 5min]
:UKflag:

I'm already looking ahead to the next few brews of AG despite the fact that the first AG effort has only been in the FV for 2 1\2 days. Not sure what to go for next, but will be bulk buying 25kg of base malt and getting several smaller quantities of other grain so I can have a play around with a few different ideas & recipes.
 
...now that is what I call commitment to the cause!! Sounds like a fun project. You are going to end up with a very interesting cellar, if you manage to keep hold of any of it, that is. :beer1:

In all honesty, I blame having got into working, well volunteering at real ale festivals 2 years ago for my inspiration on getting back into home brew. Must have tried hundreds of different beers in the last 2 years and sure enjoy finding some cracking gems out there. Would love to find some Purple Moose Brewery home brew clone recipes for a start!.

Yep, building up a decent collection for the summer and Xmas is my short term aim. But I just want enough different grains for now that I can brew whatever style I'm in the mood for at any given time. So I'm thinking a 25kg base grain buy and maybe several 500g - 1kg mixed buys so I can try anything. Probably a good several different packs of hops to. Thinking a rather basic Maris Otter with some Cascade & Brewers Gold hops next.
 
Getting a variety of packs of grains is relatively inexpensive in comparison to collecting a number of hop types.
As far as I understand it hops can be swapped and substituted in your recipes anyway, so perhaps a great variety is not so important. Maybe just try to avoid getting similar types and look to getting those that will cover a few bases.
There should be some way of setting up a hop swap shop so you could try a few grammes in a brew before you buy.

I've been looking at recipes for Timothy Taylors Landlord, Newcastle Brown Ale, Wychwoods Hobgoblin and Orkney Dark Island to name a few.
 
Last edited:

Latest posts

Back
Top