We can assume that thick slurry contains between 1.2 and 1.6 billion cells per milliliter. If we use the more conservative figure, then 180ml of thick slurry contains 1.2 * 180 = 216 billion cells. If we pitch 180ml of thick slurry into 23L of wort, we have a cell density of 216,000,000,000 / 23,000 = 9,391,304 cells per ml. George Fix’s rule of thumb for cell density is 750,000 cels per ml per degree plato. Using that rule of thumb, let’s calculate the cell density needed for a 1.050 (12.5P) wort.
12.5 * 750,000 = 9,375,000
In practice, 180ml of thick slurry is more than enough to fully attenuate beers up to around 1.060 (17P) without any hiccups, that is, as long as we properly aerate our wort. A 1.080 (20P) or greater beer is an entirely different animal due to osmotic pressure and the increased difficulty of disolving O2 into the wort. Most of the time, we can get away with underpitching by as much is 50% (e.g., 100B cells instead of 200B cells) because the difference is only one replication cycle, which is easily handled by proper aeration (there will be slight increase in ester production with some yeast cultures). That is the reason why I always state that yeast cultures are like nuclear weapons in that close is good enough. However, things start to get scetchy at 1.080 because one is starting to reach the point where dissolved O2 will not support underpitching, especially when coupled with early cell death caused by high osmotic pressure. For those who do not know, osmotic pressure is the tendency for fluid to be drawn to the side of a semi-permable membrane that has the highest solute content. In layman’s terns, the density of the wort is far higher than the density within the a yeast cell wall. What osmostic pressure does is draw water out of yeast cells, resulting in the loss of cell membrane turgor pressure, which, in turn, causes cell membranes to wrinkle and eventually implode. Pitching a greater number of cells in high gravity wort is about accounting for a) the increased difficulty of dissolving O2 in denser wort and b) premature cell death.
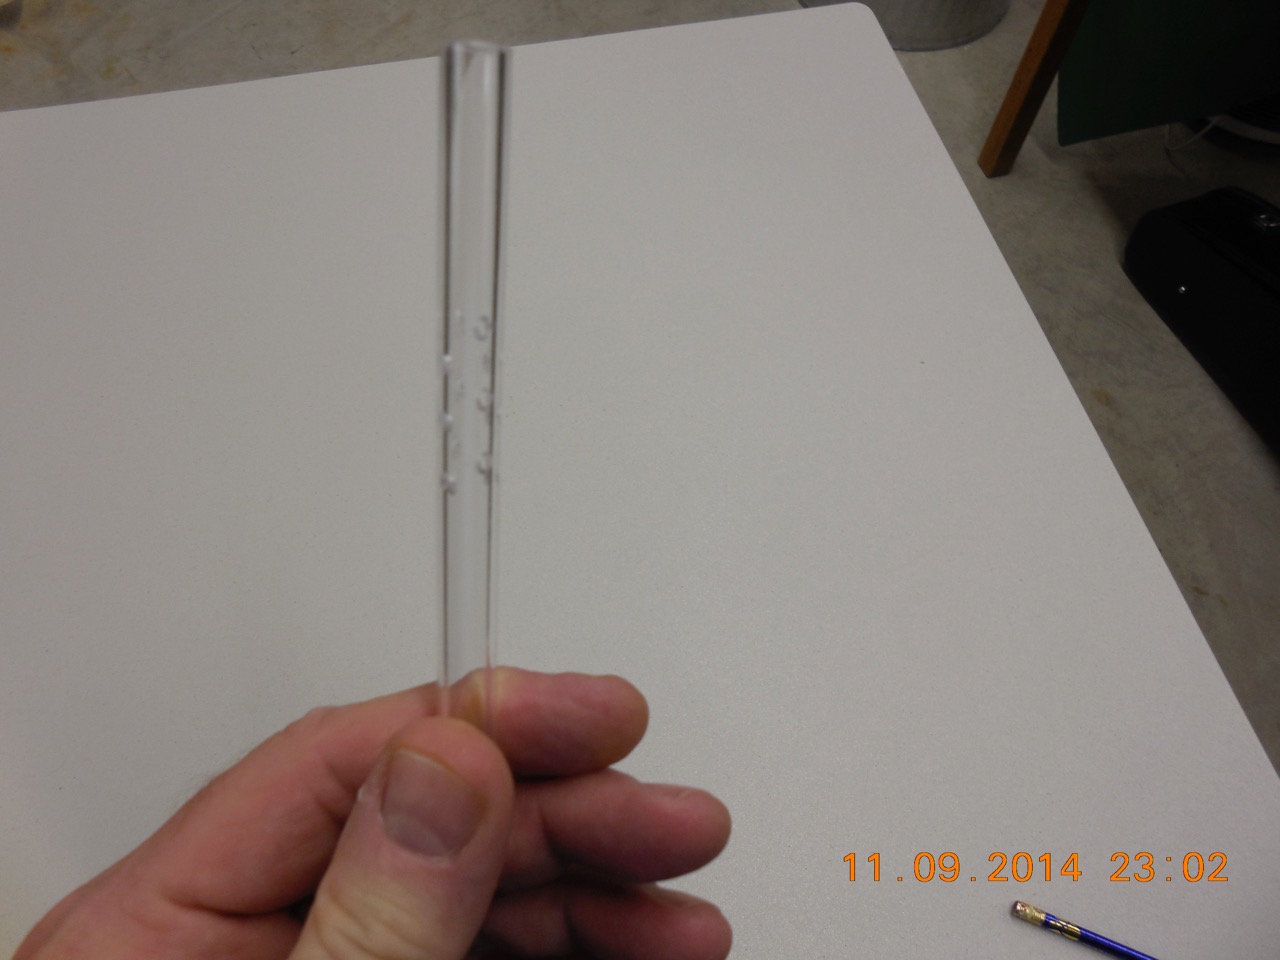
By the way, the photo below is a simple aerator design that I have been using since the nineties. In use, the aerator is attached to the outflow side of the tubing that drains one’s brewing kettle into one’s fermenation vessel. For optimum effectivness, it should be held vertically in the fermentation vessel (I use a racking cane clip). This aerator design is based on the Bernoulli principle (i.e., it is a venturi). It is made from section of 3/8” acrylic racking cane with inside dimension of 1/4”. It does not mater if the tubing is acrylic, copper, brass, or stainless steel, that is, as long as it is food grade; however, it is critical that the inside diameter of the aerator is smaller than the inside diameter of the tubing that drains one’s kettle. What happens is that forcing the wort to flow through a smaller diameter results in an increase in fluid speed and a decrease in pressure, which t causes vacuum to form that draws air in through the holes and mixes it with the wort. Preferrably, one wants to drill the holes at a downward angle from the top of the fluid flow (i.e., the part of the aerator that attached to the tubing that drains one’s kettle). If made and used correctly, one will often have to throttle back the fluid flow because the amount foam created can become quite large; however, one will be assured that the wort has reach full-air O2 saturation.


