I decided to wait for the Intrico fittings this time around . . . . I've just had a stand made for the conical and am going to collect it today . . . I'm using straight and Bent 1/2" Tap connectors as poor mans Quick Disconnects for the time being . . . Silicone tubing push fits over really well and then a zip tie to secure . . . . I will be getting the Intrico Fittings though . . . Plus they are local to me so I won't get stung for the 12 quid carriage :shock:
You are using an out of date browser. It may not display this or other websites correctly.
You should upgrade or use an alternative browser.
You should upgrade or use an alternative browser.
Effinbrewery Latest Upgrade
- Thread starter Aleman
- Start date

Help Support The Homebrew Forum:
This site may earn a commission from merchant affiliate
links, including eBay, Amazon, and others.
Bru4u
Landlord.
I use these Cone Seat unions with great effect, they are watertight even by hand tighten, cheap as chips and undo/connect in about 3 seconds. The ones I have are 3/4". BES seem to be a great source of stuff.
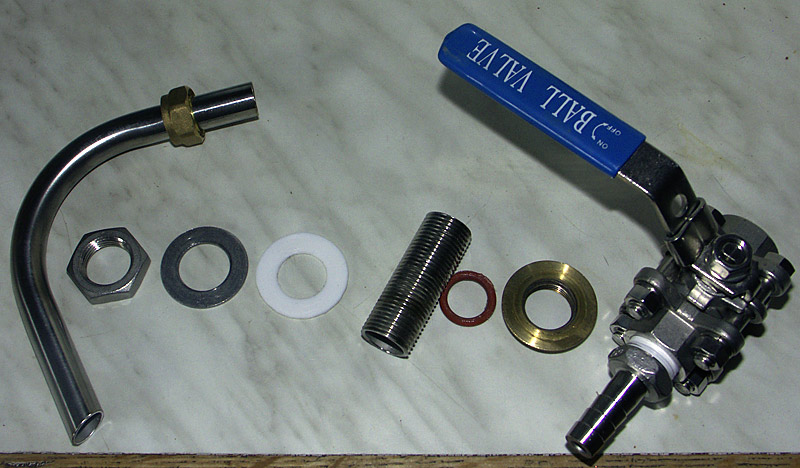
Well I've just had another slight upgrade . . . I fitted a rotating Racking Arm to Connor today. Here are the bits in the order they will assemble . . . inside on the left.
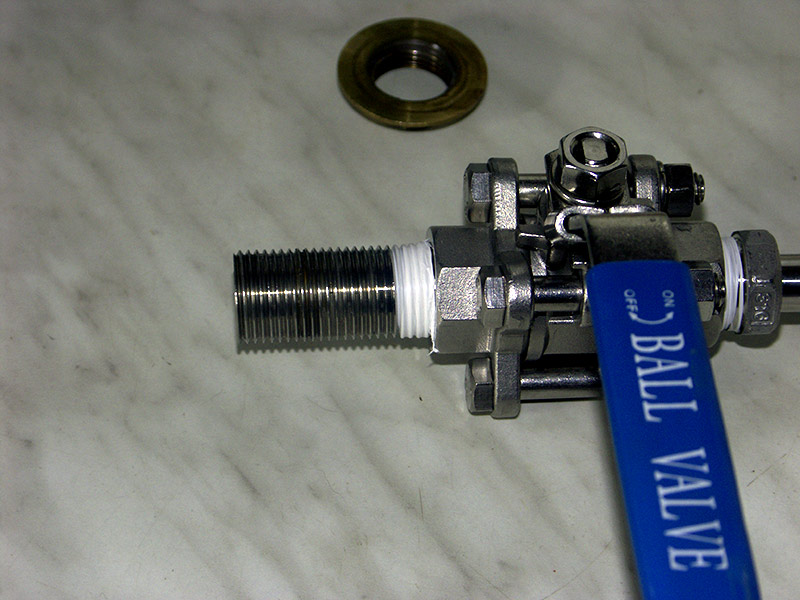
First off fit the long 1/2" BSP nipple into the ball valve and tighten it as far as it will go, then wind PTFE tape around the nipple where the body of the Ball Valve ends . . .
Screw the brass flange nut onto the nipple right down so that it tightens onto the tape before the ball valve
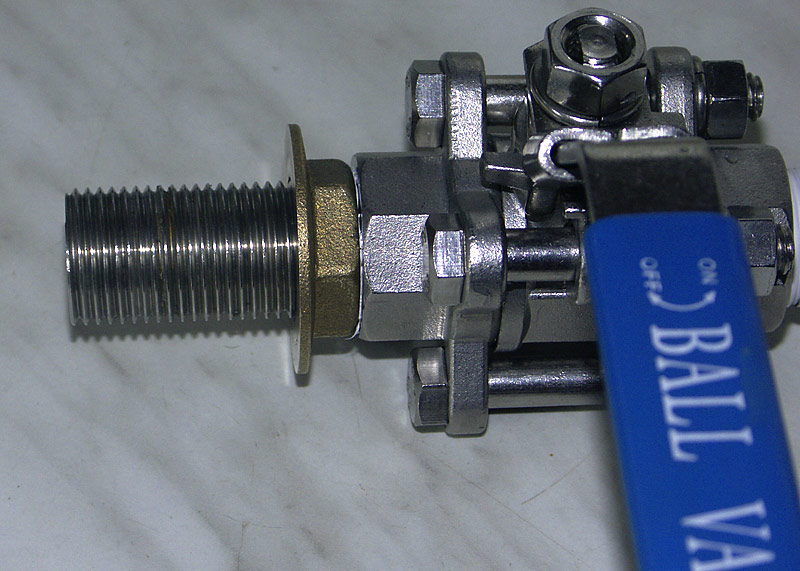
Then remove the nipple, without moving the flange nut.
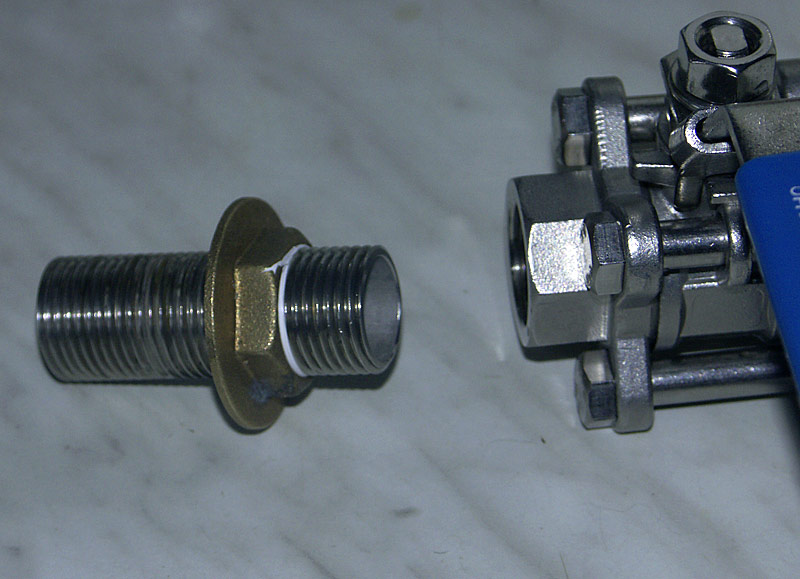
Wind on more PTFE tape to the end of the nipple
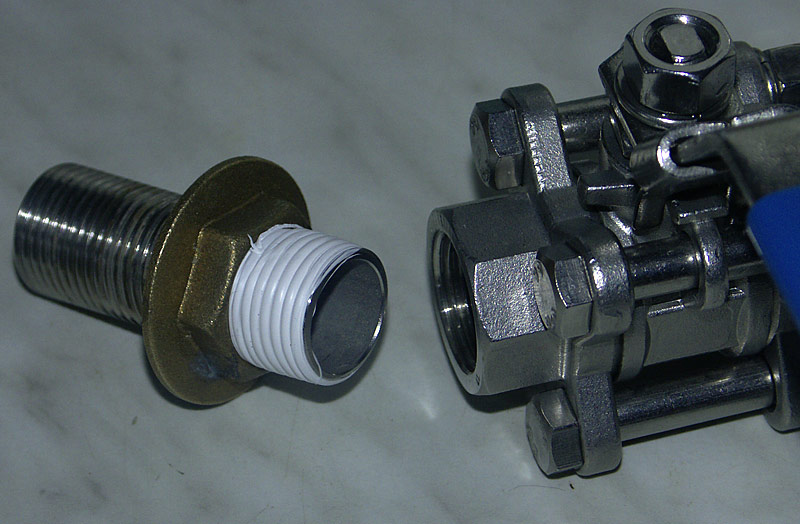
And tighten it back onto the Ball valve
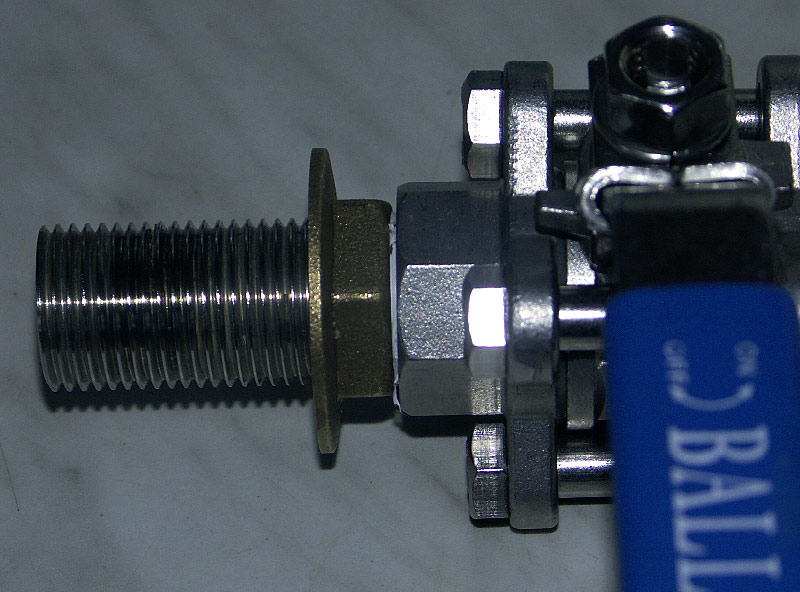
Fit a silicon O Ring to seal the wall and the flange nut . . . there is no leak path past the Flange Nut as we took care of that with the PTFE Tape.
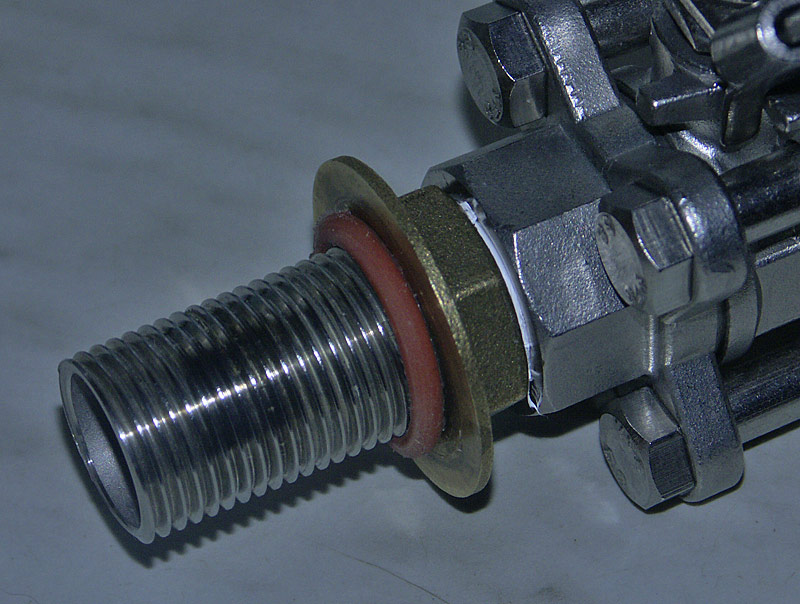
This shows the full assembly of the Racking Arm the vessel wall is sealed between the PTFE washer, and the Silicon O Ring. I'm using a 15mm Brass Compression nut temporarily to hold the racking arm (Courtesy of Nick - Muddy Disco) in place on the end of the nipple. I will replace it with a stainless one but they are a little bit expensive.
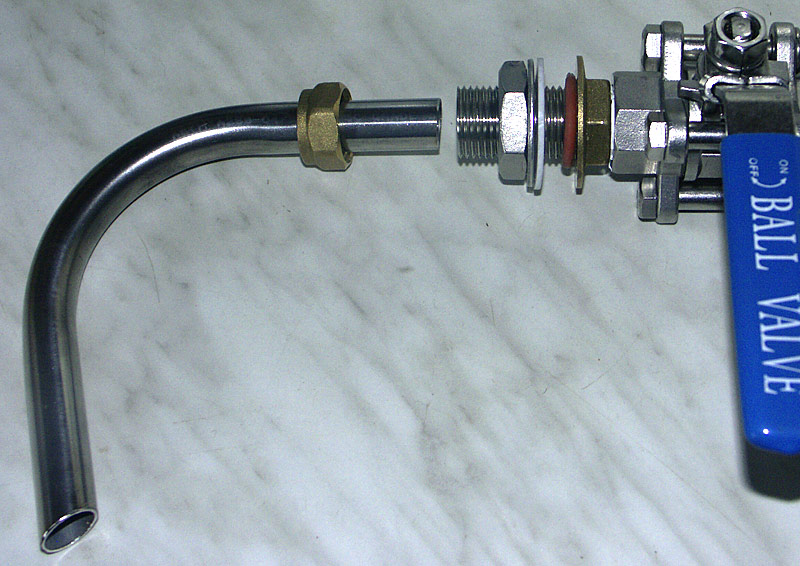
The hole in the wall of the conical is 20mm, and is just slightly smaller than required clearance for the nipple . . . but being plastic the nipple will cut its own thread as it is screwed in . .. the O ring seals between the conical wall and the flange nut.
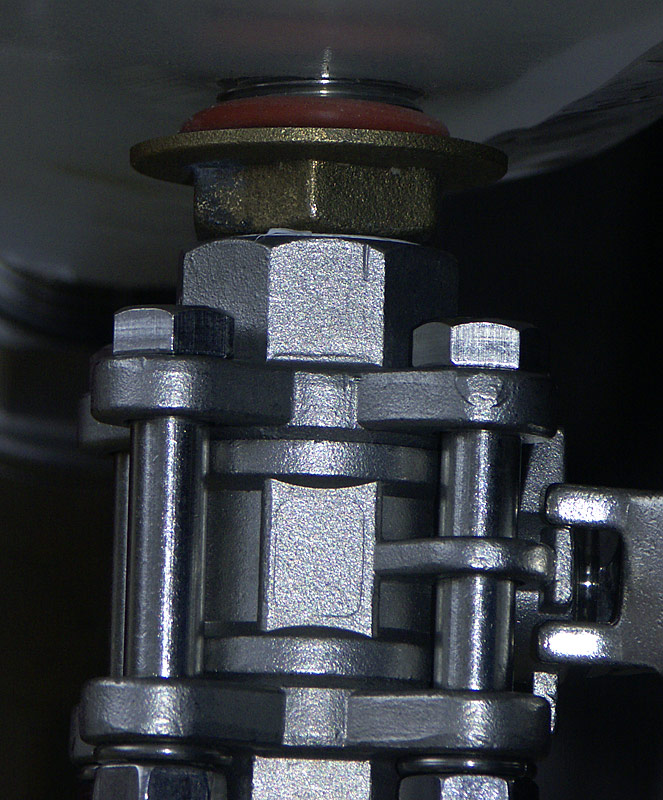
Inside First fit a PTFE washer (another engineering fit ) thanks to JamesB for that one, as it will allow the racking arm to rotate much more freely that just using another O Ring.
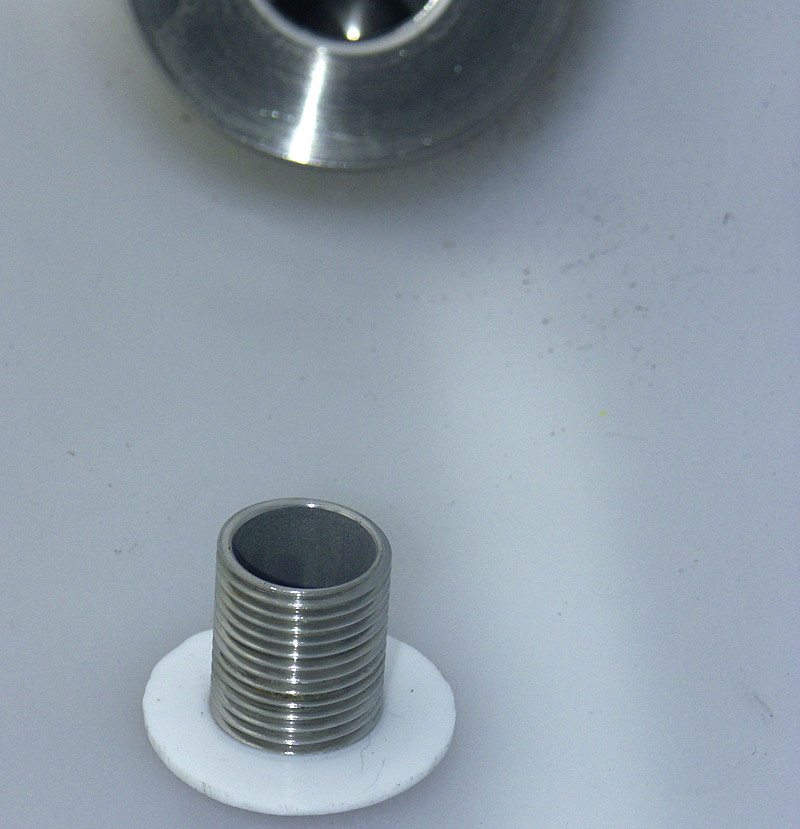
Follow that up with a M20 Form B Stainless Washer from Stig's Stainless Supplies
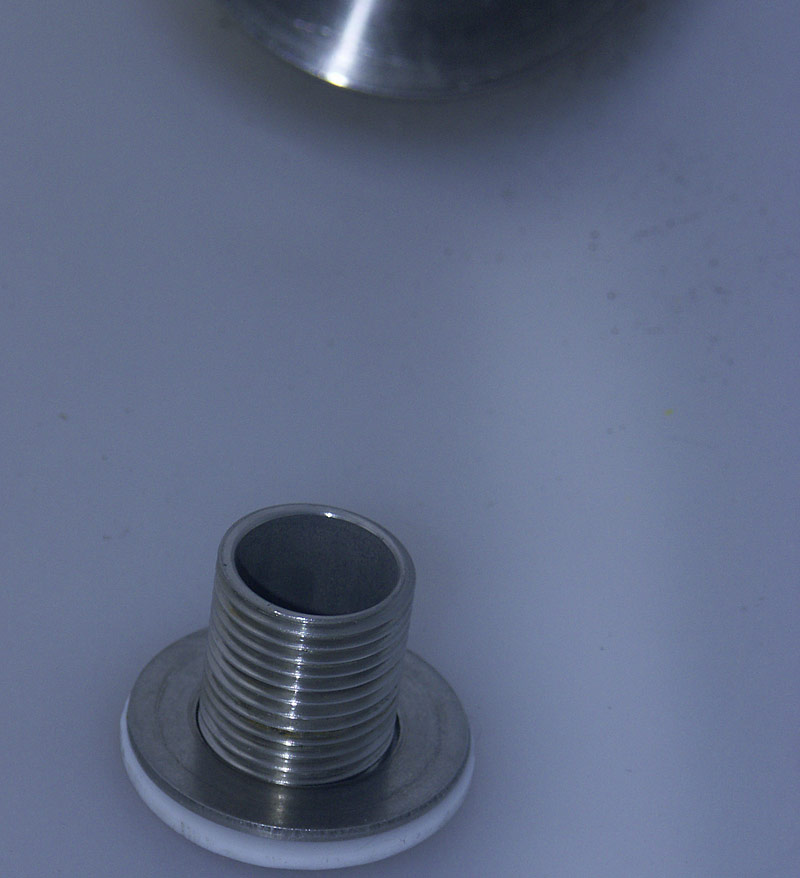
Which allows us to tighten up the 1/2" BSP Stainless Half Nut to seal everything together
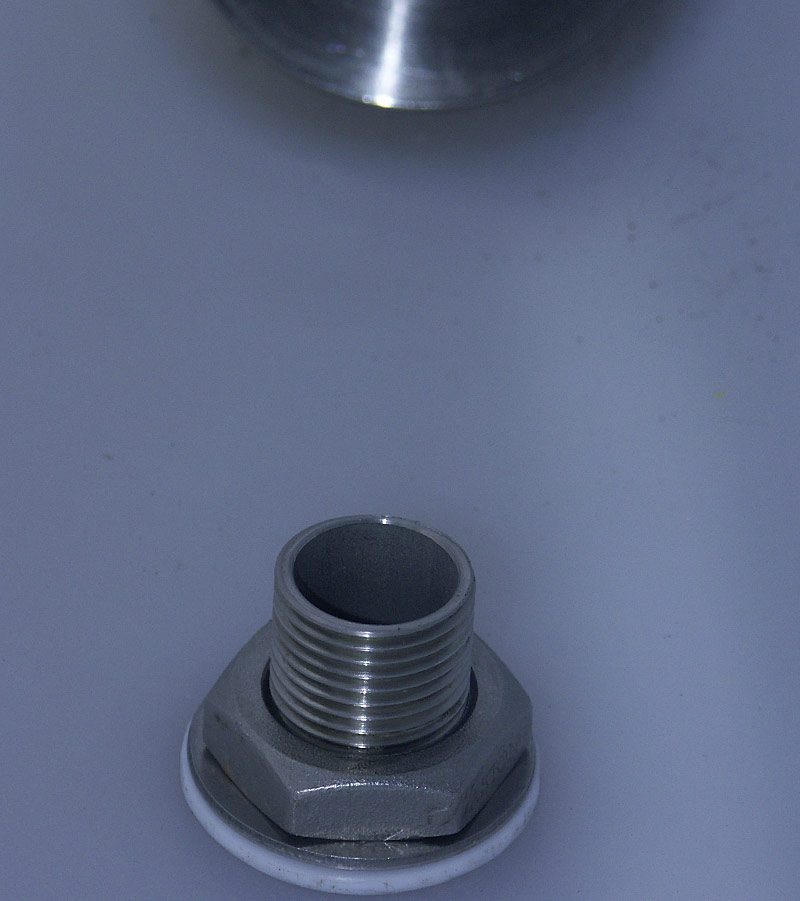
The Racking Arm is fitted and tightened in place . . . then the Arm is aligned with the arm of the Ball valve . . this allows us to know what the position of the arm is when it is full of beer. . . . here they are in a horizontal position.
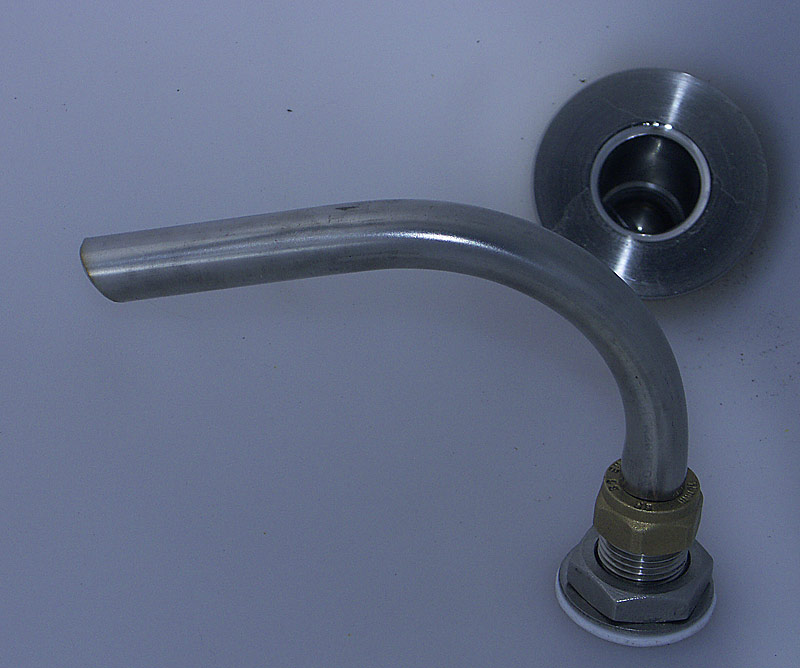
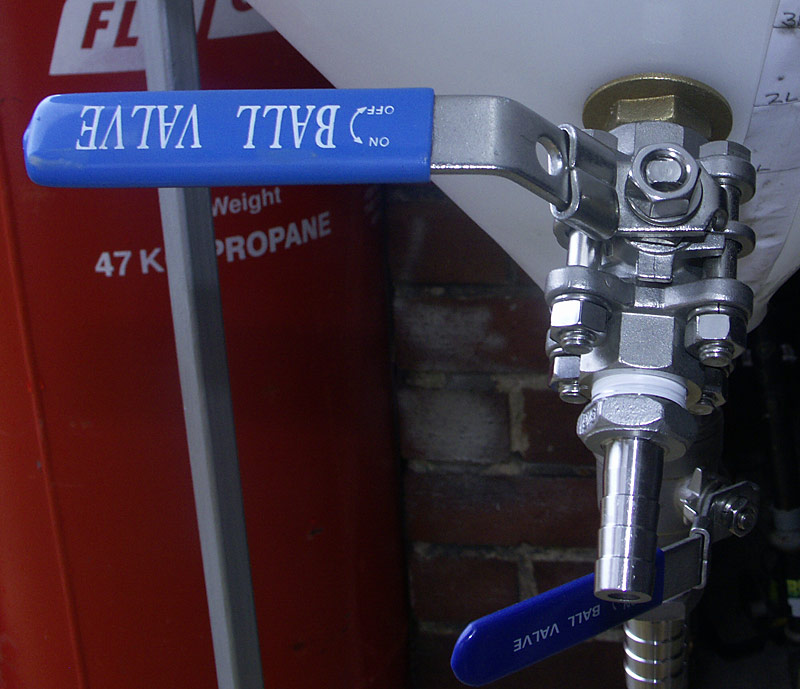
And following rotation to the vertical downward position
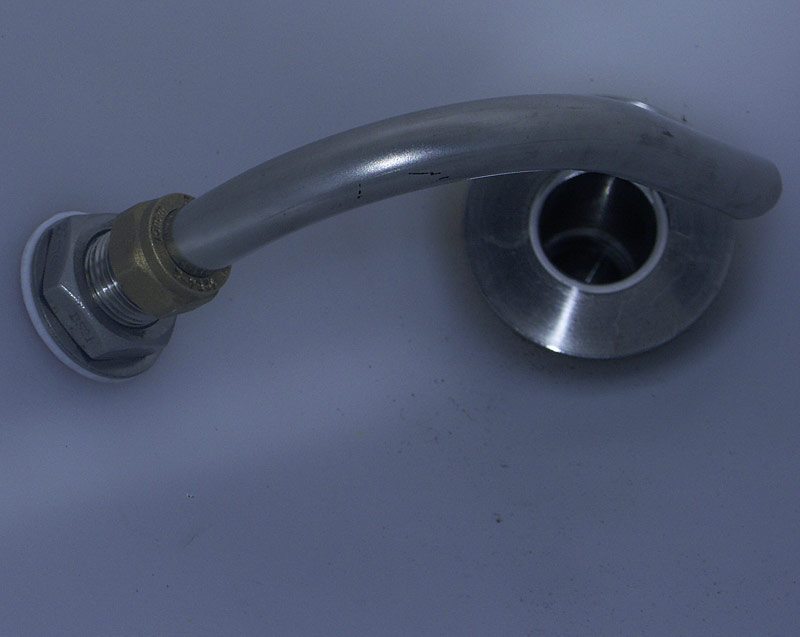
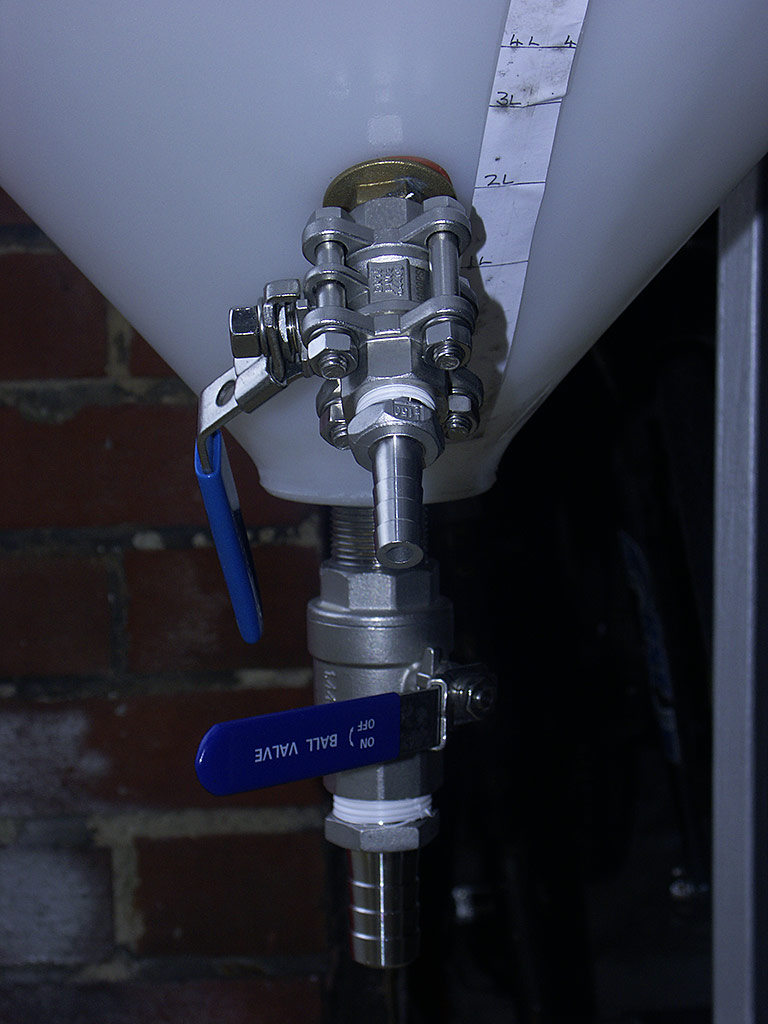
Looking forward to using this now.

First off fit the long 1/2" BSP nipple into the ball valve and tighten it as far as it will go, then wind PTFE tape around the nipple where the body of the Ball Valve ends . . .

Screw the brass flange nut onto the nipple right down so that it tightens onto the tape before the ball valve

Then remove the nipple, without moving the flange nut.

Wind on more PTFE tape to the end of the nipple

And tighten it back onto the Ball valve

Fit a silicon O Ring to seal the wall and the flange nut . . . there is no leak path past the Flange Nut as we took care of that with the PTFE Tape.

This shows the full assembly of the Racking Arm the vessel wall is sealed between the PTFE washer, and the Silicon O Ring. I'm using a 15mm Brass Compression nut temporarily to hold the racking arm (Courtesy of Nick - Muddy Disco) in place on the end of the nipple. I will replace it with a stainless one but they are a little bit expensive.

The hole in the wall of the conical is 20mm, and is just slightly smaller than required clearance for the nipple . . . but being plastic the nipple will cut its own thread as it is screwed in . .. the O ring seals between the conical wall and the flange nut.

Inside First fit a PTFE washer (another engineering fit

Follow that up with a M20 Form B Stainless Washer from Stig's Stainless Supplies

Which allows us to tighten up the 1/2" BSP Stainless Half Nut to seal everything together

The Racking Arm is fitted and tightened in place . . . then the Arm is aligned with the arm of the Ball valve . . this allows us to know what the position of the arm is when it is full of beer. . . . here they are in a horizontal position.


And following rotation to the vertical downward position


Looking forward to using this now.
highwayman
Senior Member
Excellent How to .. Aleman! Fantastic photo's to accompany the easy to follow instructions Well Done :clap: :clap: :clap:
Muddydisco
Landlord.
- Joined
- Feb 26, 2009
- Messages
- 502
- Reaction score
- 1
Looking good Tony :thumb:
I see it could of done with going another 10 degrees further around. I have made notes ready for any more
I see it could of done with going another 10 degrees further around. I have made notes ready for any more
BarnsleyBrewer
Active Member
- Joined
- Oct 17, 2008
- Messages
- 30
- Reaction score
- 1
Looking good Aleman :thumb:
BB
BB

£63.25
Sanitary clamp 1.5" (38mm) OD50.5mm Sanitary Tri-Clamp 90-Degree Pipe With Nipple And Electronic Thermometer, Stainless Steel 304 Home brewing(Without Thermometer)
DAN CHENG XIAN PENG SHI DA SHANG MAO DIAN

£10.49 (£349.67 / kg)
£11.96 (£398.67 / kg)
Mangrove Jack 3X ’s Craft Series Mead Yeast M05 (10g)
Almost Off Grid

£23.05 (£230.50 / kg)
£25.60 (£256.00 / kg)
Mangrove Jack 10x Craft Series Mead Yeast M05 (10g)
247 Homebrew

£9.99 (£199.80 / kg)
Lalvin EC-1118 Wine Yeast (10 Pack) - Champagne Yeast - Make Wine Cider Mead Kombucha At Home - 5 g Sachets - Saccharomyces cerevisiae - Sold by CAPYBARA Distributors Inc.
CAPYBARA Distributors Inc. (UK)

£6.89 (£344.50 / kg)
£7.51 (£375.50 / kg)
2x Mangrove Jack’s Craft Series Mead Yeast M05 (10g)
do-it-at-home

£10.99
£14.99
Brew it Yourself: Make Your Own Beer, Wine, Cider and Other Concoctions
ST Bookstores

£14.25
£18.99
How to Brew: Everything You Need to Know to Brew Great Beer Every Time
Amazon.co.uk

£103.05
2" OD64mm x 1.5" OD50.5mm Tri- Clamp Reducer with (19mm) OD50.5mm Thermometer Connector for Homebrewing,SS304 HMCOCOOFM(with Fittings)
weifangguanhuawangluokejiyouxiangongsi

£14.76
Digital Temperature Watch Heating Thermometer Home Brewing Tools for Wine Bottle
B&D DIRECT STORE
Cussword
Landlord.
It took three read through's, but I got there. Clever work :clap:
unclepumble
Landlord.
Very Nice work tony :clap: :clap: :clap: :clap: true dedication.
But too much buggering about for me, I have fitted one of bru's 1/2" SS bulk heads, with brass fittingson the outside (not in contact with beer) & silicone washers, & a 1/2" ss ball valve on the nipple connected to a length of silicone (ala Vossy) racking off works great, when the beer nears the level of the bulk head a couple of bricks under the rear of the stand, works great about 200ml of beer loss and clear beer all the way.
UP
Guest
All this talk about shinies and conicals, I'm getting a complex.
I'm begining to think I'm missing out on something. :shock:
I'm begining to think I'm missing out on something. :shock:
Vossy1
Landlord.
Very tidy A 
B
barneey
Guest
Hi Just reading through this old ish thread and before I embark on my conical build using an oilbits tank, could anyone give me an update on how their tank is performing or would they do anything different if they were to start a new build?
Cheers Clive
Cheers Clive
Looking very good do have a Q though the ball valves where or what am I looking for to get 15 mm type ones like the ones used, I can find the compression type but am really looking for a more sturdy type like used.
guyb
Regular.
Nunfa1 said:Please excuse my ignorance but what is the benefit of a conical fermenter? Some first class pics, guides and builds bty. :thumb:
I can only assume that you can syphon the beer from above the trub, and then open the bottom tap to release the trub and reclaim the yeast.
I would think at these volumes of beer it's impractical to wash / sterilse as you would a 25L one, or even a 60L one as I would think a conical one is static mostly due to size?
This is quite an interesting read:
http://www.the-home-brew-shop.co.uk/aca ... enter.html
guyb
Regular.
guyb said:Nunfa1 said:Please excuse my ignorance but what is the benefit of a conical fermenter? Some first class pics, guides and builds bty. :thumb:
I can only assume that you can syphon the beer from above the trub, and then open the bottom tap to release the trub and reclaim the yeast.
I would think at these volumes of beer it's impractical to wash / sterilse as you would a 25L one, or even a 60L one as I would think a conical one is static mostly due to size?
This is quite an interesting read:
http://www.the-home-brew-shop.co.uk/aca ... enter.html
having said that the link I posted gives an explanation of the fermenting process, so perhaps it's more to do with that and consistency , quality?
Similar threads
- Replies
- 12
- Views
- 1K
- Replies
- 4
- Views
- 623
- Replies
- 2
- Views
- 297
- Replies
- 31
- Views
- 1K


