First time brewer from Leeds

The Homebrew Forum

Help Support The Homebrew Forum:

This site may earn a commission from merchant affiliate links, including eBay, Amazon, and others.
No need to add CO2 at this stage as the priming sugar should carbonate it nicely. As you get towards the end of the barrel, however, CO2 can be used to top up and maintain pressure rather than it taking half an hour to draw off a pint.
You see, as you draw off beer the pressure initially is high but ...as you draw off more you leave space for the remaining gas to expand into. Eventually (around 2/3 of the way down) the gas spreads out enough to equalize with the air pressure outside and anything else you manage to get out will create a vacuum in the tank. You then have two options ...
1. Top up with an injection of CO2 (restoring pressure and keeping airborne nasties from coming into contact with/spoiling the remnants.
2. Loosen the top allowing air to get in and allow gravity to pour your beer. This either requires you to risk airborne infection or requires a bit of a session to get rid of 1/3 of a barrel in an evening (invite a mate or two round).
 
So this weekend will be my first taste of my beer.

I don't really have anywhere naturally cool to store the keg, but I do have a spare fridge in the garage. Should I store it in there with the fridge on?

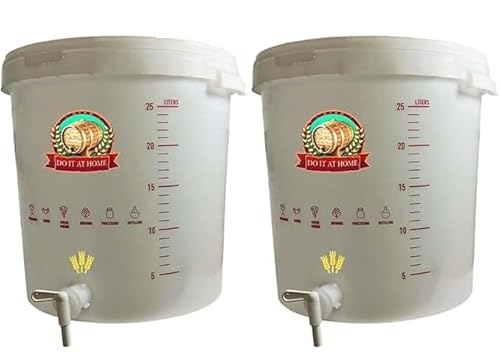
Beginners question - the tap is on the bottom of my keg, will it not be full of sediment from the bottom of the keg?

Any other tasting tips? I'm expecting it to have gone wrong at some point with all the hot summer temperatures and beginners mistakes....
 
You could keep it in fridge if it'll fit or just find the coolest place you can (remember, people have been drinking warm Ale for years ... not saying you should but ....)
Alternatively, pour some off into a carbonated drinks bottle or two (clean obviously) seal and store in a fridge for an hour or so ... you won't lose much carbonation in that time.

You will have sediment at bottom of keg, but it should be well below the tap. Just take care not to disturb it through movement. If you think it may have been disturbed (i.e. You've moved it to a higher level to be able to draw off a pint) give it a while for the bits to settle.

I think you may surprise yourself with your first brew, here's hoping! Let us know how you get on.
 
Well the tasting has happened and... it's pretty good! Definitely drinkable.

The initial taste is good, but the aftertaste is a little... acidic. Any thoughts?

keg1.png


beer1.png
 
I reckon, possibly wrongly (I'm still learning too), that it tastes acidic due to the initial high temperature and the different alcohol being produced. I'm sure someone out there knows better. You may well find you have a big of a sore head in the morning after a couple of pints!
Otherwise, it appears you have had a successful first brew so ....
Take all the lessons learned (a few in this thread) and get another lot on the go!
Even with all the apprehension and worry about errors you produced a "drinkable brew" so, in my opinion ... a winner.
Let us know what you make next and how it turns out .... and keep asking questions, it's how we all learn!
 
Well the tasting has happened and... it's pretty good! Definitely drinkable.

The initial taste is good, but the aftertaste is a little... acidic. Any thoughts?

Leave it alone for at least two more weeks ... :doh:

... and in the meantime get the next batch underway! :thumb:

PS

According to a popular survivalist, urine (especially your own) is "drinkable" so I prefer "palatable" when describing my own beer! :whistle:
 
Leave it alone for at least two more weeks ... :doh:

... and in the meantime get the next batch underway! :thumb:

PS

According to a popular survivalist, urine (especially your own) is "drinkable" so I prefer "palatable" when describing my own beer! :whistle:
Trust you @Dutto you would nearly think you were taking the p#£@....

Gerry
 
Thanks for all the encouragement!

A couple of last questions before I put the next brew on...

1. How long will this beer keep in the keg?

2. Can I fill up a screw-top bottle to hand to friends from the keg, and how long will that keep?

3. What beer do you recommend I try next for my second attempt!?
 
1. At least two months getting better every day; and then another couple probably tasting not as good.

2. "Yes" and "No". The beer will tend to be flat and it will stay flat until it starts to spoil; which may be a matter of days or weeks.

3. MY "Go To" is any Woodfordes Kit; and my favourite is the Woodfordes Wherry. It ain't easy to brew ('cos it has a reputation of sticking) but it is a beautiful pint. :thumb:

Enjoy! :thumb:
 
So just over 2 weeks since my last post and it has improved in terms of the aftertaste. Although initial flavours are a little more bitter.

Photo attached. What do you think?

poured pint.jpeg
 
I think you have made a very good start, each brew will improve as you learn from mistakes, but better if you can learn from other peoples mistakes so I will list my early mistakes so you don't need to make them.
1) Kits use tap water, so they need to make alcohol quickly so nothing else gets going, however your brew was a little too warm, I aim at 20°C but above 18°C and below 22°C for first few days is what you are looking for with most kit yeasts, stick on temperature strips are good, but give an average between ambient and brew temperature so in a room at 17°C the strip showing 19°C means brew at 21°C the reverse is also true room at 21°C and strip showing 19°C then brew at 17°C so they are just a rough guide. Thickness of fermenter wall will effect how accurate. Also because using tap water, you can never be 100% sure of no infection you will get the odd infection what ever you do, but rare, but also means although things need to be clean, no point in going OTT as your only using tap water. Using a sensor held against the side of fermenter under something to insulate it from ambient air, I use a sponge, will give you a much more accurate reading, it was when I started to do this that I realised about stick on strip being an average.
2) The air lock can help to see when fermenting is over, however I had to use electrical stuffing glands to stop them leaking and my fermenter has a screw lid so easy to seal, after all the work in sealing the air lock, now I don't use one, I now brew in a freezer with temperature control so a bung is enough on lid mainly as not enough height for air lock, and the stick on strip does nothing as I can't see it with freezer door closed, just use reading on the STC-1000.
3) Time to bottle needs the hydrometer to see if finished, but once you have temperature control air locks and hydrometers are only a second safety check, the brews all take same time as temperature constant so I know 20 days start to bottling for most kits. But before temperature control I have had a brew still active after 40 days, 40 pints takes a lot of heating and a lot of cooling so in my kitchen in winter central heating only runs during the day, so day time 20°C but night time 16°C as a result brew around 18°C since fermenting gives out heat at start it was around 19°C ideal, but as the fermenting reduces and so heat from fermenting also reduces the brew would be at 18°C which is just a little too cool, it did not stop, but was very slow.

I tried using an old demo underfloor heating tile 18W to warm up my brew in winter, however it was too big, so I would return to find the brew at 26°C or higher, hind sight is easy, needs around 8W in a fridge switched off outside to maintain 20°C in heart of winter, weight of heater matters, with my tile after switching off it took time to cool, so would over heat a little, using a simple 8W bulb very little weight so less over shoot, no need for huge heaters. Likely the best heater is the fish tank heater in the brew, however cleaning is a problem, better if not actually in beer, putting fermenter in a trug with water and heater not perfect but well on the way.

Problem with fridge was insulation too good, so starting a new brew at 19°C with ambient at over 12°C and brew would hit around 22 to 24°C then cool down again, so likely in your summer house in winter a trug with a fish tank heater and a body warmer with air lock out of neck will keep the brew within reason during cooler months.

I find if it starts at 19°C and first 3 days are cool enough to stop it over shooting then after that even if it hits 28°C it is not too bad, it is first 3 days that counts.

Now I use a fridge/freezer in freezer both heating and cooling in fridge only heating, so first 5 days in freezer, after 5 days I can move to fridge with only heating, actually move around day 7.

I found the kits vary with what you can do with them, Yorkshire bitter add any extra sugar and far too bitter, Scottish heavy however you can near double sugar and still OK. Having said that the two can kits are far better taste than any one can kit. However temperature matters, so again Yorkshire bitter if it gets too warm far too bitter, Scottish heavy will get away with it better, and the Coopers range seem to stand much more heat.

Since too hot seems to alter taste very like too much sugar in early days I could not work out a happy medium as temperature was not constant. Latter I started the other direction will low alcohol as it means I can drink more, however low alcohol means does not keep as well and more likely get an infection. Around 3% seems OK.

But main thing is enjoy.
 
Another beginners question. Pouring from the tap at the bottom of the keg means the beer comes out under a lot of pressure. Massive head on the beer. Any tips to calm it down a bit?
 
So just over 2 weeks since my last post and it has improved in terms of the aftertaste. Although initial flavours are a little more bitter.

Photo attached. What do you think?

Looks lovely and clear, great head, good lacing on the glass and great carbonation, I'd say you nailed it.
 
I'm about to commence my second brew ready for Christmas. I drank a lovely Nebraska Nut Brown Ale in the US recently. Anybody recommend a kit that achieves a similar tipple?

http://nebraskabrewingco.com/portfolio/brunette-nut-brown/
In my view it's always difficult trying to clone a commercial beer, especially if you are using a kit as a basis. I have tried some kits purporting to be copies of commercial beers and they weren't anything like them.
Anyway your American Nut Brown Ale has the following description....

Our version of the classic English-style Brown Ale has a blend of six different malts and a hop schedule that results in a low hop character. The unique malt character brings to mind the taste of a blend of various nuts. Coffee, toffee, caramel tend to come to mind in this excellent session Ale.

ABV4.7%
IBU 20
Malts: Pale Ale, Aromatic, Oats, Caramel 60, Caramel 120, Chocolate
Hops: Galena

My suggestion is following based on a using a kit.....
First, if you are going to aim for about the same ABV, you could brew to 22 litres and use a 1.7kg kit can, plus 1 kg Dark DME and 350g Golden Syrup (half a supermarket squeezy bottle).
Next you want the chocolate and caramel, so a grain steep of say 50g chocolate malt and 150 g crystal malt should work. Personally I would avoid using oats unless you are going to try to mash them with Pale Malt.
The IBUs are quite low so that probably means using a Mild Ale kit one-can. Adjust the brew volume up or down to allow for different can weights.
Next Galena is used which is a bittering hop but has citrus. So you could dry hop with Columbus or Chinook which apparently are similar, but don't overdo it, say 25-30g.
In the end my suggestion might be nothing like it but at least you will have had fun in trying :thumb:

 
Thanks TerryM

I wasn't thinking of cloning, just wanted to find a kit that produced a nice brown ale.

Anybody got a kit recommendation? I've only tried one festival one so far (Razorback IPA) and that was straightforward with good results!
 
Back
Top