Upgrading my ACE boiler...

The Homebrew Forum

Help Support The Homebrew Forum:

This site may earn a commission from merchant affiliate links, including eBay, Amazon, and others.
Leak testing now done. I had to put more PTFE on pretty much all of the threads, along with a bit of vaseline, and now no more leaks. I made short video of it in action whilst I leak tested. You can see the intake pipe working as the return pipe finally. Should make more sense now. :thumb:


Before anybody panics, that's still not the table I use when brewing with it. :smile6:
 
Hi!
Great set-up!
I've thought about a similar idea, but having 1/2 inch stainless steel tube from the base of the ACE (ACE of Base :laugh8:) up to the U-bend, similar to the Grainfather-type units, but that's going too far - or is it? :blush:
I'm not sure about the pick-up tube - won't that direct the wort away from the grain, or am I missing something?
 
Hi!
Great set-up!
I've thought about a similar idea, but having 1/2 inch stainless steel tube from the base of the ACE (ACE of Base :laugh8:) up to the U-bend, similar to the Grainfather-type units, but that's going too far - or is it? :blush:
I'm not sure about the pick-up tube - won't that direct the wort away from the grain, or am I missing something?

I don't think you need the outlet directed at the grain really. If you look at the all in one machines, they have a sparge plate sat on the grain diverting the wort away from it so that it doesn't disturb the grain bed (same reason for the veg steamer). I think a much gentler current is created from the act of removing wort from below the grain, then returning it above the grain, gravity basically. That's my thinking anyway. The purpose of the pick-up tube is for when it comes time to cool the wort. My aim is to direct the "jet" of wort through the body of the immersion chiller, and also creating a whirlpool, speeding up cooling. I got the idea from a blog on the MrMalty site http://www.mrmalty.com/chiller.php. You can see that he's fitted a whirlpool pipe to his chiller and reckons it speeds up cooling considerably. I didn't want to start messing with copper tubing, so this was my attempt at similar.

Eventually, I might be able to take advantage of that cam & groove clamp I've fitted, and make the return swappable. Wide outlet return for when mashing, then the jet for end of boil and cooling. Just unlock the clamp and switch the outlet as needed. Probably the suggestion I was given on another forum: hose barb - length of hose - barb - T piece. For now though hoping the veg steamer maintains the grain bed for me by diverting currents away from the grain. Problem is, that'd be harder to pass through the lid without making much bigger holes, so I'll probably only go there if the jet becomes a problem.

I reckon hard tubing would be a big improvement. It'd allow you to have the pump much closer to the boiler, and have a shorter run of tubing, as you can bend it to shape. Using metal tubing would been a small trade off though, as it conducts heat better than silicone hose. Can't be a huge problem though, else the better AIO machines would all be using silicone hose... lol I've not looked, but might even be able to fit a TS5 in the bottom bit, problem with that is - it's a bit close to the electrics.

Purely for lols.... Anybody up for glass tubing? https://www.mayhems.net/collections/glass-tubing :smile6: Just don't knock anything into it.......:confused:
 
First mash under-way. Details in my brew days thread.

Mashing.jpg
 
Hi Ade. Been looking at the link you posted for Mr Malty. Looks like a good idea. I have been thinking about getting another 10m roll to add to mine and if i did i suppose i could have 2 whirlpools at different levels. So what sort of fittings could i use to join them? What sort of solder is food safe? At the moment my chiller is clamped on and it keeps leaking, needs a proper connector and its slow. I would much prefer to chill to pitching temps. What size is the pickup tube your using?
 
Hiya BeerCat

My immersion chiller is a cheap one I found on eBay, but did the job.

In my brew day earlier, with the pickup tube return, it cooled from boiling down to 15 degrees (yeah, I had to warm it back up a bit so I could pitch the yeast... lol) in about 25 minutes. It's NEVER cooled that fast, or that far, before.

The one video I did make was of it working cooling the wort. You can see how quickly the numbers were going down. I bet it would be even better with a more open coiled wort chiller.


The pickup tube I used is the Brew Builder XL one, so 200mm long: https://www.brewbuilder.co.uk/1/2-pickup-tube-xl.html. You can see in the vid, I just hooked the U-bend over the rim, with the pickup inside the chiller.

Long story short, I got very good mash efficiency, with no stirring, and using the BIAB bag. No pressure build up or any of that, with the flow at about 1/3rd or so on the tap. What I didn't quite get was the lovely crystal clear wort I was hoping for. I suspect though that I put the steamer insert in too soon, and the same for when I started the pump. I reckon I needed to give it 15 minutes or so to let the grain settle inside the bag first. When I drained the boiler before sparging there was a LOT of grain on top of the strainer. It was a very very small grain bill though, so it could be with a more usual one I may have more trouble with the flow, and/or my grain bed may make a more effective filter.
 
Looks good! :thumb:
I recirculate from the start and give it a good stir after 20 or 30 minutes then i leave it until its clear. I have had a few batches that did not get crystal clear wort but the final beer was clear. Not exactly sure what but i did 3 brews at a mates house with tap water and none of them were as clear as i get here. I always pitch colder than fermenting temp if i can as its meant to give a cleaner beer. With small grain bills i have used a colander and a youngs bag.
 
Hi!
I suspend the steamer basket from the handles on the ACE so that it's just above the grain but not actually resting on it.
I use Wilko's garden wire - cheap and it has 1001 uses in the brew shed.

I'll have to give that a go, sounds like a plan.

Looks good! :thumb:
I recirculate from the start and give it a good stir after 20 or 30 minutes then i leave it until its clear. I have had a few batches that did not get crystal clear wort but the final beer was clear. Not exactly sure what but i did 3 brews at a mates house with tap water and none of them were as clear as i get here. I always pitch colder than fermenting temp if i can as its meant to give a cleaner beer. With small grain bills i have used a colander and a youngs bag.

My brews have been getting clearer lately, since I started cooling them faster and doing a more vigorous boil. Bit naughty with the boil, I tend to boil on the 1600 watt element (nice rolling boil) until the wort volume has reduced, then whack it up to a volcanic boil 2500watts. Doing this my beer hasn't the haze that was plaguing me. I now believe though that on at least 1 occasion the haze was suspended yeast, the bitter I made and used Clarity Ferm has finally started to go crystal clear even after chilling.

My water I usually use 21 litres of RO filtered and about 9 litres of treated tap water. My water is too hard for paler brews if I don't, I get really bad efficiency if I don't adjust. This time around though I added 3g of Gypsum, 2 in the grain, 1 in the boil. Could be why I got the best efficiency yet, or part of it. Read in a few places that this can also aid clarity.

This brew was a small grain bill, but a normal volume (22.5 litres once I diluted). It's a braggot, so a big part of the OG comes from honey rather than grain. Gravity of ambient wort came out at 1.068, which I diluted to an OG of 1.060 in the FV. :thumb1: 2 packets of Belle Saison, it promised to be around the 8.5% ABV mark... lol I went full on with the hops too, details here Ade's Brew Days. A bit hoppy to be considered a traditional braggot...
 
Nearly forgot to say, I usually pitch at 18 degrees C now, then let it free rise. This one I pitched at 17 (brought it up a bit from the 15 degrees... lol) degrees C, and today it's bubbling away nicely. I've not used Belle Saison before though, so hoping it doesn't need super high temps to be nice.
 
I made a couple of alterations to the return and lid.

First up, I moved the mini ball valve tap from the pump to the U-bend. I was finding it difficult to adjust attached to the pump, plus this allows me to shut the flow off further up the pipe. It also extends the length of the top of the inverted U, giving me more leeway with mounting.

ModifiedOutlet1.jpg

Then I drilled a second hole in the boiler lid, allowing me to mount the return further into the pot, rather than right by the wall.

NewHole.jpg

You can see that the 2 combined move the return further towards the middle than before.

AlteredFitted.jpg

I noticed when I used it on Wednesday that it was difficult getting the return lined up with the veg steamer insert. This should improve things in this regard hopefully.
 
I'm about to "improve" this a bit again, just ordered the parts.

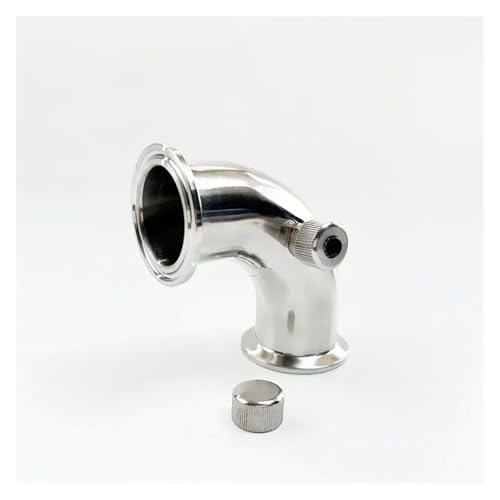
Basically, I'm going to fit a female thread/male fitting quick disconnect on the thread of the tap. Then onto the pump I'm going to fit a 90 degree elbow, then male thread/female quick disconnect so I can quickly fit and remove the pump onto the boiler tap directly.

Then I'm going to cut a 20mm hole towards the middle of the lid and fit a 1/2" BSP "nipple", with a recessed back nut and O ring on each side, creating a bulkhead. To the bottom of this I am going to fit a T piece. To the top of it I'm going to fit a 90 degree elbow, and a part F camlock fitting, so I can swap the pipe between this and my whirlpool setup. That way I can return via the T when mashing, and via the "whirlpool" when cooling after the boil.

I'll post photos again once it's done, which will better explain what I mean.

Right now I hate having the pump dangling, with such a long length of hose from tap to pump, and I'm not keen how deep the return is when recirculating the mash, it makes using the steamer insert awkward and fiddly.
 
Hi Ade. Been looking at the link you posted for Mr Malty. Looks like a good idea. I have been thinking about getting another 10m roll to add to mine and if i did i suppose i could have 2 whirlpools at different levels. So what sort of fittings could i use to join them? What sort of solder is food safe? At the moment my chiller is clamped on and it keeps leaking, needs a proper connector and its slow. I would much prefer to chill to pitching temps. What size is the pickup tube your using?


Sorry, I didn't read this properly before, I have now.

How about using compression fittings rather than solder? Or you could drill 2 holes in the side of the boiler, have the joins on the outside and just use plumbers solder? The downside of the outside option is the need to fit taps so you can close them off when not been used. The plus side is that it's less "stuff" displacing liquid volume inside your boiler... Have you seen these at all? Another con with that though, you can't lower it inside your immersion chiller. Reading around though, apparently you need silver solder, I have no idea how easy it is to use though, I don't solder if I can help it. lol

The pickup tube I'm using is 200mm long.
 
Right, my tweaks to the build have been completed (thanks to Lardy at Brew Builder for the parts, excellent service). I'll let the pics explain things better.

MashingT1.jpg MashingT2.jpg
MashingT3.jpg MashingT4.jpg
MashingTConnected.jpg

The T fitting will be used when mashing, for a more gentle return that's also higher up so I can fit the veg steamer insert in more easily. I'll still be using the "jet" return when cooling the wort at the end of the boil. I did modify this slightly too, I removed one of the elbows and the nipple, the U didn't really help to be honest, the silicone hose is flexible enough with just a 90 degree elbow.

JetReturn.jpg

One tip when you are planning to use a Q-Max cutter, double check that you have a hex key to fit... I ended up using a spanner to tighten, as none of our hex keys were big enough.

Anyway, I'm much happier with the design now, the pump is nicely supported whilst still been lower than the bottom of the boiler, and it looks nice and tidy. It's also incredibly easy to remove for cleaning thanks to the quick disconnects. Now I just want to get some heat-shrink on that electrical connector, protect it from any splashes.

Pump1.jpg Pump2.jpg

One last photograph, showing the whole set-up all connected together.

Tweaked.jpg
 
Thanks bud.

I used a 20mm qmax, and the hole was spot on for the 60mm nipple. I had to drill the pilot hole twice though, the bit I had big enough for the qmax couldn't puncture the steel and just slid around, so I had to use a smaller bit to drill a pilot hole for the bit to drill the pilot hole. lol

It's given me confidence to be honest, so next plan is to fit a ball valve tap to my 33 litre pan. That way I can pump the sparge water directly from the pan into the top of the ACE, rather than using a jug. Also considering fitting an element and some form of temperature controller to the pan, so I can use it as a HLT and second boiler. It's practice at the end of the day, and maybe one day I can build a bigger BIAB/RIMS vessel myself. ;)
 
Well a valuable lesson learned today... Not to set the flow above 1/3rd on the output of the pump! Tried higher, grain bed kept compacting, bent my false bottom up... Got lovely mash efficiency though (about 85% according to beersmith 2... lol). Probably because we doughed in like we used to, and I stirred 3 times during the mash rather than relying on the pump.
 
Lol been there. I had to flatten mine with a hammer. Glad i accidentally threw it away. Thinking about it an 8" false bottom would fit the ace. I only use the bag that comes with it for hops now as bought a larger bag which is coarser and drains much better.
 
Moot point now sadly bud. My ACE packed up 5 minutes before the end of a 75 minute boil... LCD went blank, boil stopped, never came back on. Luckily it had been boiling very vigorously for 70 minutes already, so I bunged in the 5 minute hops and flame out hops together, and turned the wort chiller on. Given I have 20.5 litres of wort with an OG of 1.060, rather than the target of 23 litres with an OG of 1.052, I'm confident it boiled enough. lol

I'm now in negotiations with my wife for a replacement, possibly one of the Klarstein/Hopcat/Brewdevil clones.
 

Latest posts

Back
Top