Springer
Its a dogs life
- Joined
- Oct 9, 2009
- Messages
- 1,445
- Reaction score
- 0
Detailed below is the conversion of a SS vessel into a boiler and mash tun. I have shown the construction of the mash tun in another post, so here is the start of the two pieces. 
Managed to get this from a mate FOC, as he owed me a favour. Its stainless but has been painted.
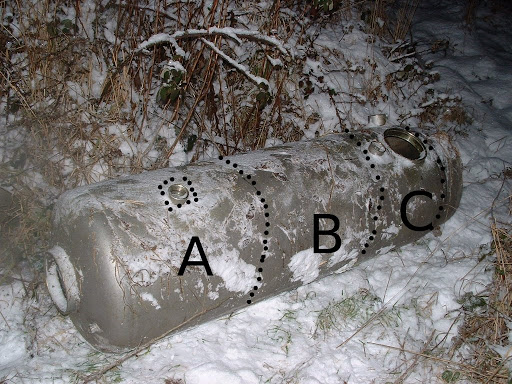
I decided that section C would be a lot of trouble to use, so I hacked along the dotted lines and removed it from the base dished end and section B. I now have a nicely rolled up section, to use on the next project, to patch the other vessel after just hacking out the part with the bosses and not lose any capacity.
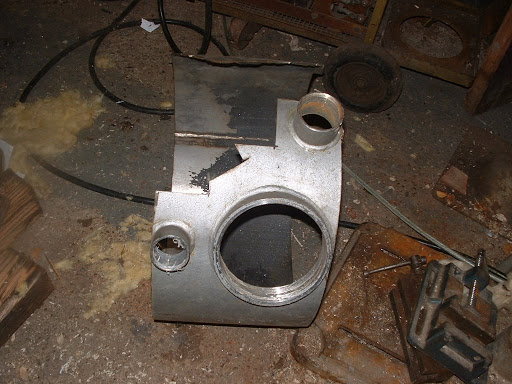
Next decided the required volume balance between mash tun and boiler, ( hope the calcs were correct ) and then cut along the line between A and B, cut out the outlet on A, cut a circle out of the scrap section C to plate the circular end hatch, and a curved piece to patch the outlet on A.
Then made my way to a tig welding mate, and got A patched up and section B welded to the dished end base where C had been attached attached :?
Still with me ?
All the hacking was done with those thin cutting discs specially for SS. I now use thin disc all the time even for mild steel, you can cut quite accurately with them.
There was much thought about the heating source and I decided to go the gas way. The only way to get my wort out of the base dished end was though the outlet with a pipe to the edge, which would have given problems in a fierce flame, so out came the grinder again.
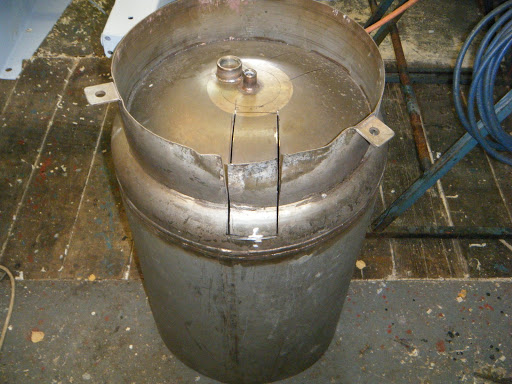
And a bit more hacking from the scrap section and another visit to my mate, produced this.
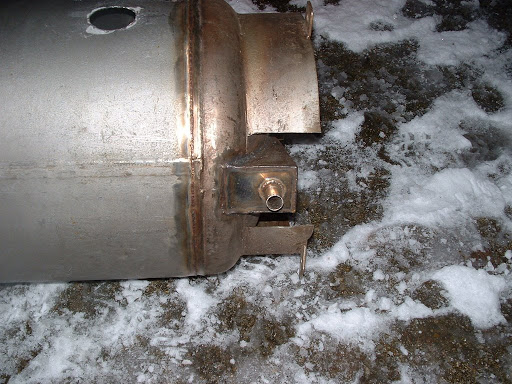
Thats about when I decided that I would prefer to go electric, never mind all the wasted work. After much research and agonising I decided on balance that immersion heaters would be a bettter option than kettle elements.
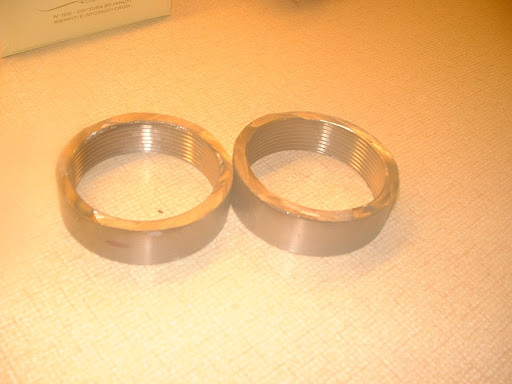
So I ordered a stainless 2 1/4 inch bsp boss from BES for £30 :sick: and then hacked it into three ?? Two for this project and one for something else up my sleeve So all in all the bosses cost about a tenner each, not two bad I suppose. Immersions are about a tenner, kettle elements with leads quite a bit more and getting hard to get. !
Yes i know there only two the other is in the workshop.
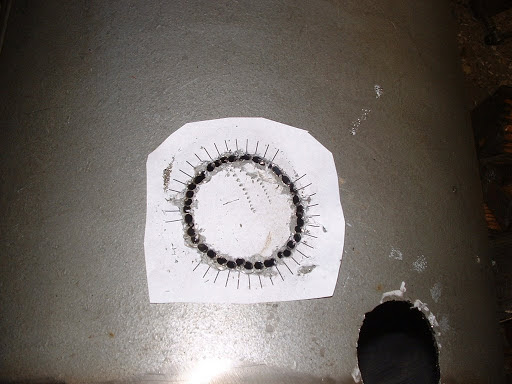
Next job was to make two holes for them in the boiler. Whenever I chain drill I always get fed up and start making the spacings to big and I definitely did not want a lot of filing on stainless. So I fired up Qcad, my drawing package, ( really excellent and very easy to use package ) and drew out this. A circle the right size, a line and a drill circle and then multi copy, 30 seconds
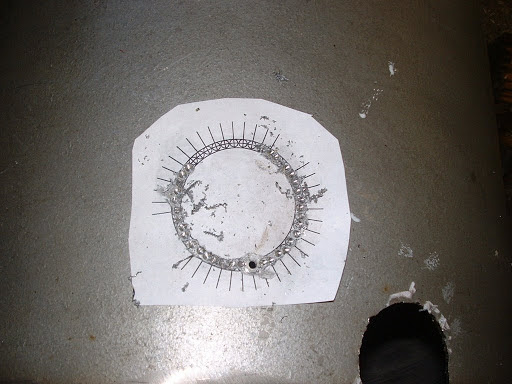
Used a spot of PVA to attach it to the side wall and started drilling.
Technique was to spot all the holes first with a 3mm drill, then drill through, then open out with a 4mm drill and then a bit of inclined drilling, bit of small chisel work, (old screwdriver) and them a quick file up. Used one 3mm drill for the lot, it had been shortened so that it only protruded from the chuck about 10 mm, very rigid.

There needs to be enough speed to stop the drill snagging but not to much or it will skate and not cut and work harden the stainless.
Don't forget the safety glasses as Norm of The New Yankee Workshop would say.
Off to see tig mate tomorrow, more pictures when back and lagging added.
You know I think I deserve a :drink: even if I say it myself :lol:
Managed to get this from a mate FOC, as he owed me a favour. Its stainless but has been painted.

I decided that section C would be a lot of trouble to use, so I hacked along the dotted lines and removed it from the base dished end and section B. I now have a nicely rolled up section, to use on the next project, to patch the other vessel after just hacking out the part with the bosses and not lose any capacity.

Next decided the required volume balance between mash tun and boiler, ( hope the calcs were correct ) and then cut along the line between A and B, cut out the outlet on A, cut a circle out of the scrap section C to plate the circular end hatch, and a curved piece to patch the outlet on A.
Then made my way to a tig welding mate, and got A patched up and section B welded to the dished end base where C had been attached attached :?
Still with me ?
All the hacking was done with those thin cutting discs specially for SS. I now use thin disc all the time even for mild steel, you can cut quite accurately with them.
There was much thought about the heating source and I decided to go the gas way. The only way to get my wort out of the base dished end was though the outlet with a pipe to the edge, which would have given problems in a fierce flame, so out came the grinder again.

And a bit more hacking from the scrap section and another visit to my mate, produced this.

Thats about when I decided that I would prefer to go electric, never mind all the wasted work. After much research and agonising I decided on balance that immersion heaters would be a bettter option than kettle elements.
So I ordered a stainless 2 1/4 inch bsp boss from BES for £30 :sick: and then hacked it into three ?? Two for this project and one for something else up my sleeve
Yes i know there only two the other is in the workshop.

Next job was to make two holes for them in the boiler. Whenever I chain drill I always get fed up and start making the spacings to big and I definitely did not want a lot of filing on stainless. So I fired up Qcad, my drawing package, ( really excellent and very easy to use package ) and drew out this. A circle the right size, a line and a drill circle and then multi copy, 30 seconds

Used a spot of PVA to attach it to the side wall and started drilling.
Technique was to spot all the holes first with a 3mm drill, then drill through, then open out with a 4mm drill and then a bit of inclined drilling, bit of small chisel work, (old screwdriver) and them a quick file up. Used one 3mm drill for the lot, it had been shortened so that it only protruded from the chuck about 10 mm, very rigid.
There needs to be enough speed to stop the drill snagging but not to much or it will skate and not cut and work harden the stainless.

Don't forget the safety glasses as Norm of The New Yankee Workshop would say.
Off to see tig mate tomorrow, more pictures when back and lagging added.
You know I think I deserve a :drink: even if I say it myself :lol:


