My Electric Brewery - Part 1, The Control Panel

The Homebrew Forum

Help Support The Homebrew Forum:

This site may earn a commission from merchant affiliate links, including eBay, Amazon, and others.

chastuck

Senior Member
Joined
Apr 20, 2013
Messages
190
Reaction score
14
Location
Bromley
Being in my early sixties and now retired, I have decided to build my definitive brewery which will probably be the last one I build. I have determined that this will be the best one I have ever made, picking up from my experience of building stainless steel pots over the last five years and my home brewing of around 40 years, plus all the knowledge picked up from the Forum. I have tried to follow best practice and learn from my past attempts at working with Bergland pots. In this regard, I have decided to follow the build of The Electric Brewery (http://www.theelectricbrewery.com/) as best I can, bearing in mind their successful clones all around the world. I have changed their overall plan to cater for my own brewing preferences. For instance, this means incorporating a separate HERMS set up rather than a combined HERMS/HLT coil and not buying Blichman BoilerMaker pots, which are incredibly expensive in the UK. The pots I have bought are the high-end stainless steel 100L pots from mrlard, to which I will add my own taps and elements. This will give me a ½ barrel brewery size. Below I have shown pictures of the first stage of my efforts, which is building the control panel for the brewery. I will post my pot conversions as I work on them in later instalments.
This is how all the bits looked before construction:
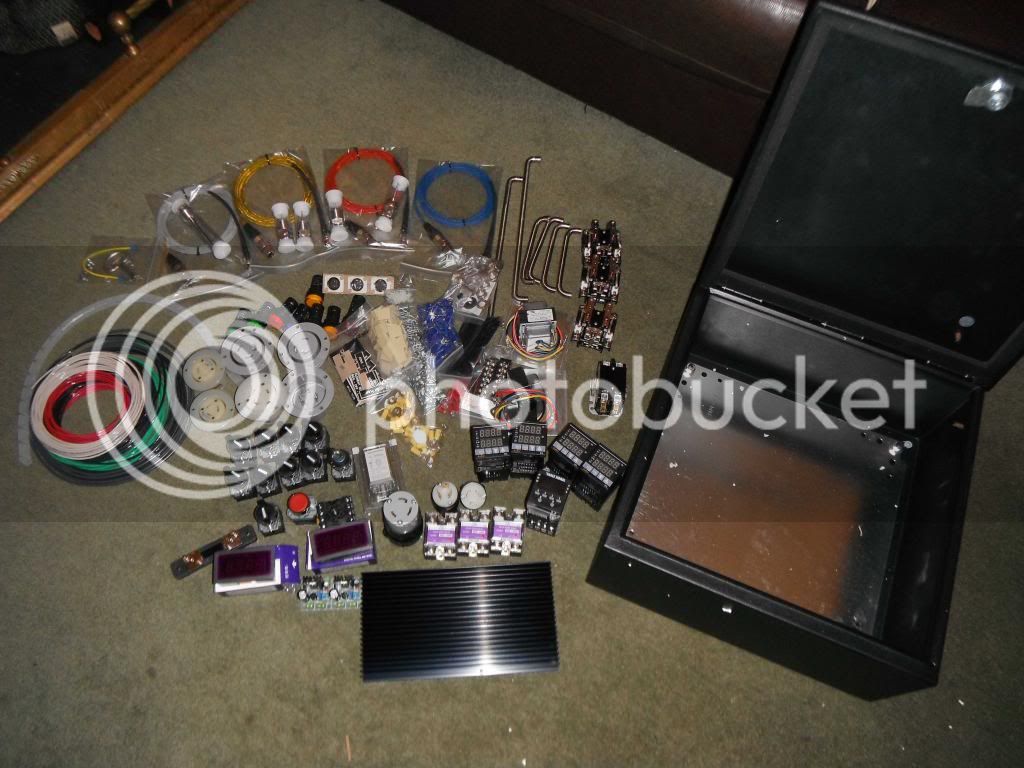
ControlPanelBits_zps4a815486.jpg


Working out where to put the receptacles:
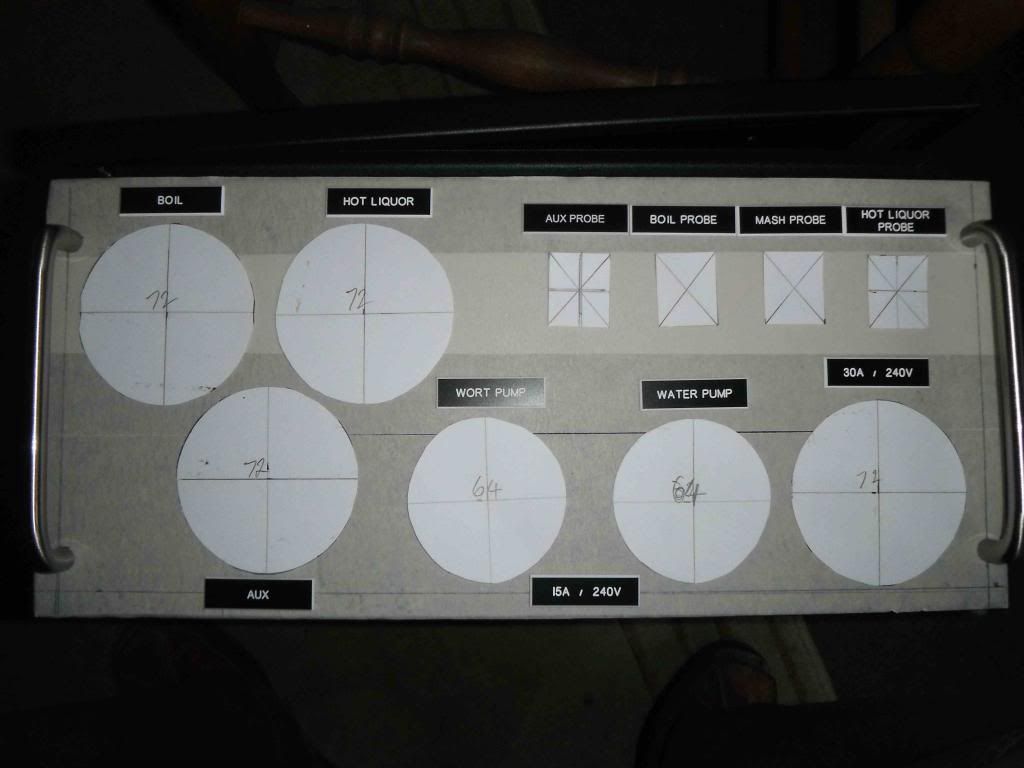
DSCF1680_zps0ca402ec.jpg


The holes in the case all cut out ready for mounting the switches and components:
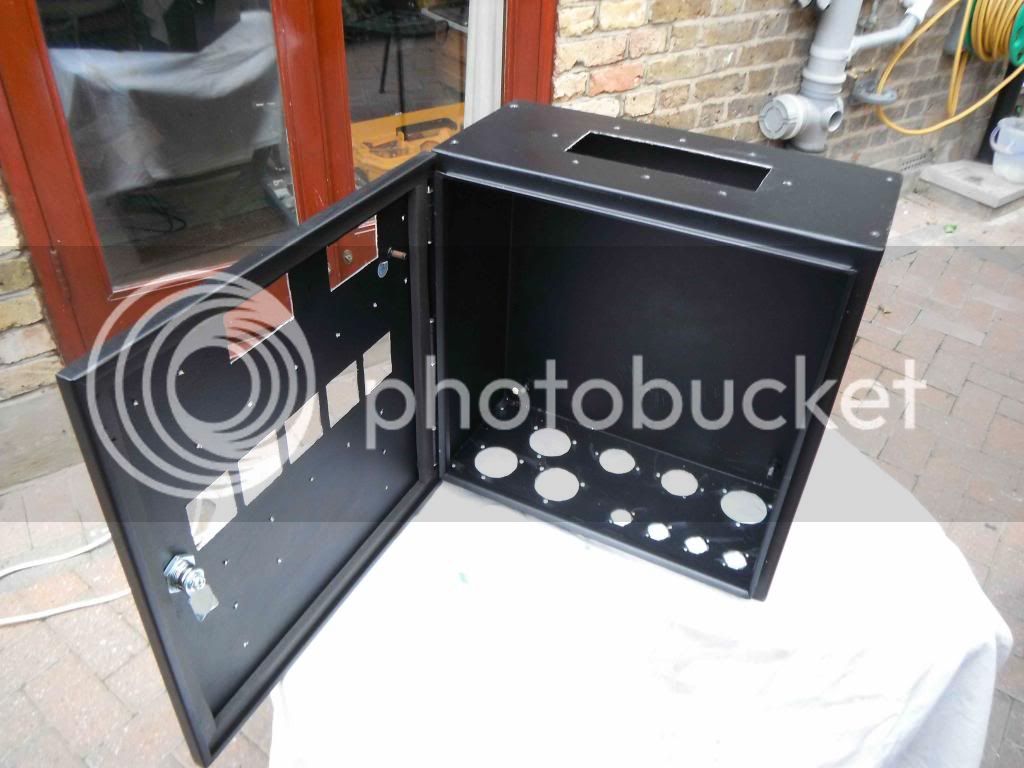
DSCF1682_zps8b72b194.jpg


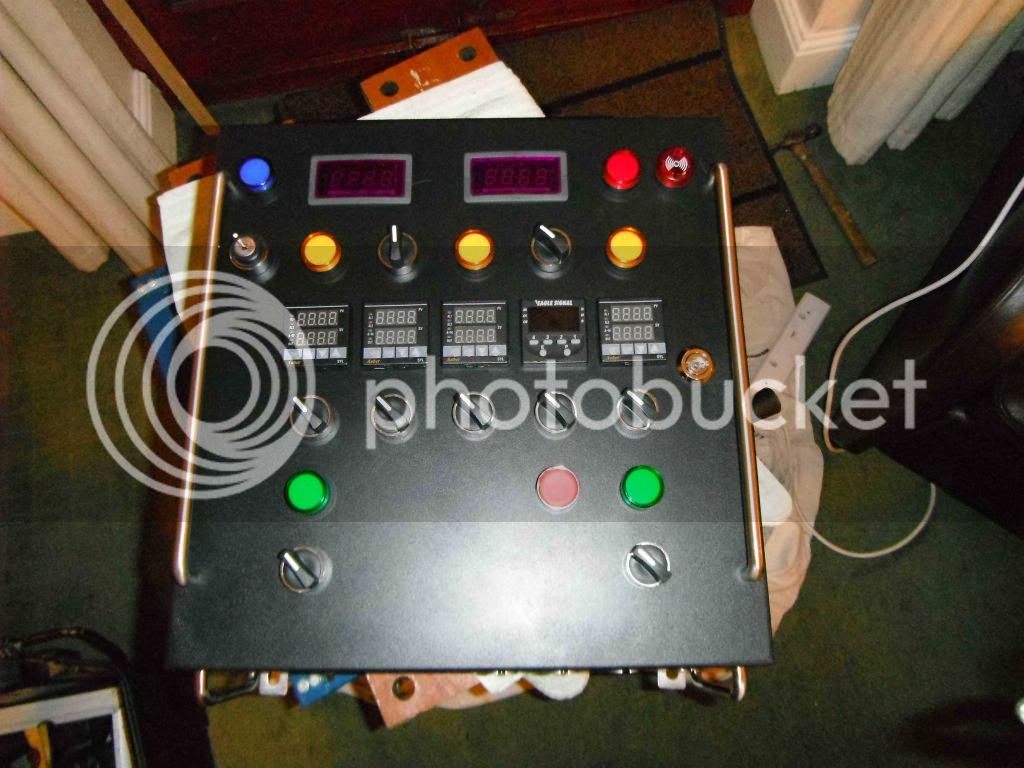
Components mounted:
DSCF1696_zpscb578337.jpg


DSCF1694_zps45a252bb.jpg


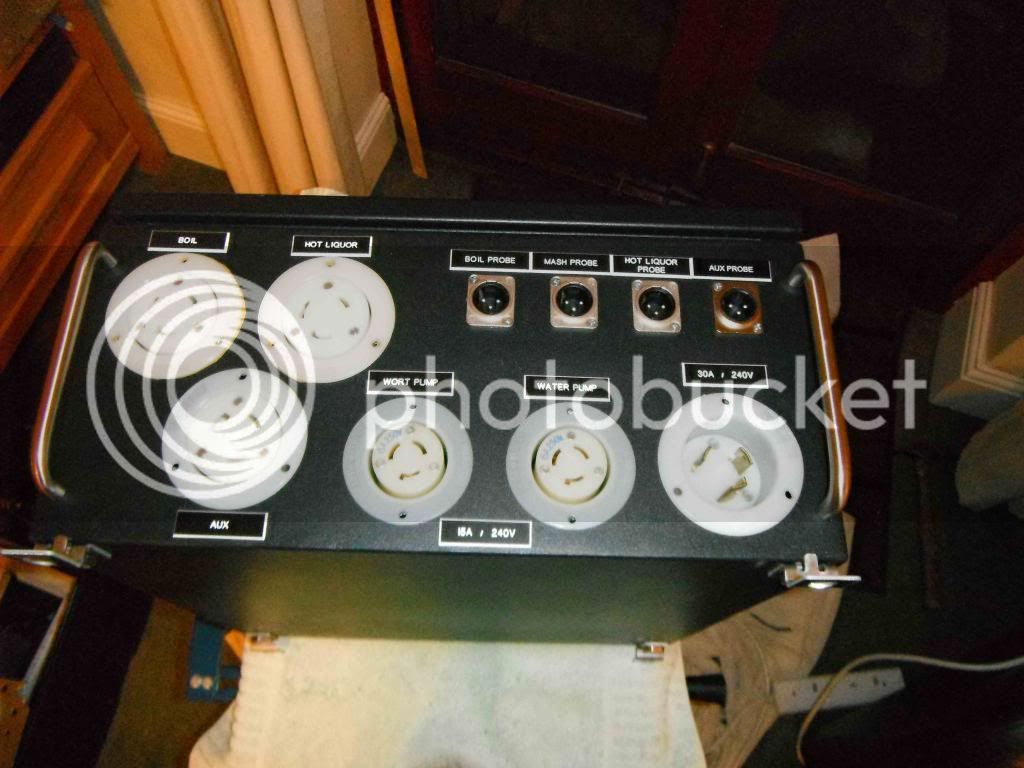
Receptacles fitted:
DSCF1701_zps838d6489.jpg


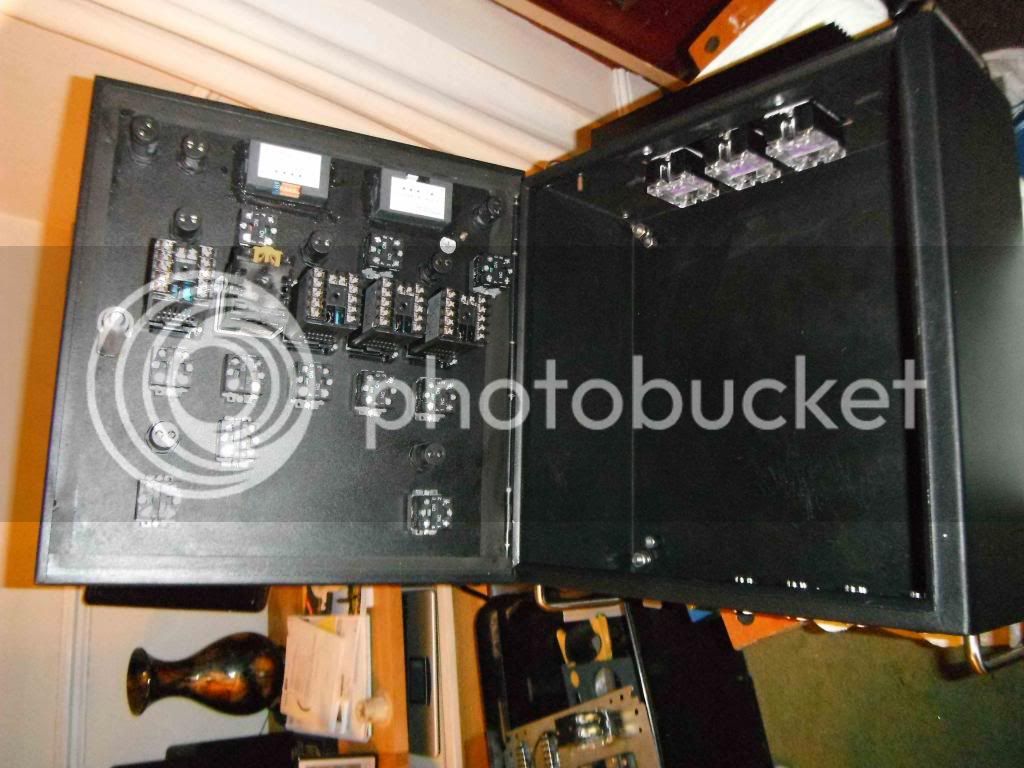
Working out where the relays and buses will go:
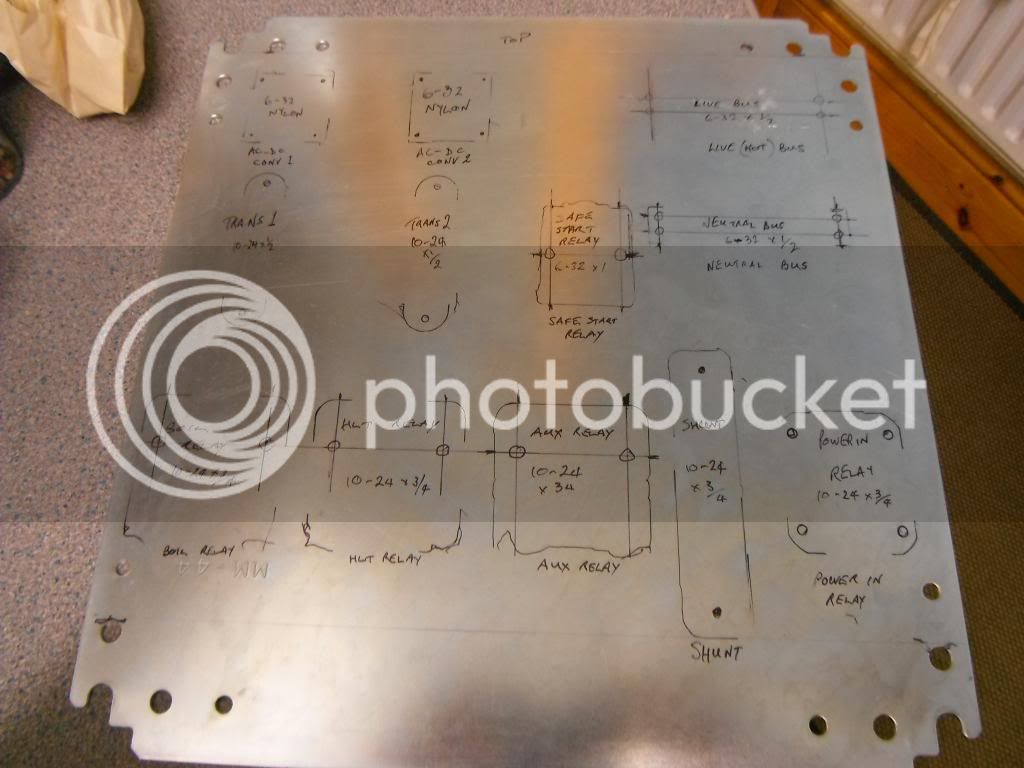
DSCF1688_zps6a51c2f1.jpg


Relays and buses fitted to back plate:
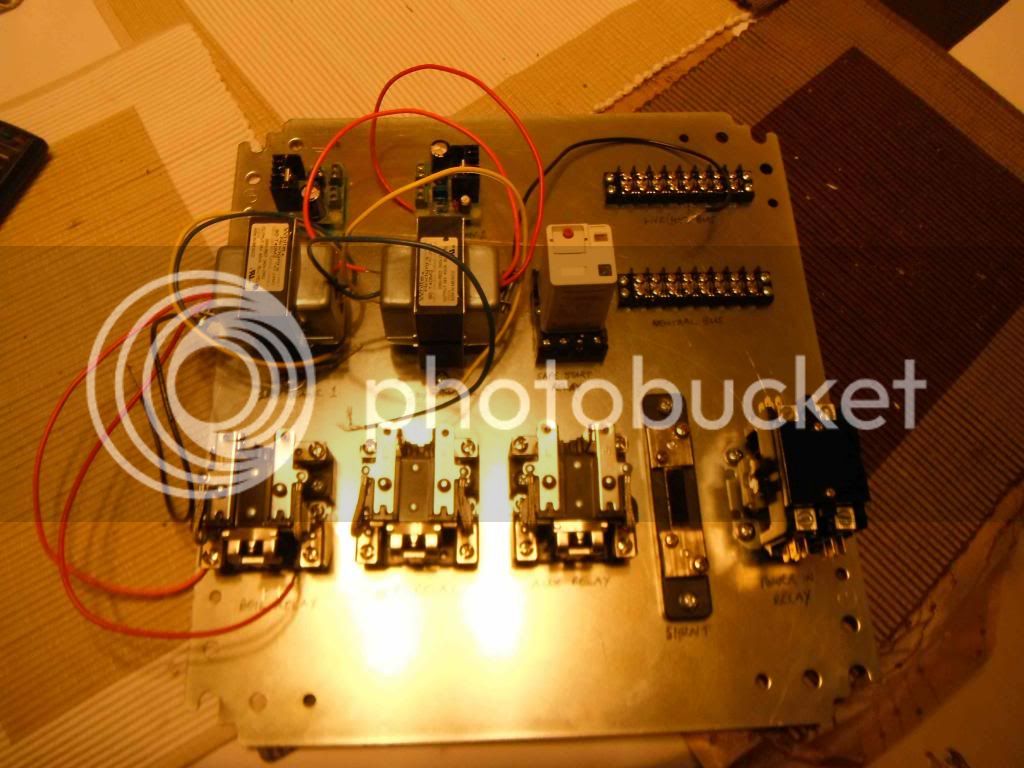
DSCF1692_zps8df26422.jpg


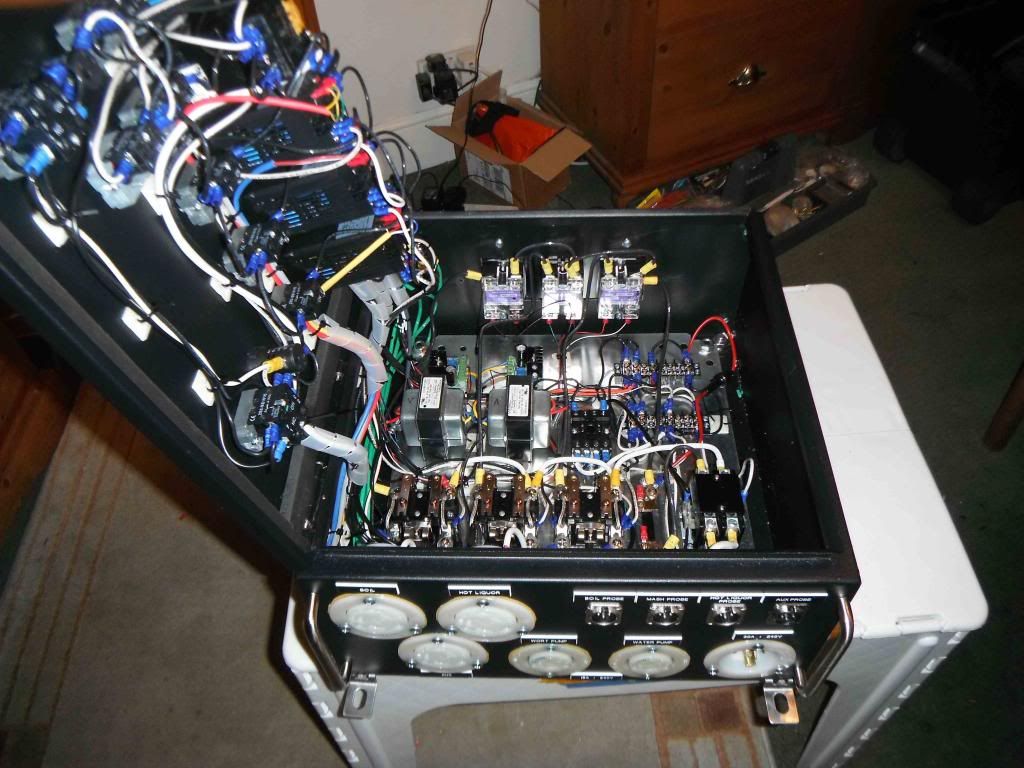
All the wiring completed:
DSCF1708_zpsdd687122.jpg


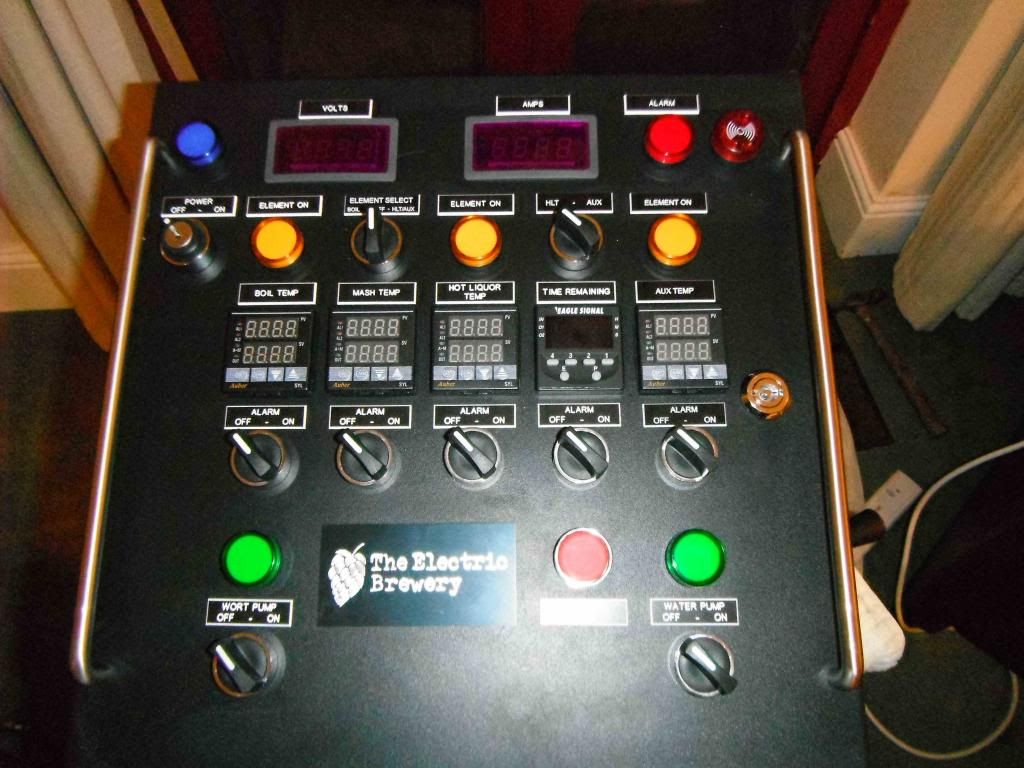
And finally, the finished look:
DSCF1699_zpsac2e7ffb.jpg


The next stage will be to work on the boil kettle and HLT, followed by the mash tun. I have all the stainless steel plumbing bits and Starrets that I need, so will start metal bashing next week. Watch out for Part 2 to see how I get on.
 
Hello mate, very impressive. I'm currently attempting the very same thing .

Jay
 
Fantastic. Well done.

I'm looking at something similar to what you've achieved however I wouldn't be at all certain I could manage the shift from 120V components to 240V components.

Could you confirm what you did different to the electric brewery blueprint to achieve the 240V build?

Thanks.
 
acaoshes said:
Fantastic. Well done.

I'm looking at something similar to what you've achieved however I wouldn't be at all certain I could manage the shift from 120V components to 240V components.

Could you confirm what you did different to the electric brewery blueprint to achieve the 240V build?

Thanks.
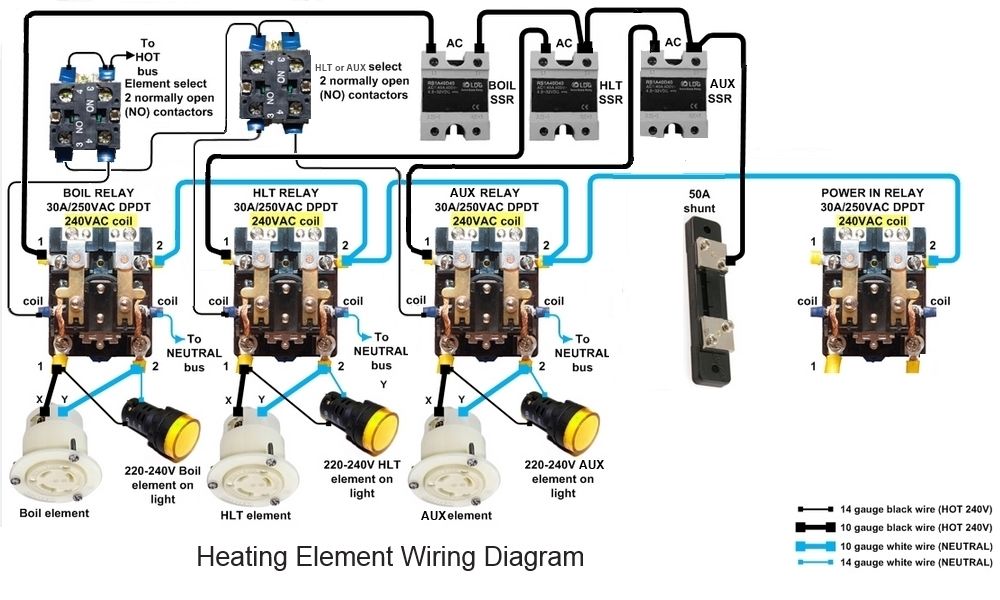
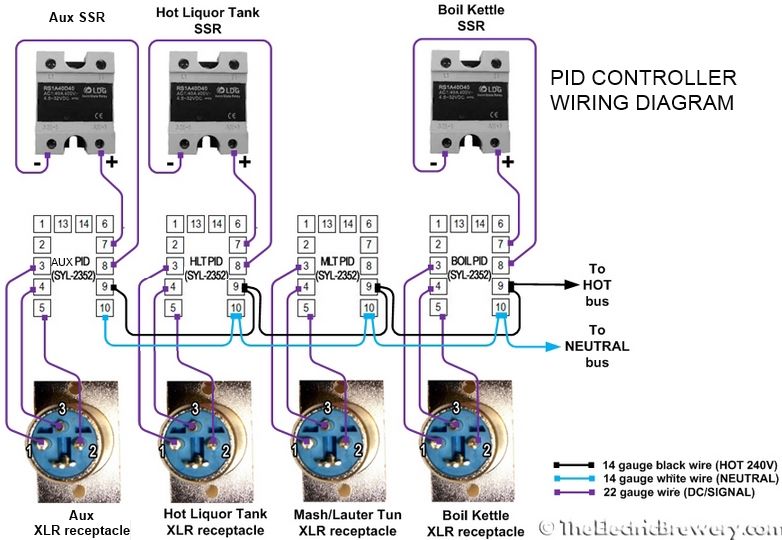
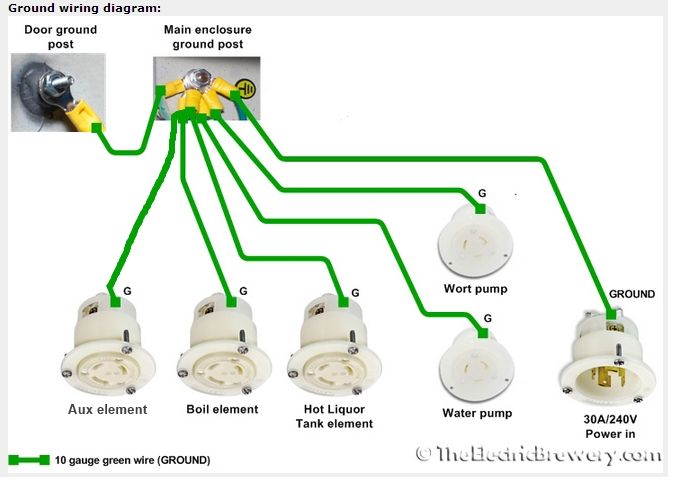
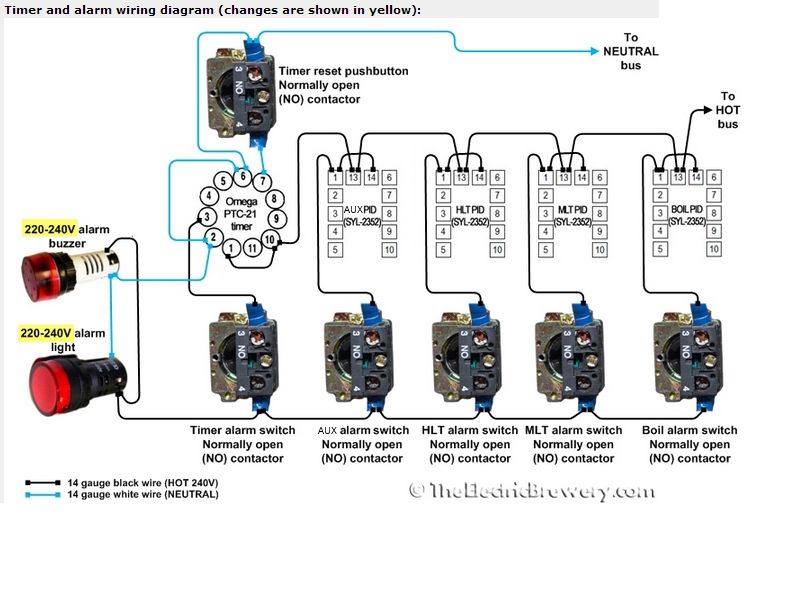
Fortunately, The Electric Brewery site publishes comprehensive details on 240v conversion: http://www.theelectricbrewery.com/forum ... hp?t=25393. I modified their circuits and layouts to suit my need for a separate and additional HERMS/RIMS requirement. The main circuit diagrams with my modifications are shown below.

HeatingElementWiring_zps890006ad.jpg


PIDwiringdiagram_zps332449a5.jpg


GroundWiringDiagram_zps2c568cb9.jpg


Timerandalarmwiring_zpsc13fa805.jpg


I also have to say that I bought the 240v control panel kit direct from The Electric Brewery itself (except the parts for my additional changes). I didn't want the bother of sourcing all the individual components, and then have the added worry of whether the bits were compatible or had been tested. In practice, I don't think buying the kit complete was any dearer than individual sourcing, including adding the rip-off import duty.
 
@chastuck
Thanks very much for this information. I appreciate your time and advice. Looks like I'll be having myself a 101 electronics crash course over Christmas.
Regards.
 
Hi Chastuck,

So what's your opinion of this control panel? You bought it in kit form...was it simple to construct?

I'm either going to buy their 2 element panel (1 turned on at a time) and run a HERMS in the HLT just as they do...or buy a RIMS pipe from Mr. Lard and modify the panel like yourself to control a 3rd stainless element.

The parts you used for modifying...did the Electric Brewery people help with this or did you figure it all out yourself? I'm guessing you purchased all the EB probes too..?

It may be too much of a pain but it would be amazing if you could list ALL the parts you bought from the US for your brewery. I'm looking to purchase and ship in one unit.

Did you consider using Mr. Lard 100% for the control panel and everything else? I started out falling for the Electric Brewery setup but bulking at the overall cost...then pricing up a (sort of) UK equivalent...but now I'm thinking an EB control panel/probes combined with Mr. Lards pots etc is the way to go...

ATH
 
AllTheHops said:
Hi Chastuck,

So what's your opinion of this control panel? You bought it in kit form...was it simple to construct?

I'm either going to buy their 2 element panel (1 turned on at a time) and run a HERMS in the HLT just as they do...or buy a RIMS pipe from Mr. Lard and modify the panel like yourself to control a 3rd stainless element.

The parts you used for modifying...did the Electric Brewery people help with this or did you figure it all out yourself? I'm guessing you purchased all the EB probes too..?

It may be too much of a pain but it would be amazing if you could list ALL the parts you bought from the US for your brewery. I'm looking to purchase and ship in one unit.

Did you consider using Mr. Lard 100% for the control panel and everything else? I started out falling for the Electric Brewery setup but bulking at the overall cost...then pricing up a (sort of) UK equivalent...but now I'm thinking an EB control panel/probes combined with Mr. Lards pots etc is the way to go...

ATH
The control panel is brilliant. No - it wasn't simple to construct, but it is manageable if you have the confidence and take your time. Unless you know what you are doing with electrics, electronics and metal cutting tools it can be difficult to make and easily cocked-up. You can't cut corners with a project like this. You really must have the right tools and the right knowledge. I figured out the extra components myself, but there again I had a clear idea of where I was going and what I needed. All the parts I bought from the Electric Brewery site are already listed on their site under 'Parts' and yes, I bought the probes from them as well. The extra PID, relay and switches for my AUX output I bought direct from Auberins. Unless you have access to a cheap market source for components, I would suggest it is actually no cheaper to try and buy bits and pieces here and there. Plus, you have the confidence that by buying the complete kit you are getting top quality and guaranteed compatibility. As well as my separate AUX on the panel to control an external HERMS pot, I am still going to install a HERMS coil in the HLT. I want to see if this will work as good as my HERMS pot.

I did consider using mrlard for everything that he could get, but in the end I decided that the proven track record and world-wide success of the Electric Brewery was more certain to ensure success. Having said that, I did buy my 100L high-end pots from him. To be honest, I would have preferred the Blichmann Boilermaker pots, but they are really expensive for the size I needed. Maybe one day I will upgrade and rebuild with these pots.
 

Latest posts

Back
Top