Herms brewing

The Homebrew Forum

Help Support The Homebrew Forum:

This site may earn a commission from merchant affiliate links, including eBay, Amazon, and others.
Hi!
I am using the tea urn purely as a HLT. When the liquor hits strike temperature it's pumped into the mash tun through the tap (underletting) and a PID controls the temperature of the mash by heating the wort directly through the ACE boiler's concealed element; the grain sits on a false bottom and the element is dialled down with a PWM voltage regulator. A pump recirculates the wort past a temperature probe connected to the PID and back into the top of the mash tun.
I get the impression that a RIMS tube, as you show, is used by brewers using bottled gas to heat the boiler. The RIMS tube is the only electrical heater in an otherwise gas-based brewery.
 
Ok I've gotcha now :thumb:
Those RIMS tubes are used by people who don't have the facility to directly heat the mash, ie. those who use coolbox mash tuns and the like, as an alternative to a HERMS heat exchange coil.
 
So, small pump, kettle and inkbird and a length of copper would do the trick?
You would really benefit from using a PID temperature controller. They might sound a bit more technical than they really are but they are intelligent compared to some other controllers. Worth the effort. How's your wiring and electrical skills.

You would also need some lengths of food safe hose and hose clips.
 
That good if you can get a hand with it. You will also need to mod the kettle so it stays on rather than turning itself off each time it boils.

It's been a while since I've done it but it involves bypassing the on off switch and wiring power direct to the element.

Sent from my SM-G903F using Tapatalk
 
I think HERMS is a better option than RIMS, it's an easier build for a start, but also the element in the RIMS is in direct contact with the wort meaning scorching, heat spots, denaturing of enzymes are more likely than with HERMS.
It's not really difficult, and I used to love all the tinkering that went along with it, but I got to the point where I was trying to streamline my brew days so the HERMS was the first thing to go.
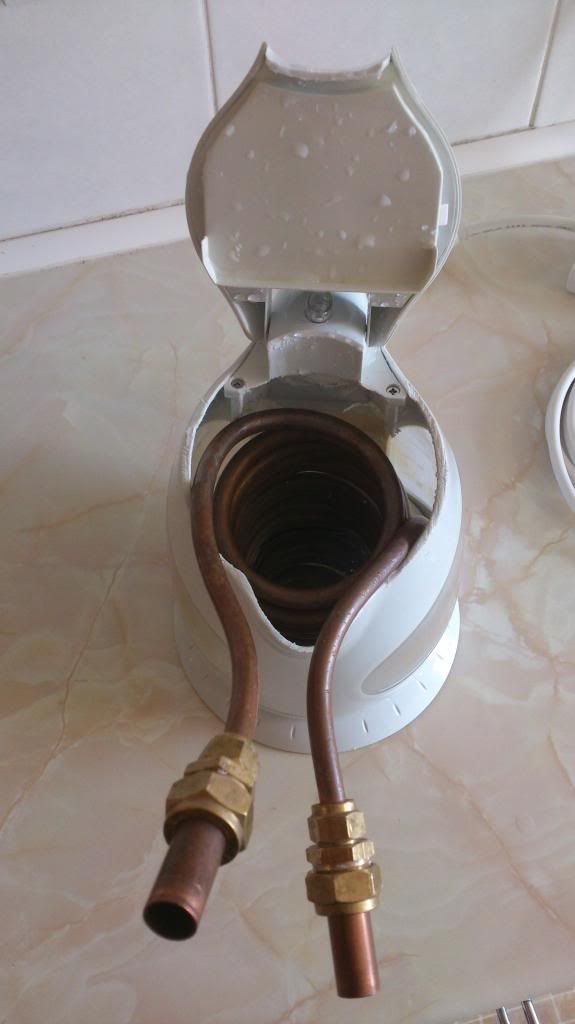
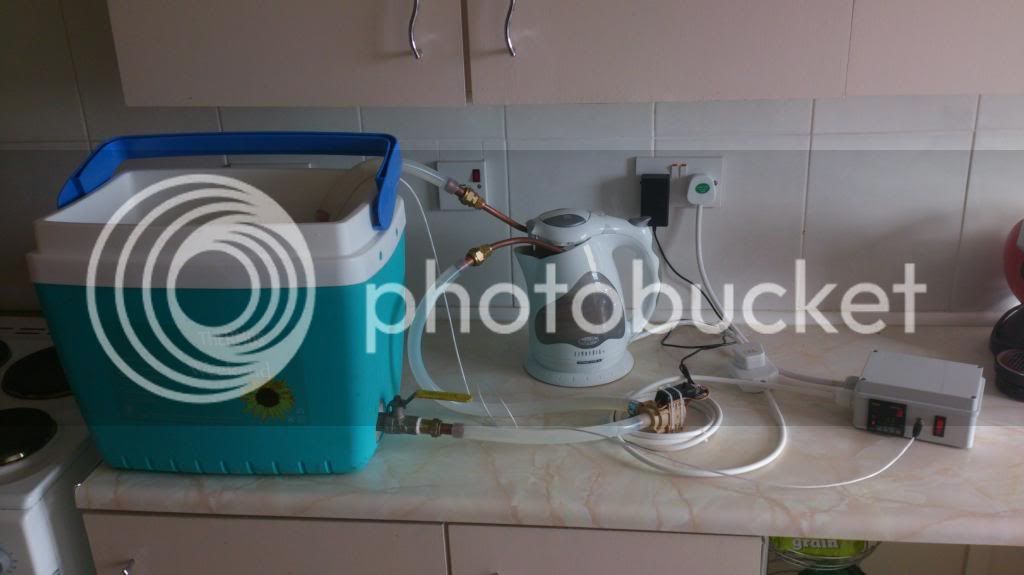
I made a copper coil and put it in a kettle , see below, with a little solar pump all controlled by a PID and it worked brilliantly for controlling temperature and for stepped mashes.
I haven't used it for over a year, but I the PID is great for controlling the HLT/boiler.


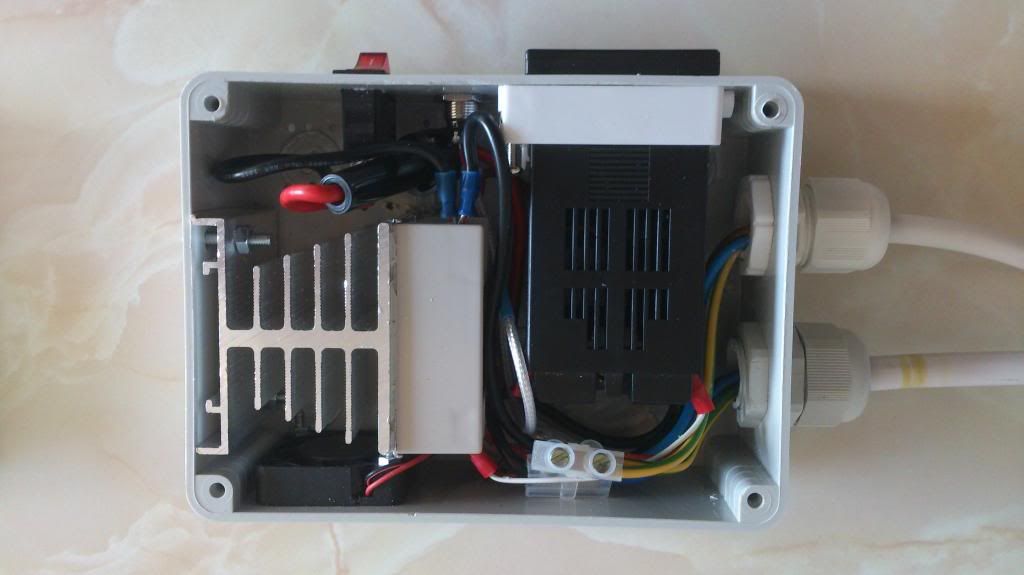
I'm looking to do a one element/one pump control box like yours. Do you have a wiring diagram for yours? A photo of the inside would be much appreciated if not.
 
I'm looking to do a one element/one pump control box like yours. Do you have a wiring diagram for yours? A photo of the inside would be much appreciated if not.

Hi!
I've just finished my control box build - it's to control a mash tun and a HLT separately.
I used this diagram to help me: http://i767.photobucket.com/albums/xx316/BigDave1970/PID%20wiring_zps7m9m9rwb.jpg
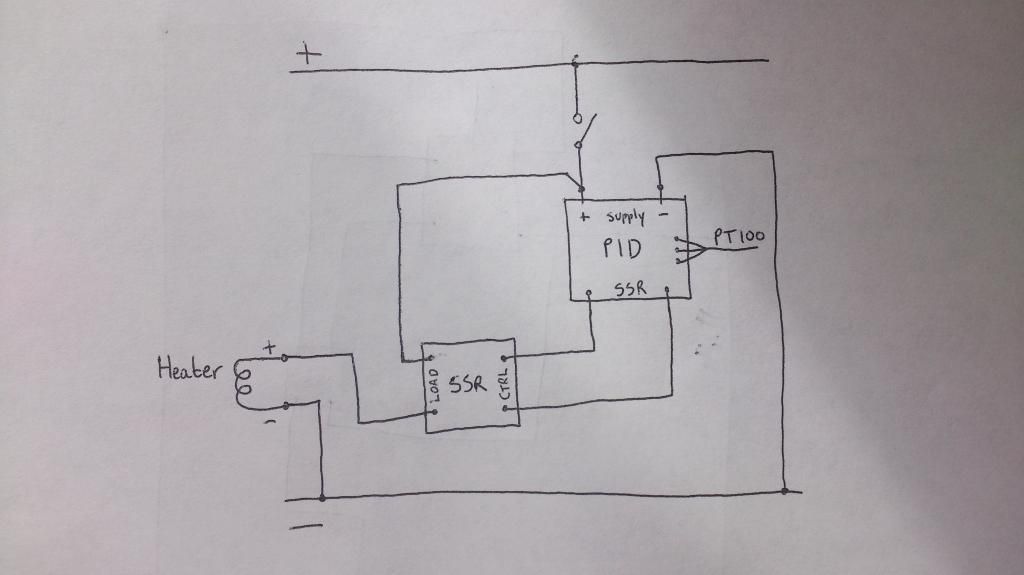
The diagram below is how I'd wire up a single Inkbird PID and single output socket:

Wiring 2.jpg
 
Hi!
I've just finished my control box build - it's to control a mash tun and a HLT separately.
I used this diagram to help me: http://i767.photobucket.com/albums/xx316/BigDave1970/PID%20wiring_zps7m9m9rwb.jpg
The diagram below is how I'd wire up a single Inkbird PID and single output socket:

Hi @Bigcol49, your drawings were very helpful and I'm nearly at the build stage. Just need to decide what size project box to get.

I note you have a 1a inline fuse before the live wires into the PID, is this just an extra safety feature so you don't overload the PID? Some of the builds I've seen utilise a fuse but others don't so wondering how necessary you see it as.
 
I note you have a 1a inline fuse before the live wires into the PID, is this just an extra safety feature so you don't overload the PID?

Hi!
Yes, it's to protect the PID, although I'm not sure that it is totally necessary. However, they are relatively cheap and don't add much complexity to the build (although they are a PITA to solder onto - tiny terminals). I got mine from my local Maplin store - a fuse holder that fits onto the side of the project box so that the fuse can be changed without opening the box.
I got my project box from my local City Electrical Factors store - they can show the size of the box before buying - the poor lad behind the counter took three trips to the warehouse before I got one large enough.
 
Nearly finished, need to have a bit of a clean up and buy and fit a PT100. I have two switches, one to control the PID and another to control the element to allow me to continue to monitor the temp with the element switched off.

I amended the drawing you kindly provided Bigcol49, so thanks again for that. In the end the power input ended up being closer to the output so I only had to use a connector block on the earth.

Definitely an enjoyable build, if I made the odd daft mistake (cutting the wrong end of an kettle lead one and having to order a replacement). A bigger box and some better planning for the placement of the components would have been an improvement.

Tempted to do a dual PID one in the future.

20170420_211948.png


Wiring_Diagram_1.png
 

Latest posts

Back
Top