GrainFather G30 steam hood for 4” in-line extractor fan ducting -Any links ideas ?

The Homebrew Forum

Help Support The Homebrew Forum:

This site may earn a commission from merchant affiliate links, including eBay, Amazon, and others.
Built my condenser for far less than kegland or the even more expensive SsBrewtech one.
Definitely had condensation issue in extractor tube which I had to drain out before the fan. I realised it was a death trap and the condenser is all round better.
 
Built my condenser for far less than kegland or the even more expensive SsBrewtech one.
Definitely had condensation issue in extractor tube which I had to drain out before the fan. I realised it was a death trap and the condenser is all round better.
Be interested if you could share a parts list or photos please? TC parts seem ok to get hold of, it’s finding a spray nozzle and TC plate that fits the spray nozzle that seems elusive.
 
Last edited:
Be interested if you could share a parts lidlst please? TC parts seem ok to get hold of, it’s finding a spray nozzle and TC plate that it will fit into.
https://www.homebrewtalk.com/threads/spike-steam-lid-used-on-65l-brewzilla.689178/#post-9070523Post 7 has pictures of what I did. There are a few configuration options mine not the same design as kegland and others.
The lid on my Guten is metal so I didn't replace. You'll notice that the lid top part is concave unlike the metal distill lids or the other distill hats. It didn't really make a difference but since then a panel beating friend did beat that part convex.
The hole in the lid on my system was 2 inches so I used a 2 inch bulkhead to TC and then fitted 2 inch before sizing down to 1.5 inch.
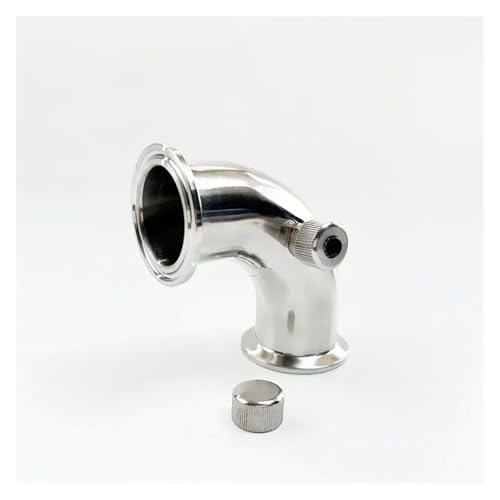
For the spray I did eventually get a 1.5 inch plate with a 10mm hole in but I'd already used the 90 degree with the side arm tube bit to fit the connection tube to the water supply and spray. This is supported by silicone tube to make it solid.
Re the spray I picked up a garden spray bottle that had a metal spray nozzle on it ( brass I think) and then I soldered this onto a piece of soft metal copper pipe that connects to the water supply. I run the water supply at 20 psi and then adjusted the spray nozzle, once I was happy with that I fixed it in that spray pattern with some solder.
My arrangement does have some of the steam condensing on the copper pipe before the spray but that hasn't been detrimental. I think the copper reacts with DMS anyway. I do now have a stainless adjustable spray nozzle but haven't bothered to fit it as current system has worked very well for more than 30 brews.
Do make sure you have an angle sloping down so no water can run back into your kettle.
Water use is about 15 litres at most in an hour boil, I use that water for cleaning.
Remember the first part of condenser is hot so don't pick lid up by that part.
I put a towel on the lid and a tea towel around the first part to keep lid and early condenser hot which encourages steam to condense where I want it to.
Inspection hole is useful for looking in and hop additions and other stuff. I cut the hole to use the lid from a kilner jar, they come in several sizes and smaller would be fine on a smaller system. Clip the lid down if you can.
You must reduce the boil power though, I only need 25% to keep a rolling boil/ simmer.
Blimey that’s impressive that!

I assumed there would be some sort of off the shelf spray nozzle with an npt thread to fit into some sort of tri clamp fitting.

Hats off to you for the custom solution! Probably pst my diy skill set!
 
Blimey that’s impressive that!

I assumed there would be some sort of off the shelf spray nozzle with an npt thread to fit into some sort of tri clamp fitting.

Hats off to you for the custom solution! Probably pst my diy skill set!
I do have a spray nozzle that I bought subsequently I'll find it and see how it performs and attaches.
It was a very simple diy job to attach the spray nozzle on my hack.
 
https://www.homebrewtalk.com/threads/spike-steam-lid-used-on-65l-brewzilla.689178/#post-9070523Post 7 has pictures of what I did. There are a few configuration options mine not the same design as kegland and others.
The lid on my Guten is metal so I didn't replace. You'll notice that the lid top part is concave unlike the metal distill lids or the other distill hats. It didn't really make a difference but since then a panel beating friend did beat that part convex.
The hole in the lid on my system was 2 inches so I used a 2 inch bulkhead to TC and then fitted 2 inch before sizing down to 1.5 inch.
For the spray I did eventually get a 1.5 inch plate with a 10mm hole in but I'd already used the 90 degree with the side arm tube bit to fit the connection tube to the water supply and spray. This is supported by silicone tube to make it solid.
Re the spray I picked up a garden spray bottle that had a metal spray nozzle on it ( brass I think) and then I soldered this onto a piece of soft metal copper pipe that connects to the water supply. I run the water supply at 20 psi and then adjusted the spray nozzle, once I was happy with that I fixed it in that spray pattern with some solder.
My arrangement does have some of the steam condensing on the copper pipe before the spray but that hasn't been detrimental. I think the copper reacts with DMS anyway. I do now have a stainless adjustable spray nozzle but haven't bothered to fit it as current system has worked very well for more than 30 brews.
Do make sure you have an angle sloping down so no water can run back into your kettle.
Water use is about 15 litres at most in an hour boil, I use that water for cleaning.
Remember the first part of condenser is hot so don't pick lid up by that part.
I put a towel on the lid and a tea towel around the first part to keep lid and early condenser hot which encourages steam to condense where I want it to.
Inspection hole is useful for looking in and hop additions and other stuff. I cut the hole to use the lid from a kilner jar, they come in several sizes and smaller would be fine on a smaller system. Clip the lid down if you can.
You must reduce the boil power though, I only need 25% to keep a rolling boil/ simmer.
Made a really nice job of that bud I like the way you have used the la parfait lid as a hop port , I will nick that idea athumb.. chapeau! I am planning jost to use a bit of 80mm stainless flue pipe or if not that some stainless tube of maybe 50 mm. I have a nieghbour who is a welder and I thik he has a plasma cutter so I am going to ask him if he can do the job. My plan is not to have it condensing but to stick the flue out of a small but handy window in my brewhouse. I am hoping the steam will heat the vertical section enough to get it over an acute bend into another section which will be outside the window where the steam will condense and drip out.
 
If you are venting outside, just use the silver flexi. A U bend immediately off the boiler will ensure any condensate with collect (drain) there. No run back. No welding required.
 
If you are venting outside, just use the silver flexi. A U bend immediately off the boiler will ensure any condensate with collect (drain) there. No run back. No welding required.
I think you are right and I have a bit of silver flexi from my failed inline fan experiment... why spend more ! 🤣 Still have to get a hole cut and a exit pipe welded on though and a hop port cut too.
 
I think I am too 😂😂.

I do that every brew. Tbh, if the window has a shelf, stand the fan there and run another bit of flexi out of the window. Aircon fittings are the same size.
 
Last edited:
This is my vented anti-boilover lid.
After malt comes out, pop this on (4" hose on top) and run away. I normally have breakfast and then return about 45m later and add first hops.
 

Attachments

  • 20231206_092143.jpg
    20231206_092143.jpg
    84 KB
Last edited:
@RoomWithABrew. Cracking building. Nicely done spray condenser. Minimises water use, could you run it off a pump and a reservoir?
Yes I could. Shameful but we get a lot of rain here and no water meter. Also very economical aside from brew day with water. No water here in NZ gets reused after processing, not like London.
I would use the 1000 litre tanks of rainwater for this if needed. Currently they wait in case of earthquake.
 
Do you prefer one to the other?

I just saw the Keg land set up. I am planning avery much cheaper version of the... I mean very much cheaper 🤣 🤣
pray tell!😂
i give up online looking!
was hoping buy the condenser complete but £160 near xmas it’ll have to wait! unless i find a link for 3 monthly payments like Klarna app!
just got scared as my online shopping with bad day 🧠i’ll fuff it up again 🤦‍♂️🥴🫡
 
pray tell!😂
i give up online looking!
was hoping buy the condenser complete but £160 near xmas it’ll have to wait! unless i find a link for 3 monthly payments like Klarna app!
just got scared as my online shopping with bad day 🧠i’ll fuff it up again 🤦‍♂️🥴🫡
Very simple it will be two holes cut in my lid one at 100mm to take a bit of 100mm stainless flue pipe which will be welded and then a section of flexible ducting joined to that which will be hung out the window. I think the steam should heat the stainless pipe enough to stop condensation at the top of it where the flexi will join the steam should drive over into the cooler section outside and then condense and drip into the garden. The other hole will be a little smaller to take the hops . Should cost me no more than the bit of flue which I will get my neighbour to weld into the hole he has cut to take it. Couple of beers and he will be happy.
 
Best to read what other home brewers are saying about the steam condenser's lack of boil and lower boil off rate, which is understandable seeing how they work.
A simple hood made out of a bowl and a drip can less than $40 AU, I brew outside but if inside a flexible 100mm dia hose fitted to the top and directed out side.
Anyone worried about boil over about 2-3 ml of distilling conditioner prevents that.

1701896713568.png
 
How does it work?
Is as simple as it looks.
You sit it on the kettle, you attach the hose and on the other end there is a bathroom extractor fan.

The 12 holes let air in, which carries away the stream. When and if the boil foams up, 12 holes gentle blow onto the foam and stop it boiling over, just like you granny blowing on a milk pan.

I have on occasions had foam scum all the way up the boiler and touching the lid, but never any further.

It also has a tag inside, so it can rest on the side of the kettle.
 
lads n lasses a really interesting and learning experience to me!
great to get help in the most ‘for normal people with proper working 🧠’ but alas your dealing with dangeruss Brian n his 0.5 brain cells. we can all laugh at it! your not laughing at me but laughing with me! as old lads know like chippy n clint etc. they know my humour and i don’t get offended😂
went in tangent! 🤦‍♂️
new year payday hoping to snag the option 3 of the Brewzilla steam condenser..160 beaver pelts i know! but me likes SHINY SHINY!
i like to carry on with this thread! it highlights parts of our brewing process that’s sometime over looked.
catch you all lata.
mind looking back on my steam hood i built it was too high yp not nuff size (that’s the lady’s say!) 🥴🤦‍♂️
and the fan for all it worked if wind outside is still!
just looked naff in a already grab n brick walked outhouse!
getting shiny shiny isn’t the answer (someone said can’t polish a turd!!! )
but a sprinkling of fairy dust (lick o paint etc) can help wonders!
watching Griffo on his chancel re-doing his brewery.
latest one is the widow mounted fan!!!
hmmmm 60 off quid gets me thinkin…
watch this space
love you all like jelly tot
bri
 

Latest posts

Back
Top