strange-steve
Quantum Brewer
- Joined
- Apr 8, 2014
- Messages
- 6,027
- Reaction score
- 5,804
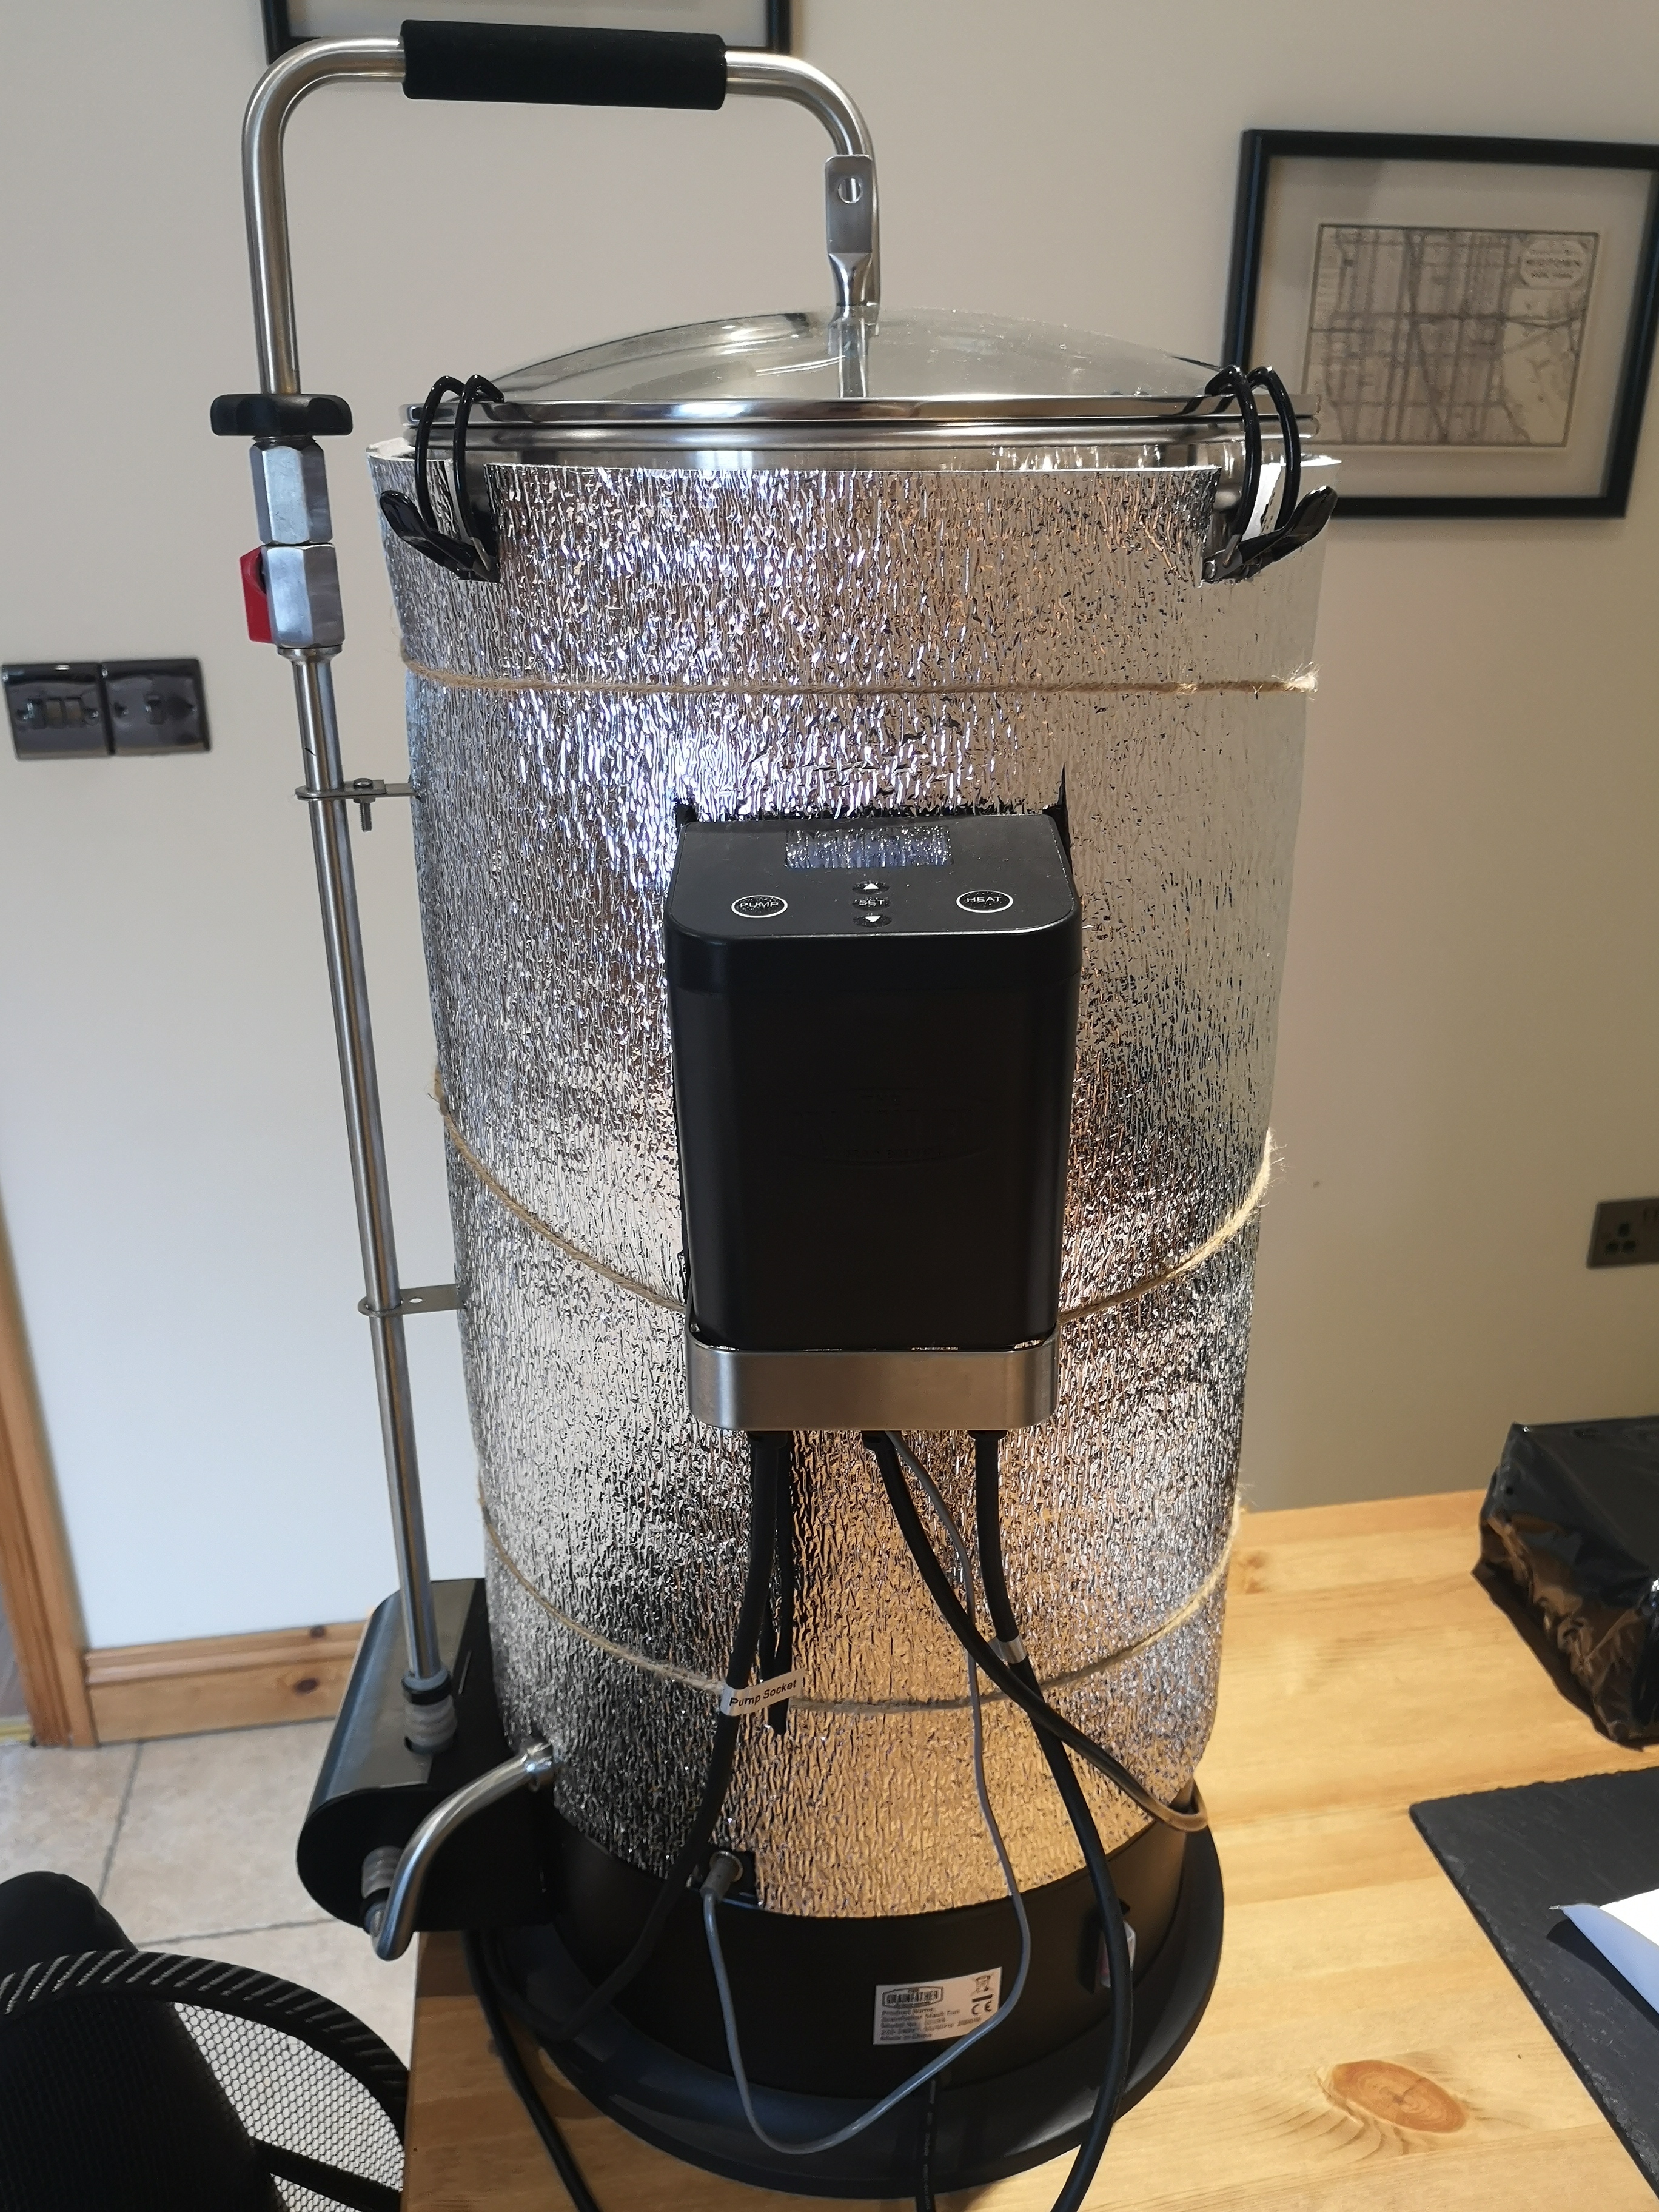
In Lidl the other day I spotted a 6m x 0.5m roll of radiator reflector for £4.99, so I bought it and made a graincoat for my GF. A single roll is actually enough to make 5 coats, so if you make a balls up as I did then no worries :thumba:
You'll need scissors, Stanley knife or similar, measuring tape, sharpie pen and some tape.
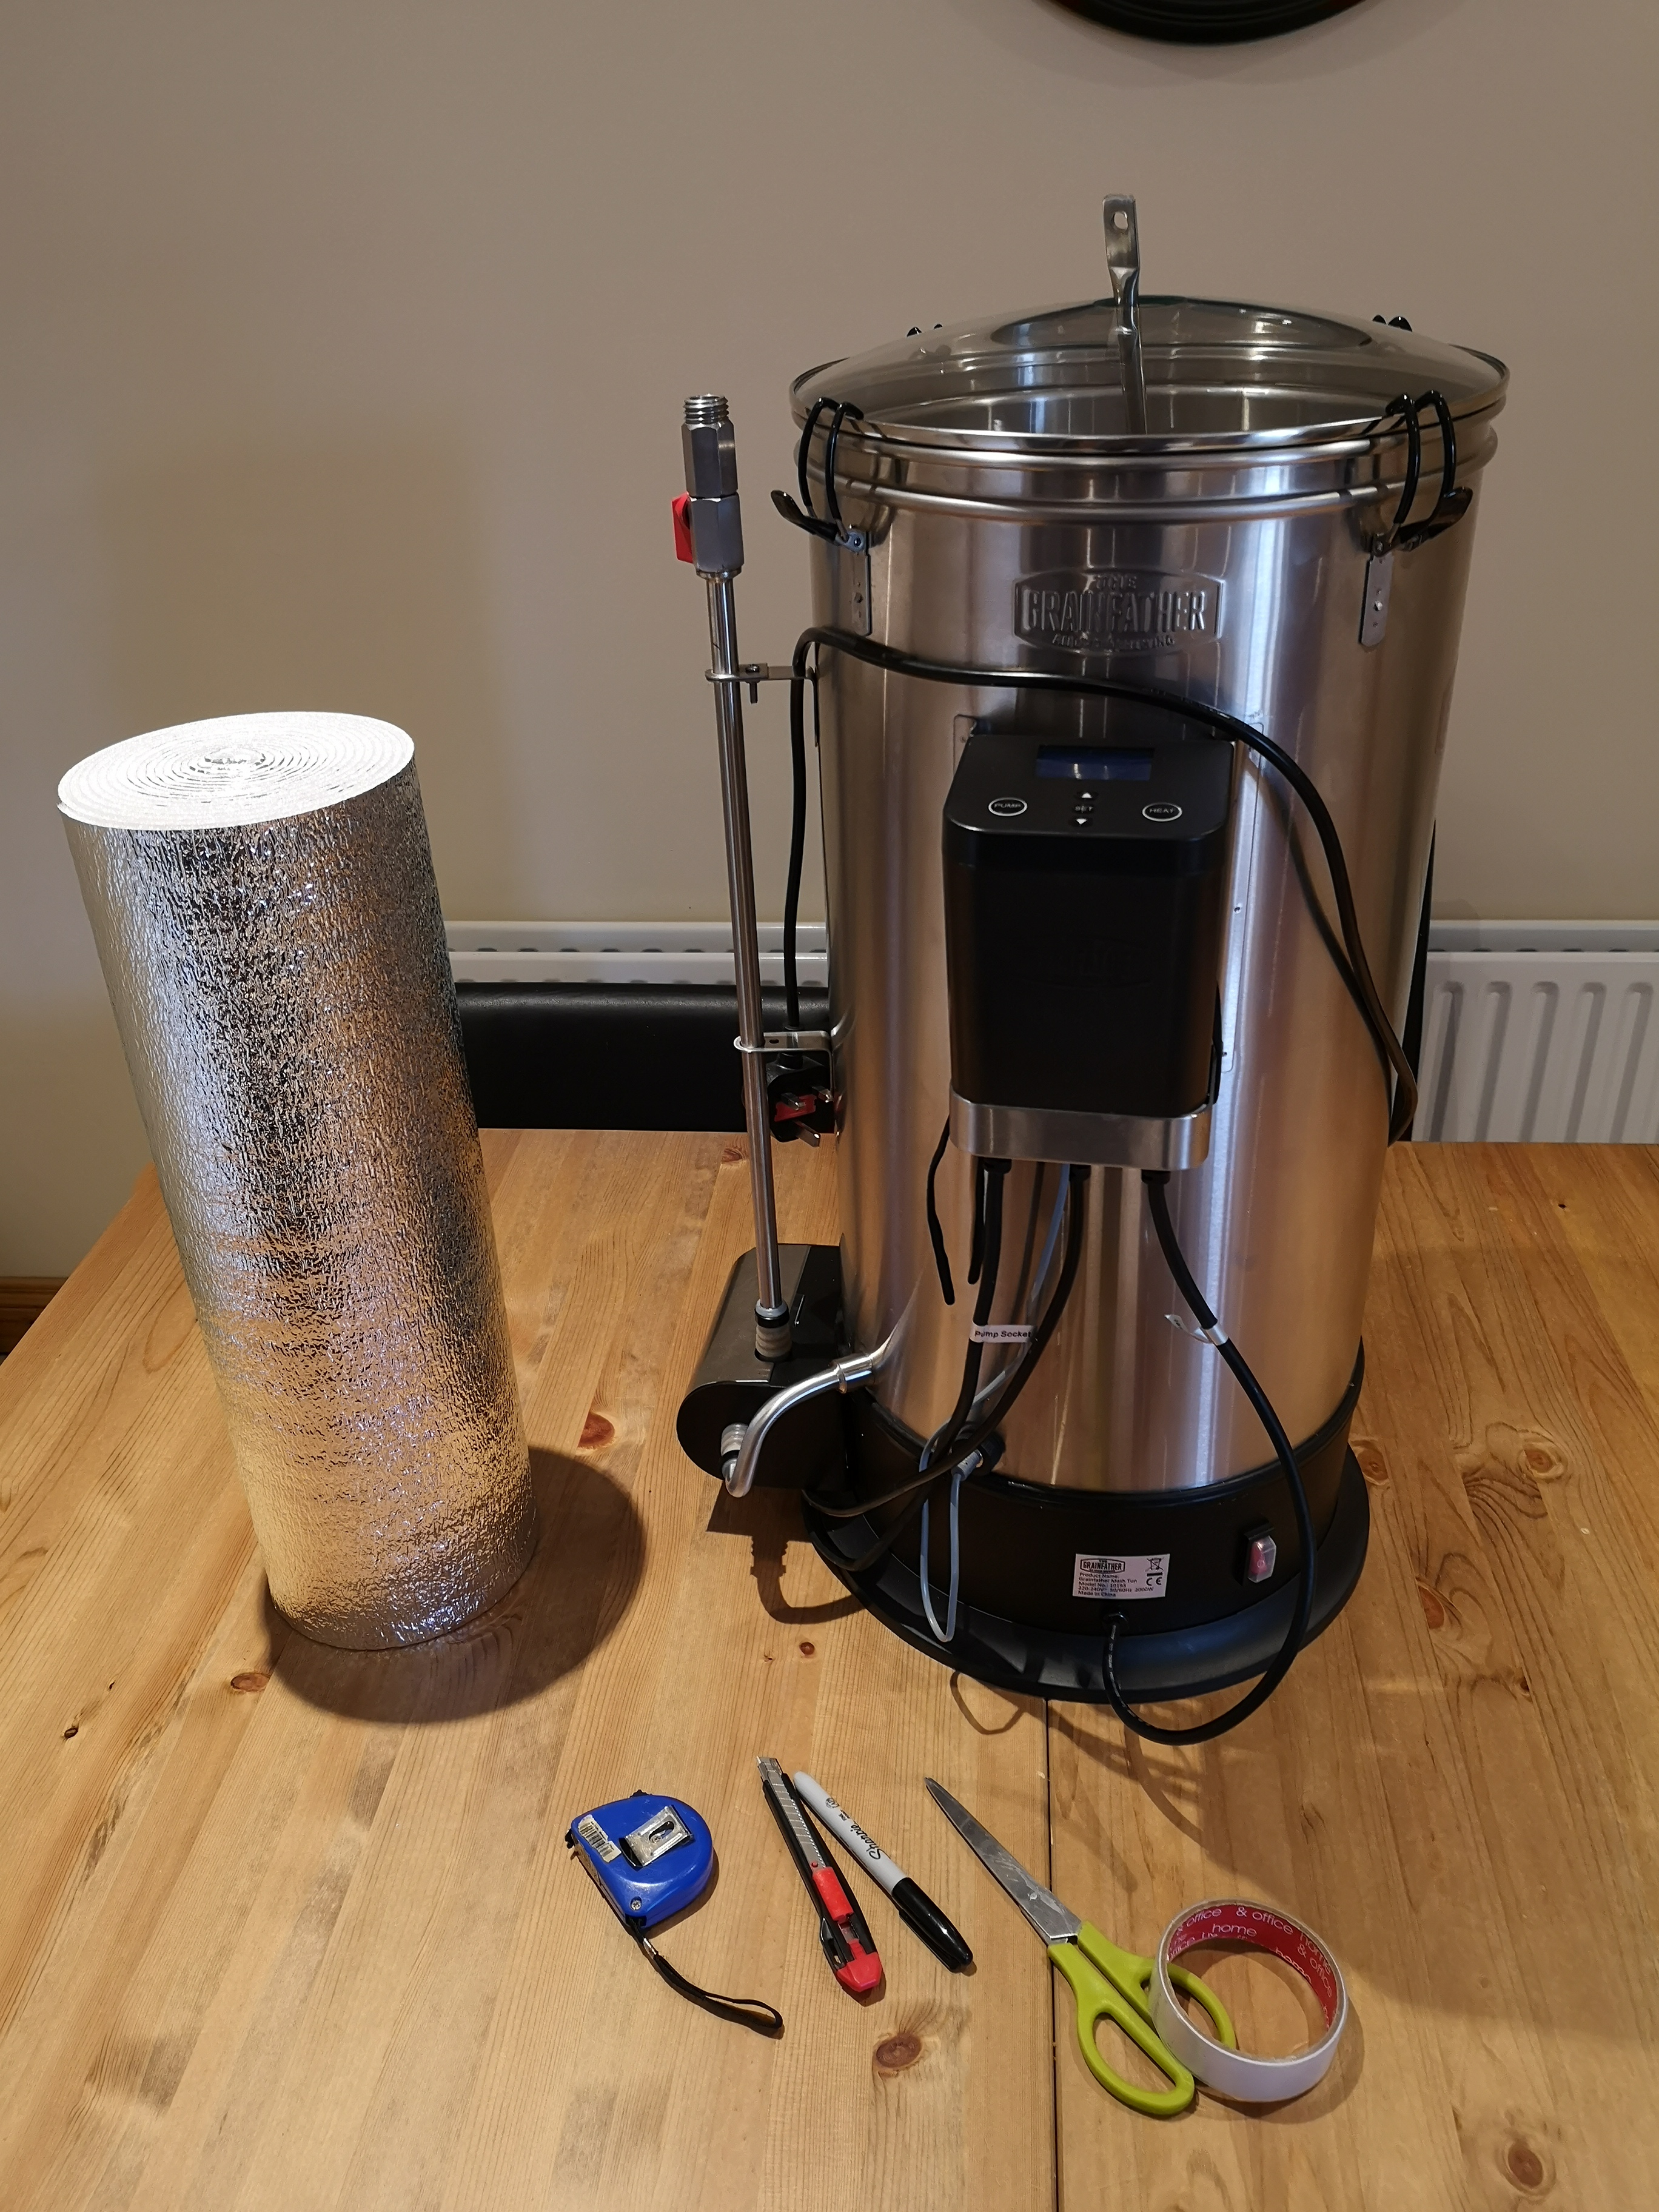
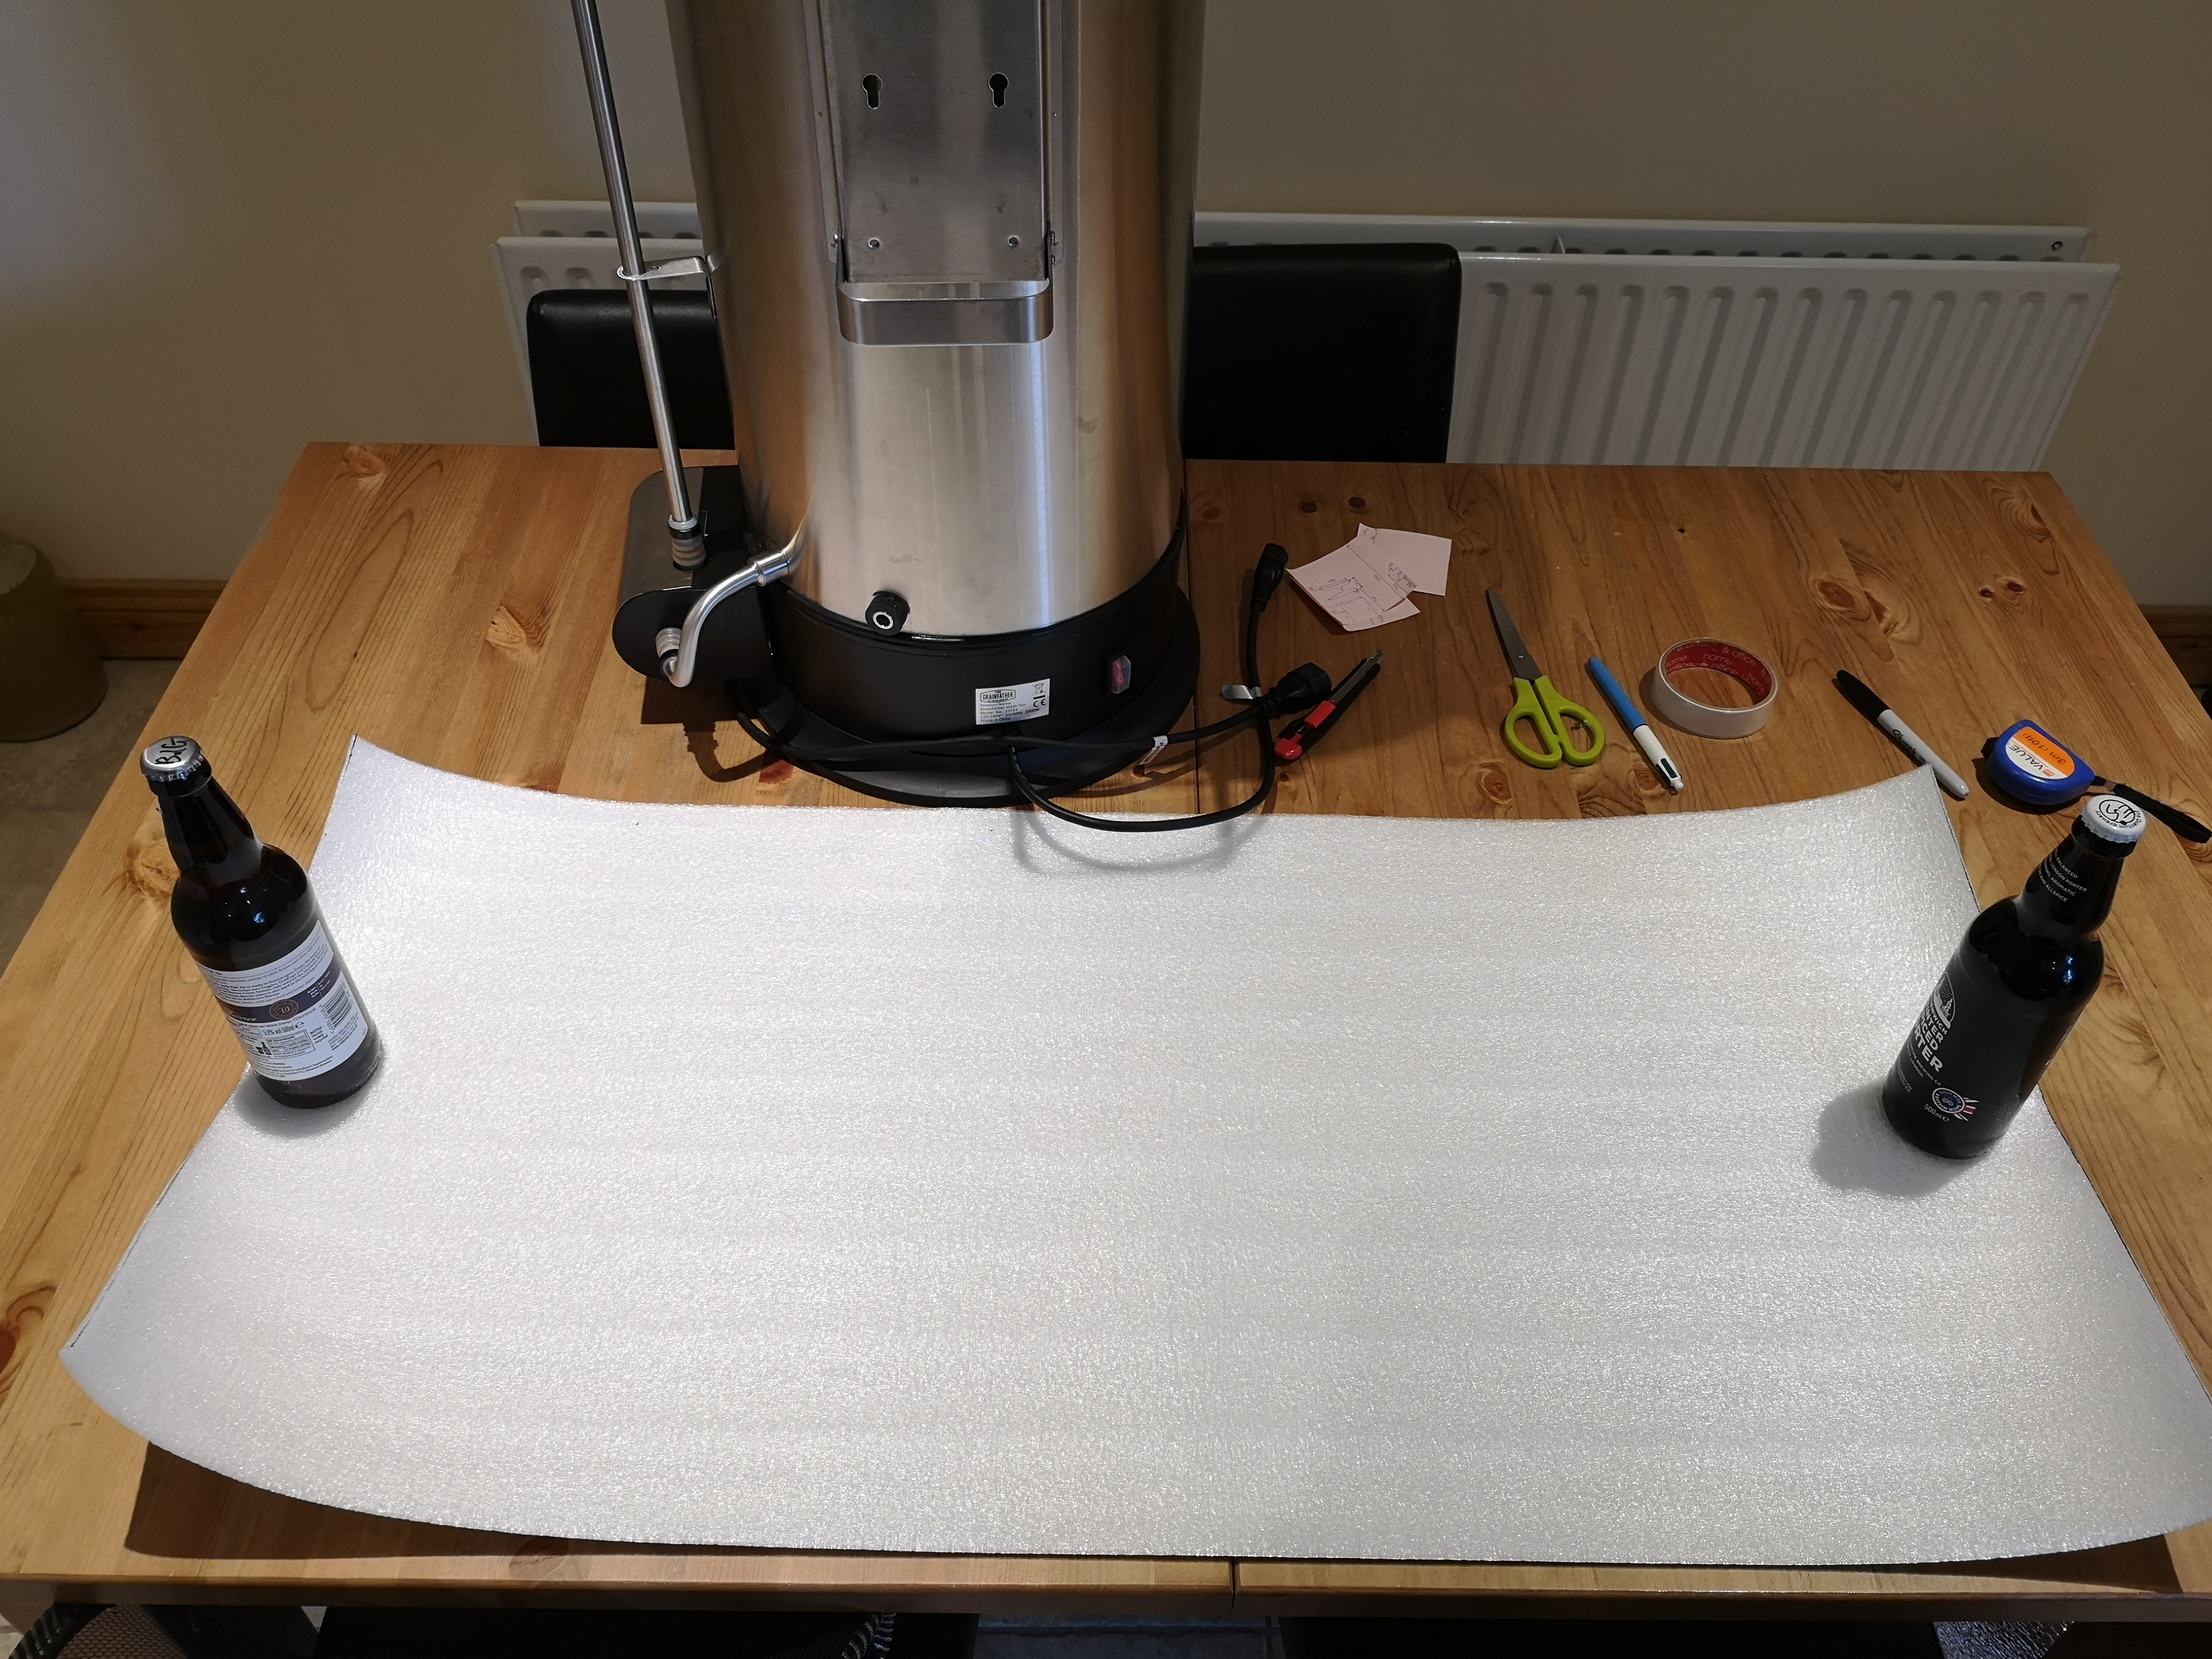
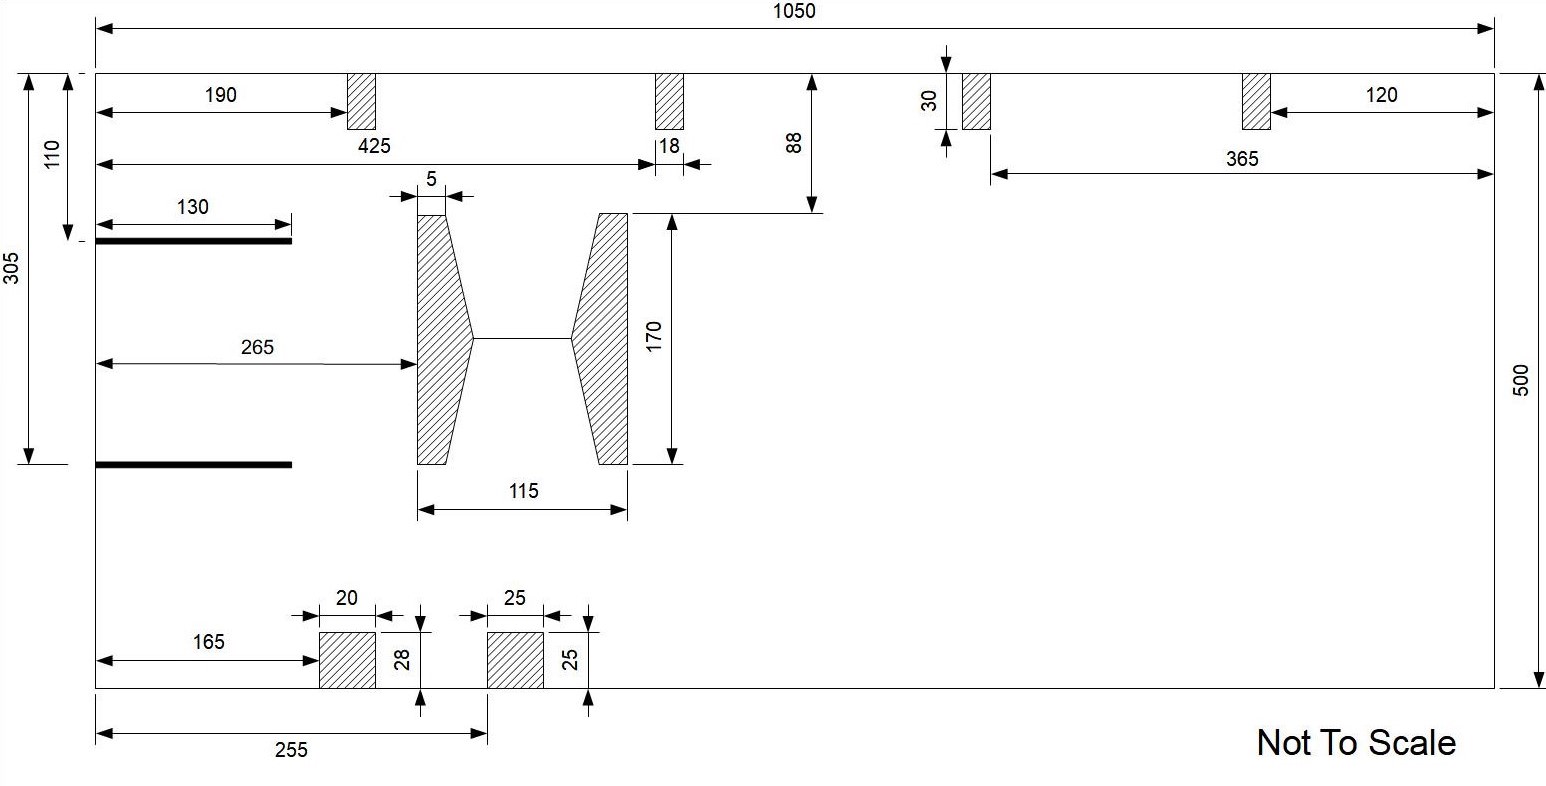
First thing was to cut a piece at 1050mm which is enough to wrap around with a bit of overlap. The roll I had was 0.5m wide which is just about perfect for the height of the GF.
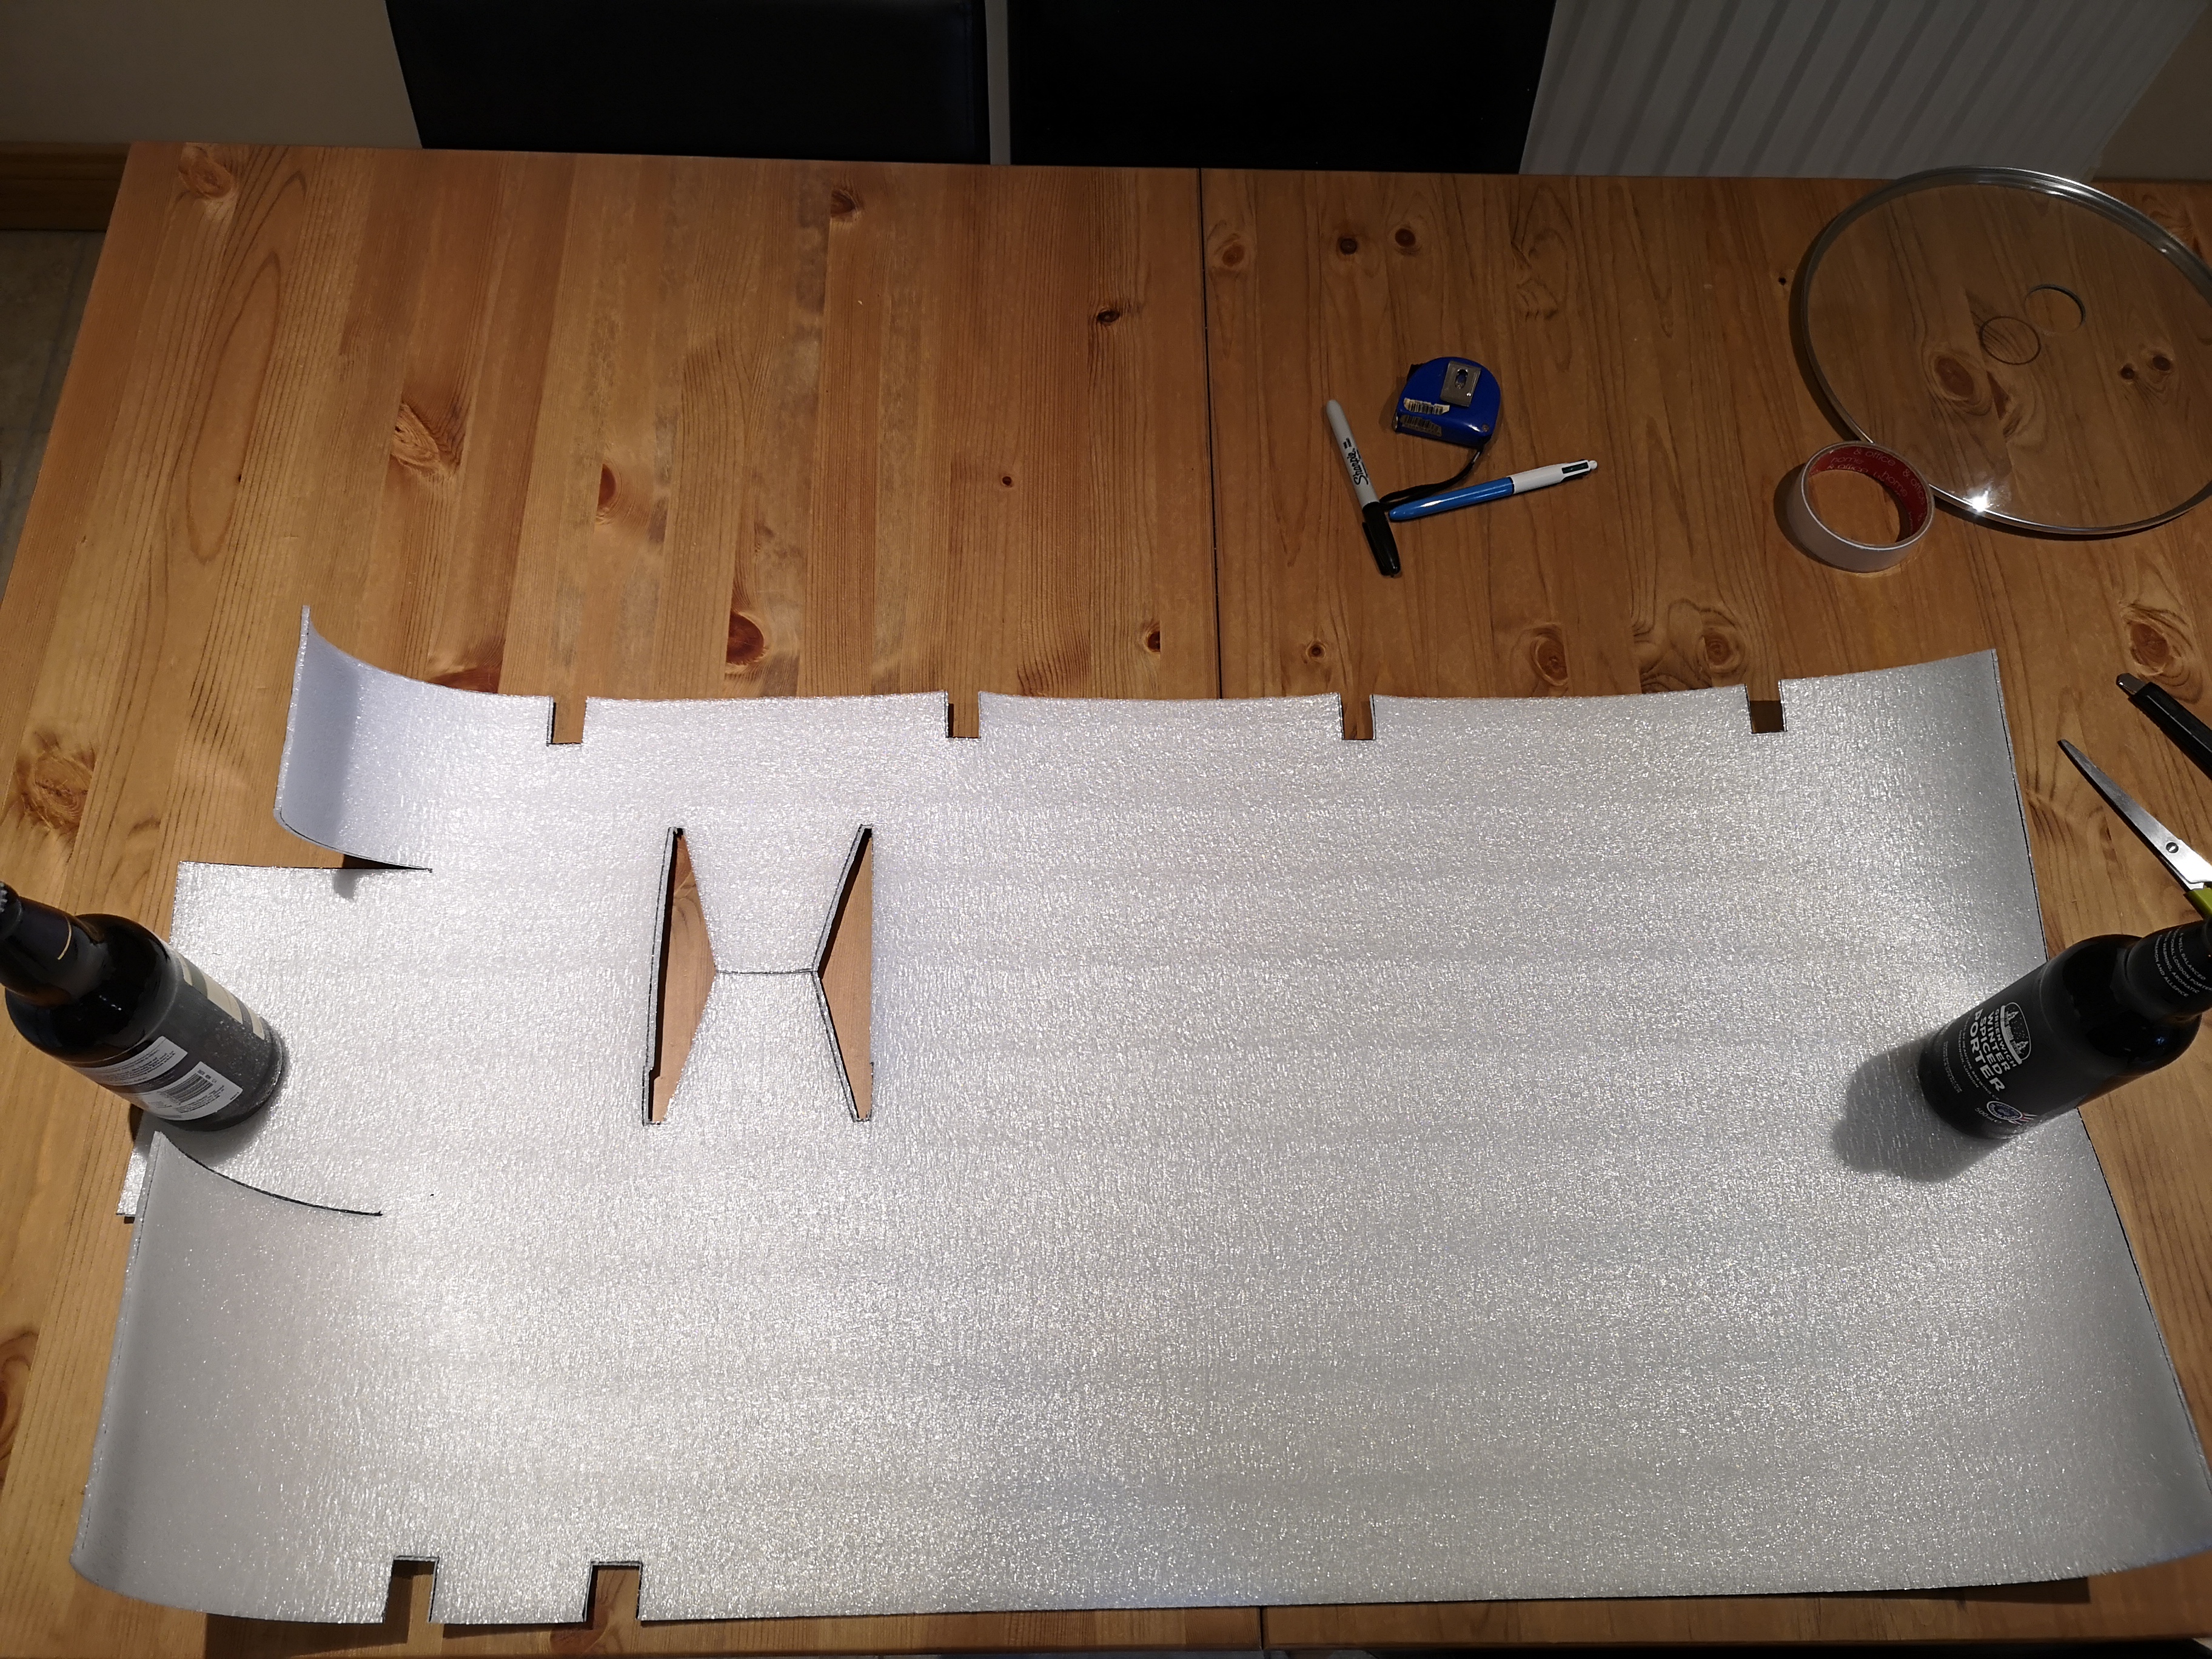
Next I measured and marked (on the white side) the cutouts for the lid clamps, controller etc. The reason for the oddly shaped box in the middle is to allow the flaps to push in behind the controller as you'll see later.
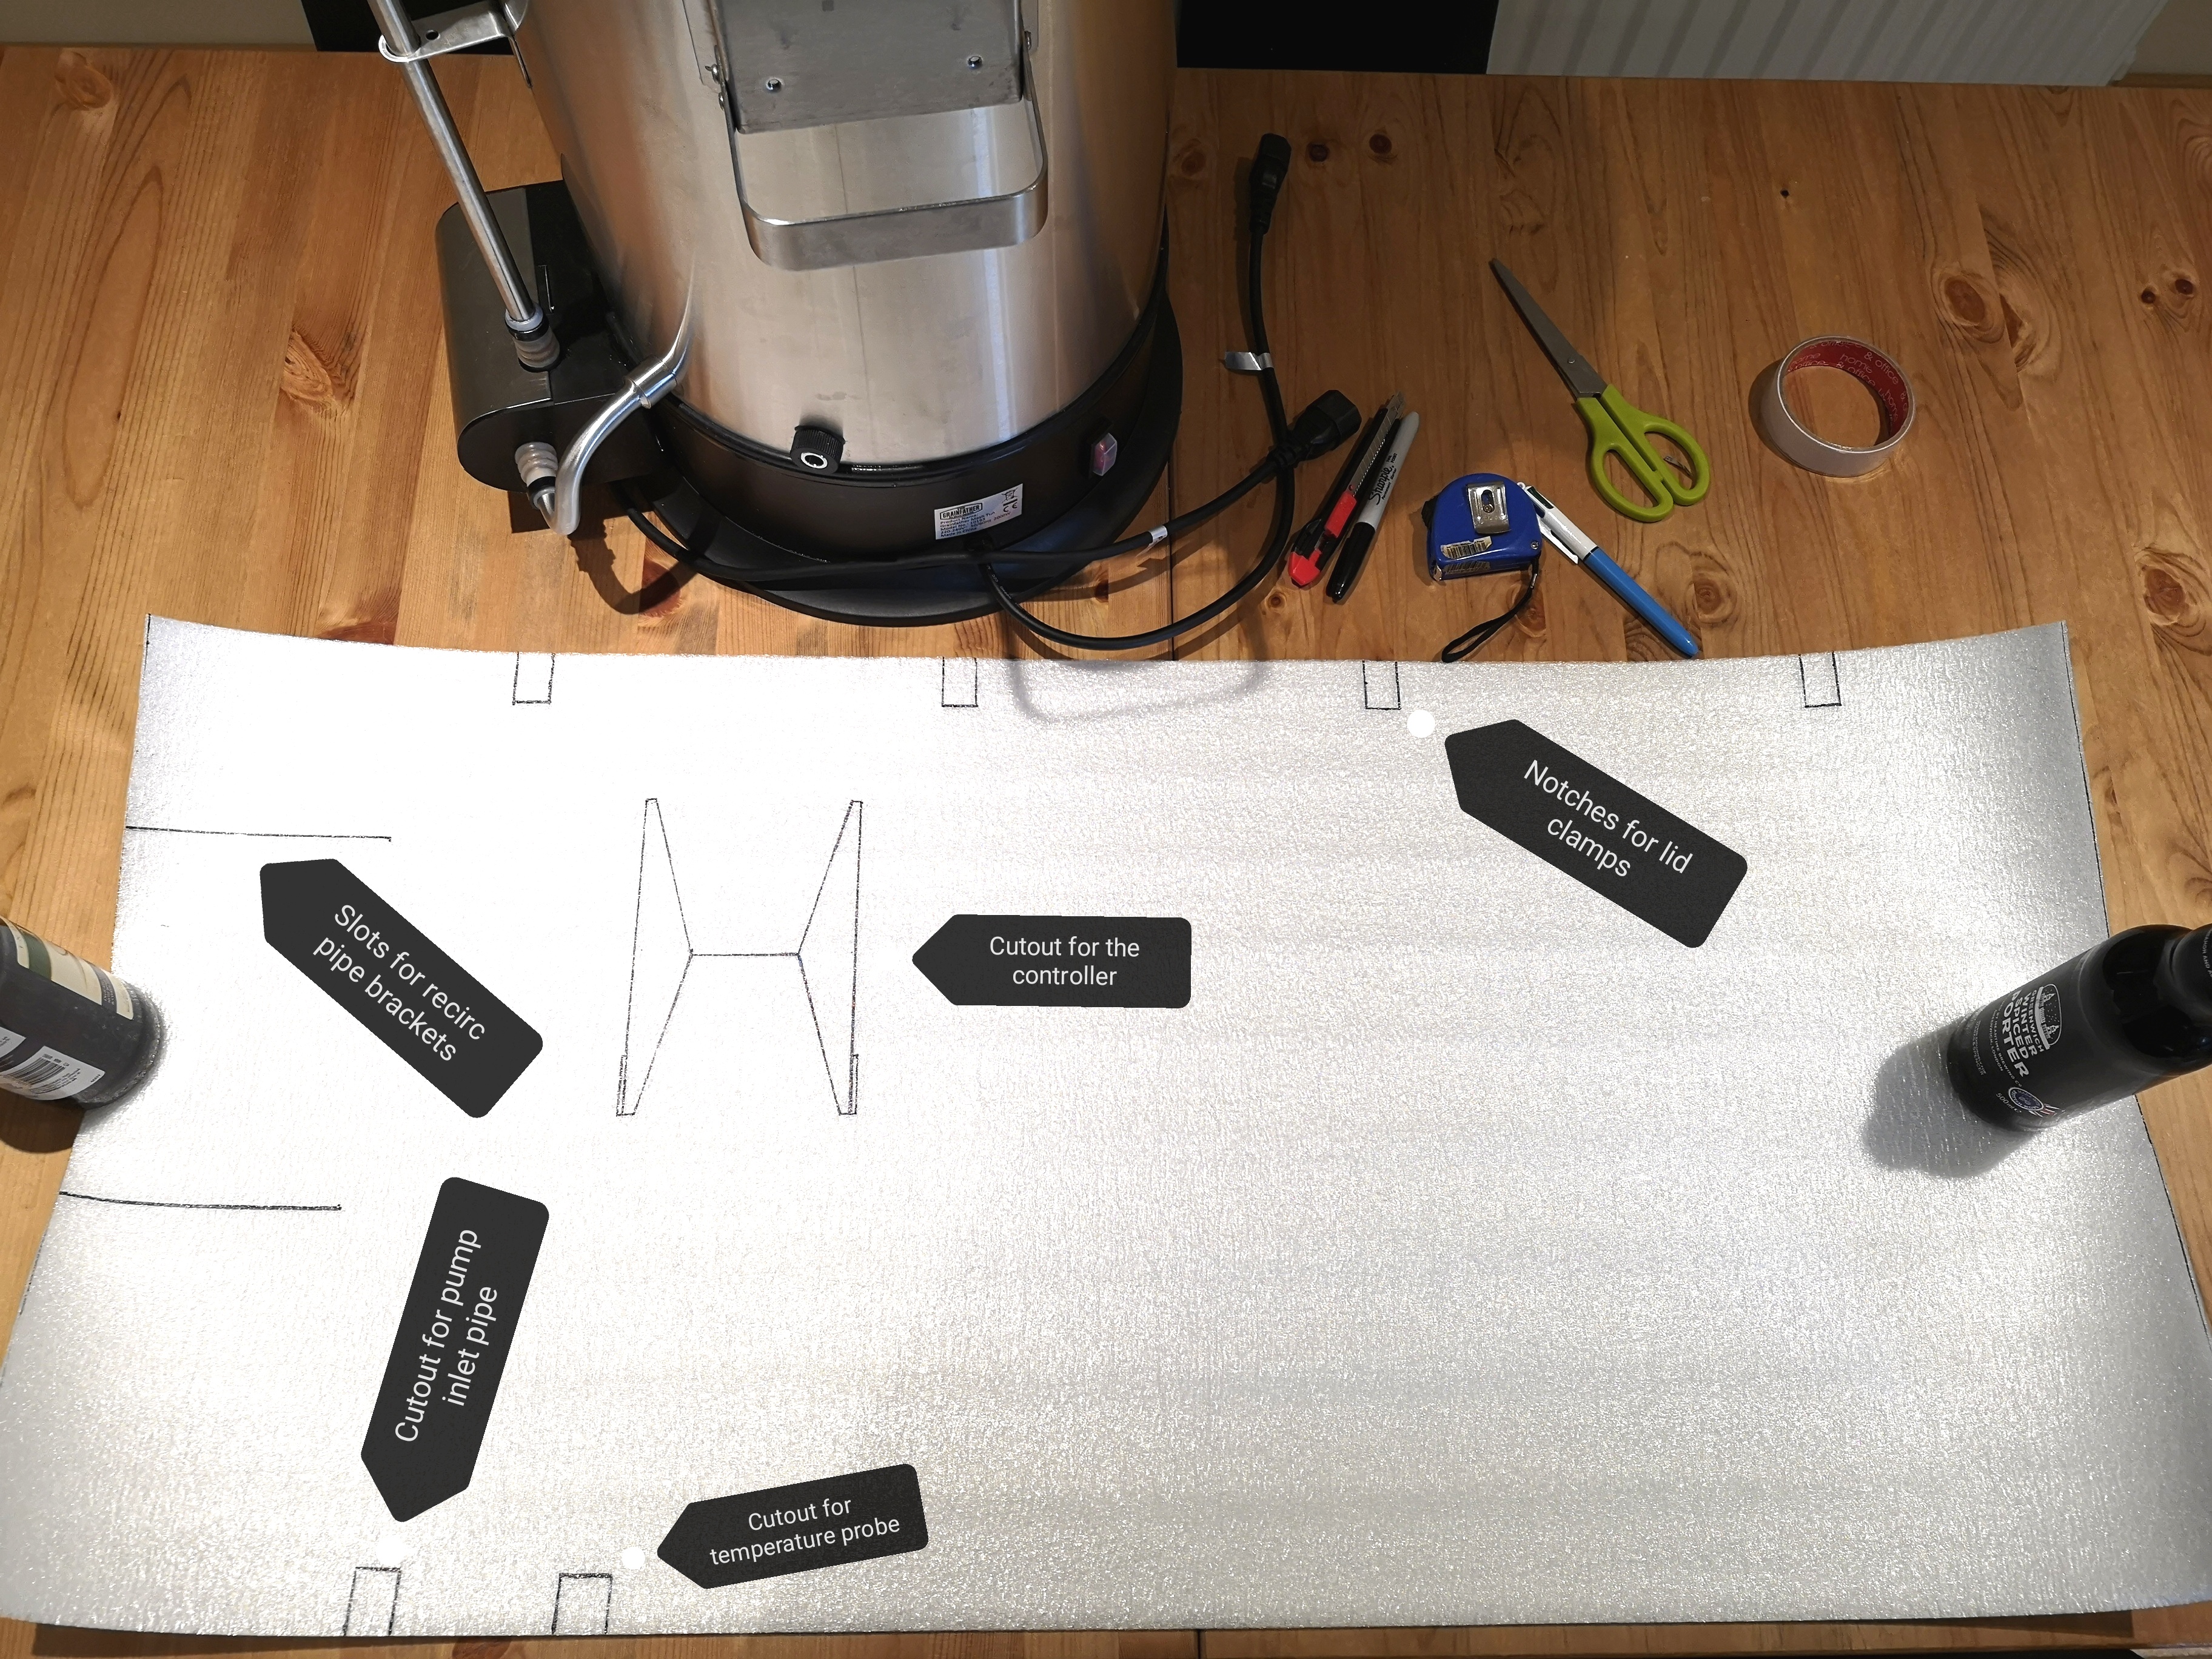
Use the scissors and knife to cutout and you then have this, ready to be attached. I put a little piece of tape at the ends of the 2 slots on the left to stop them tearing.
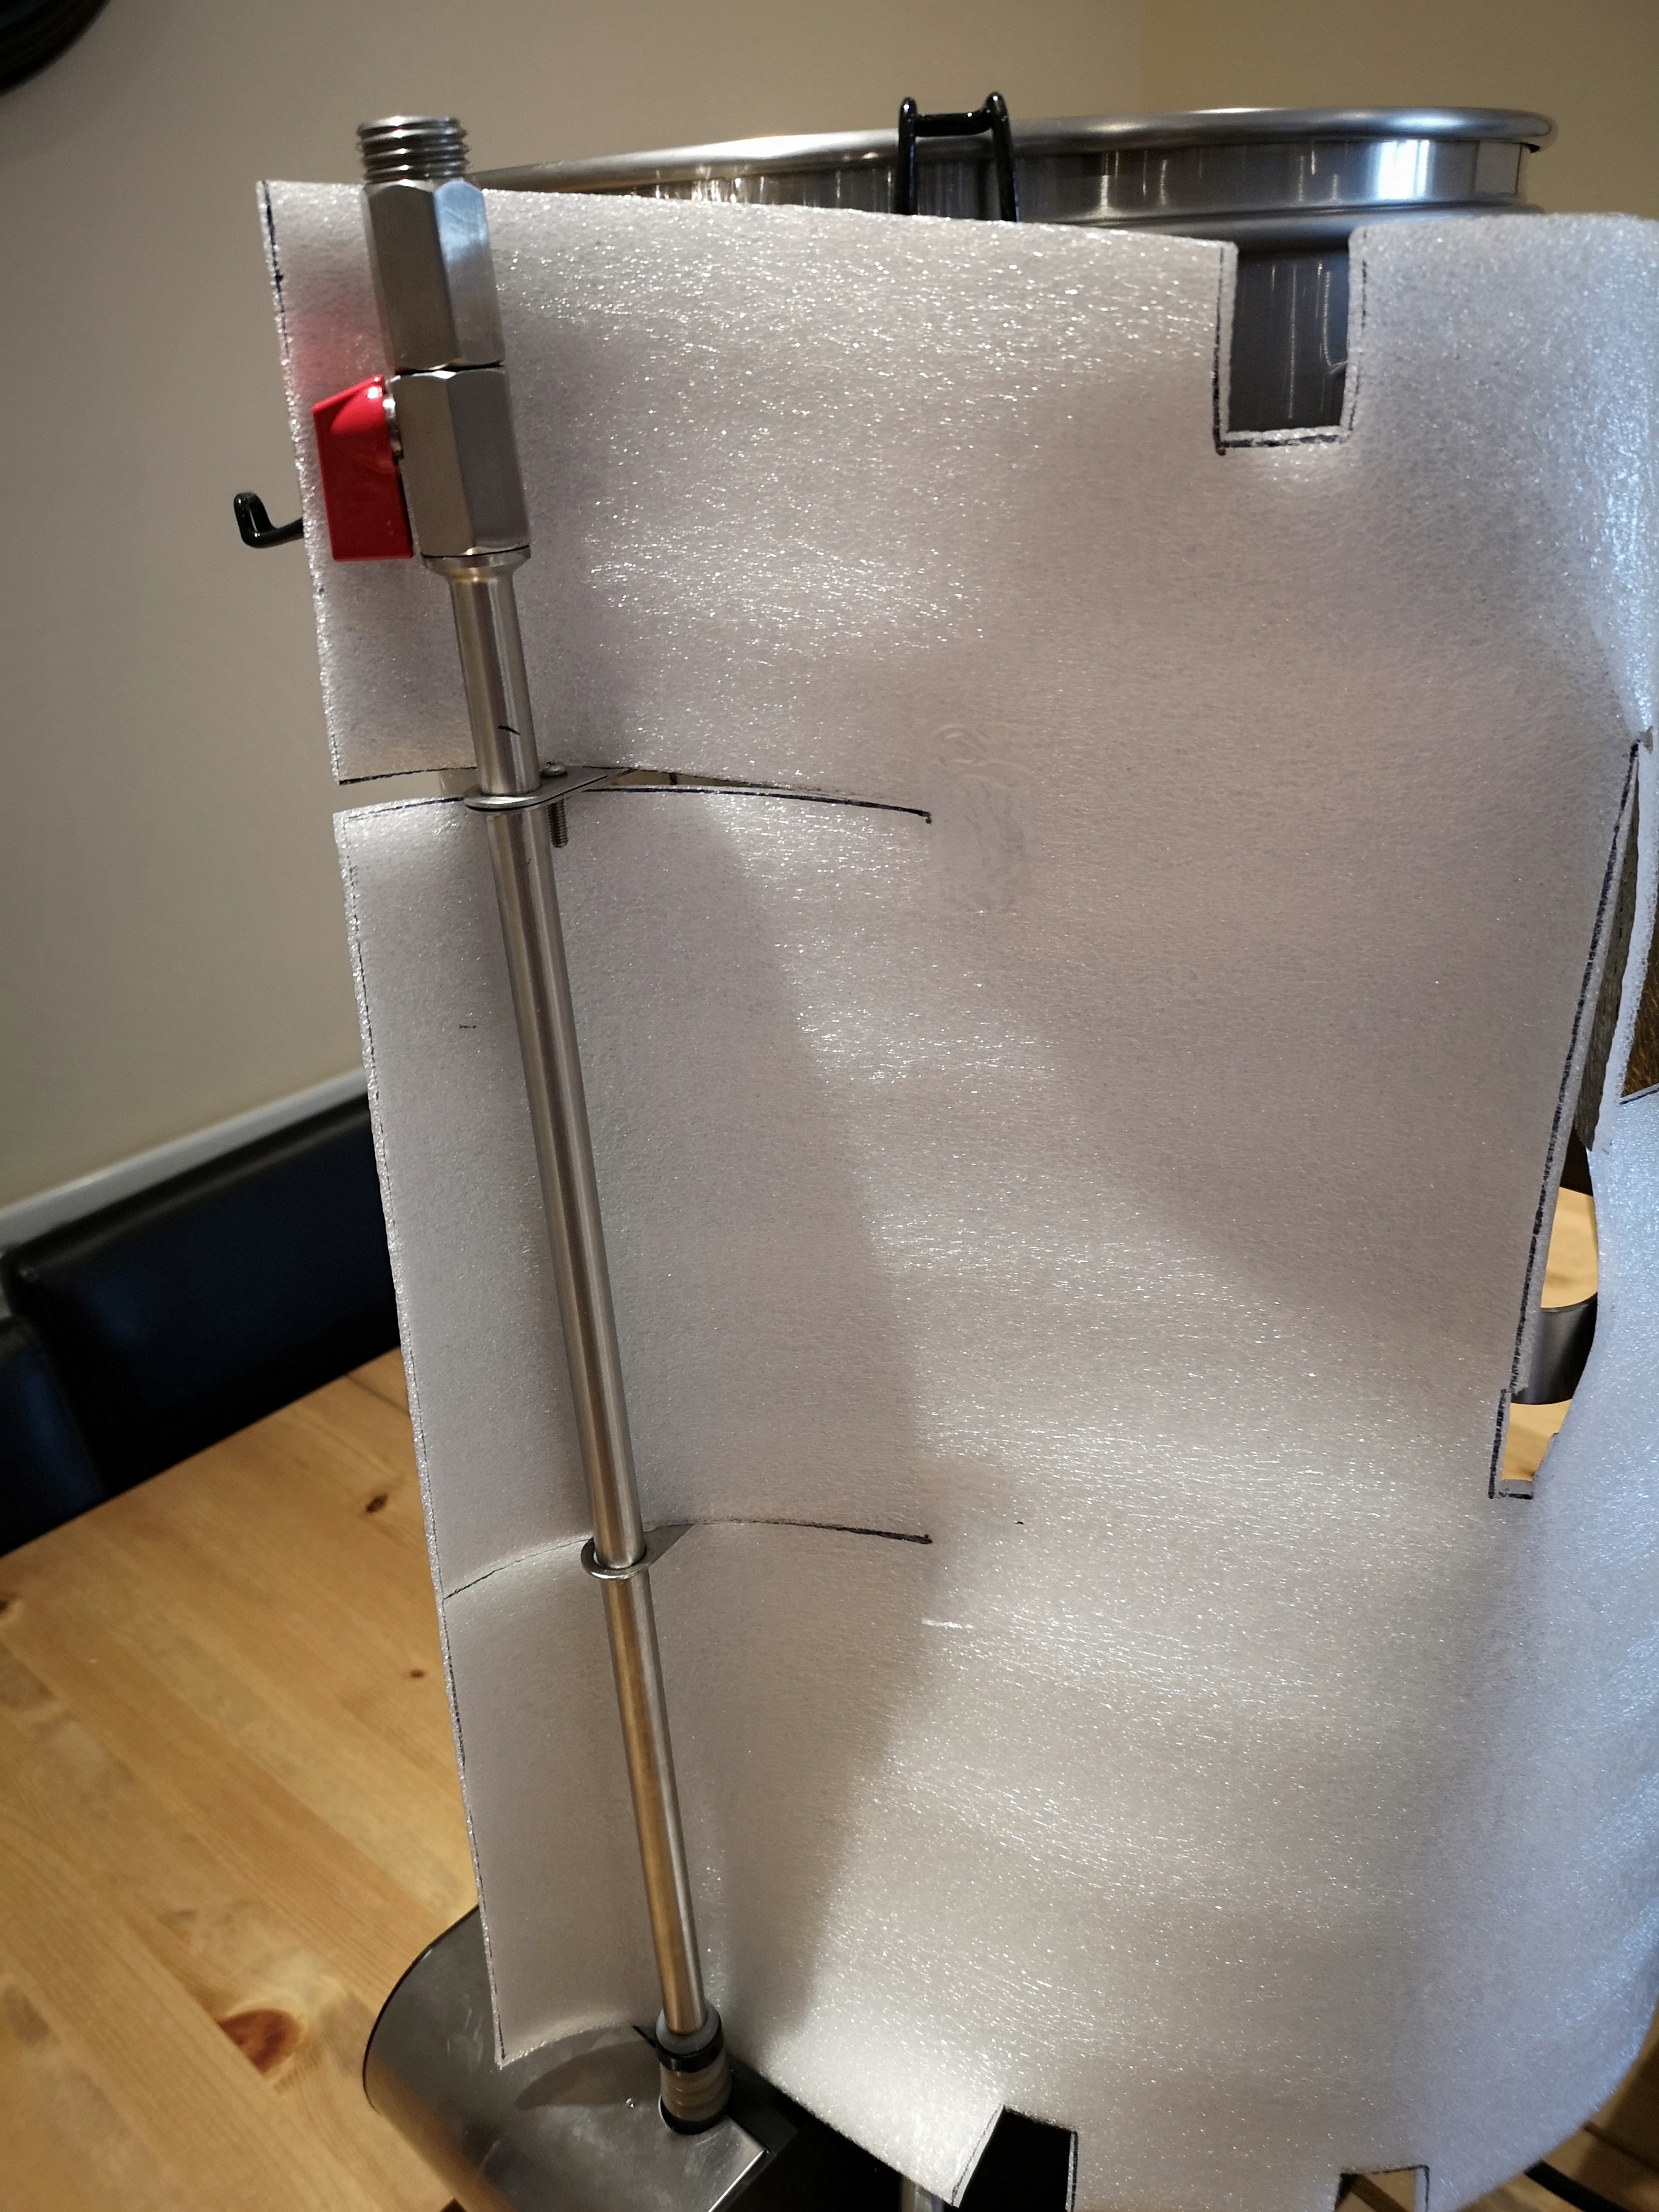
To fit to the GF, first remove the controller, then start by sliding the left hand side of the coat behind the recirc pipe...
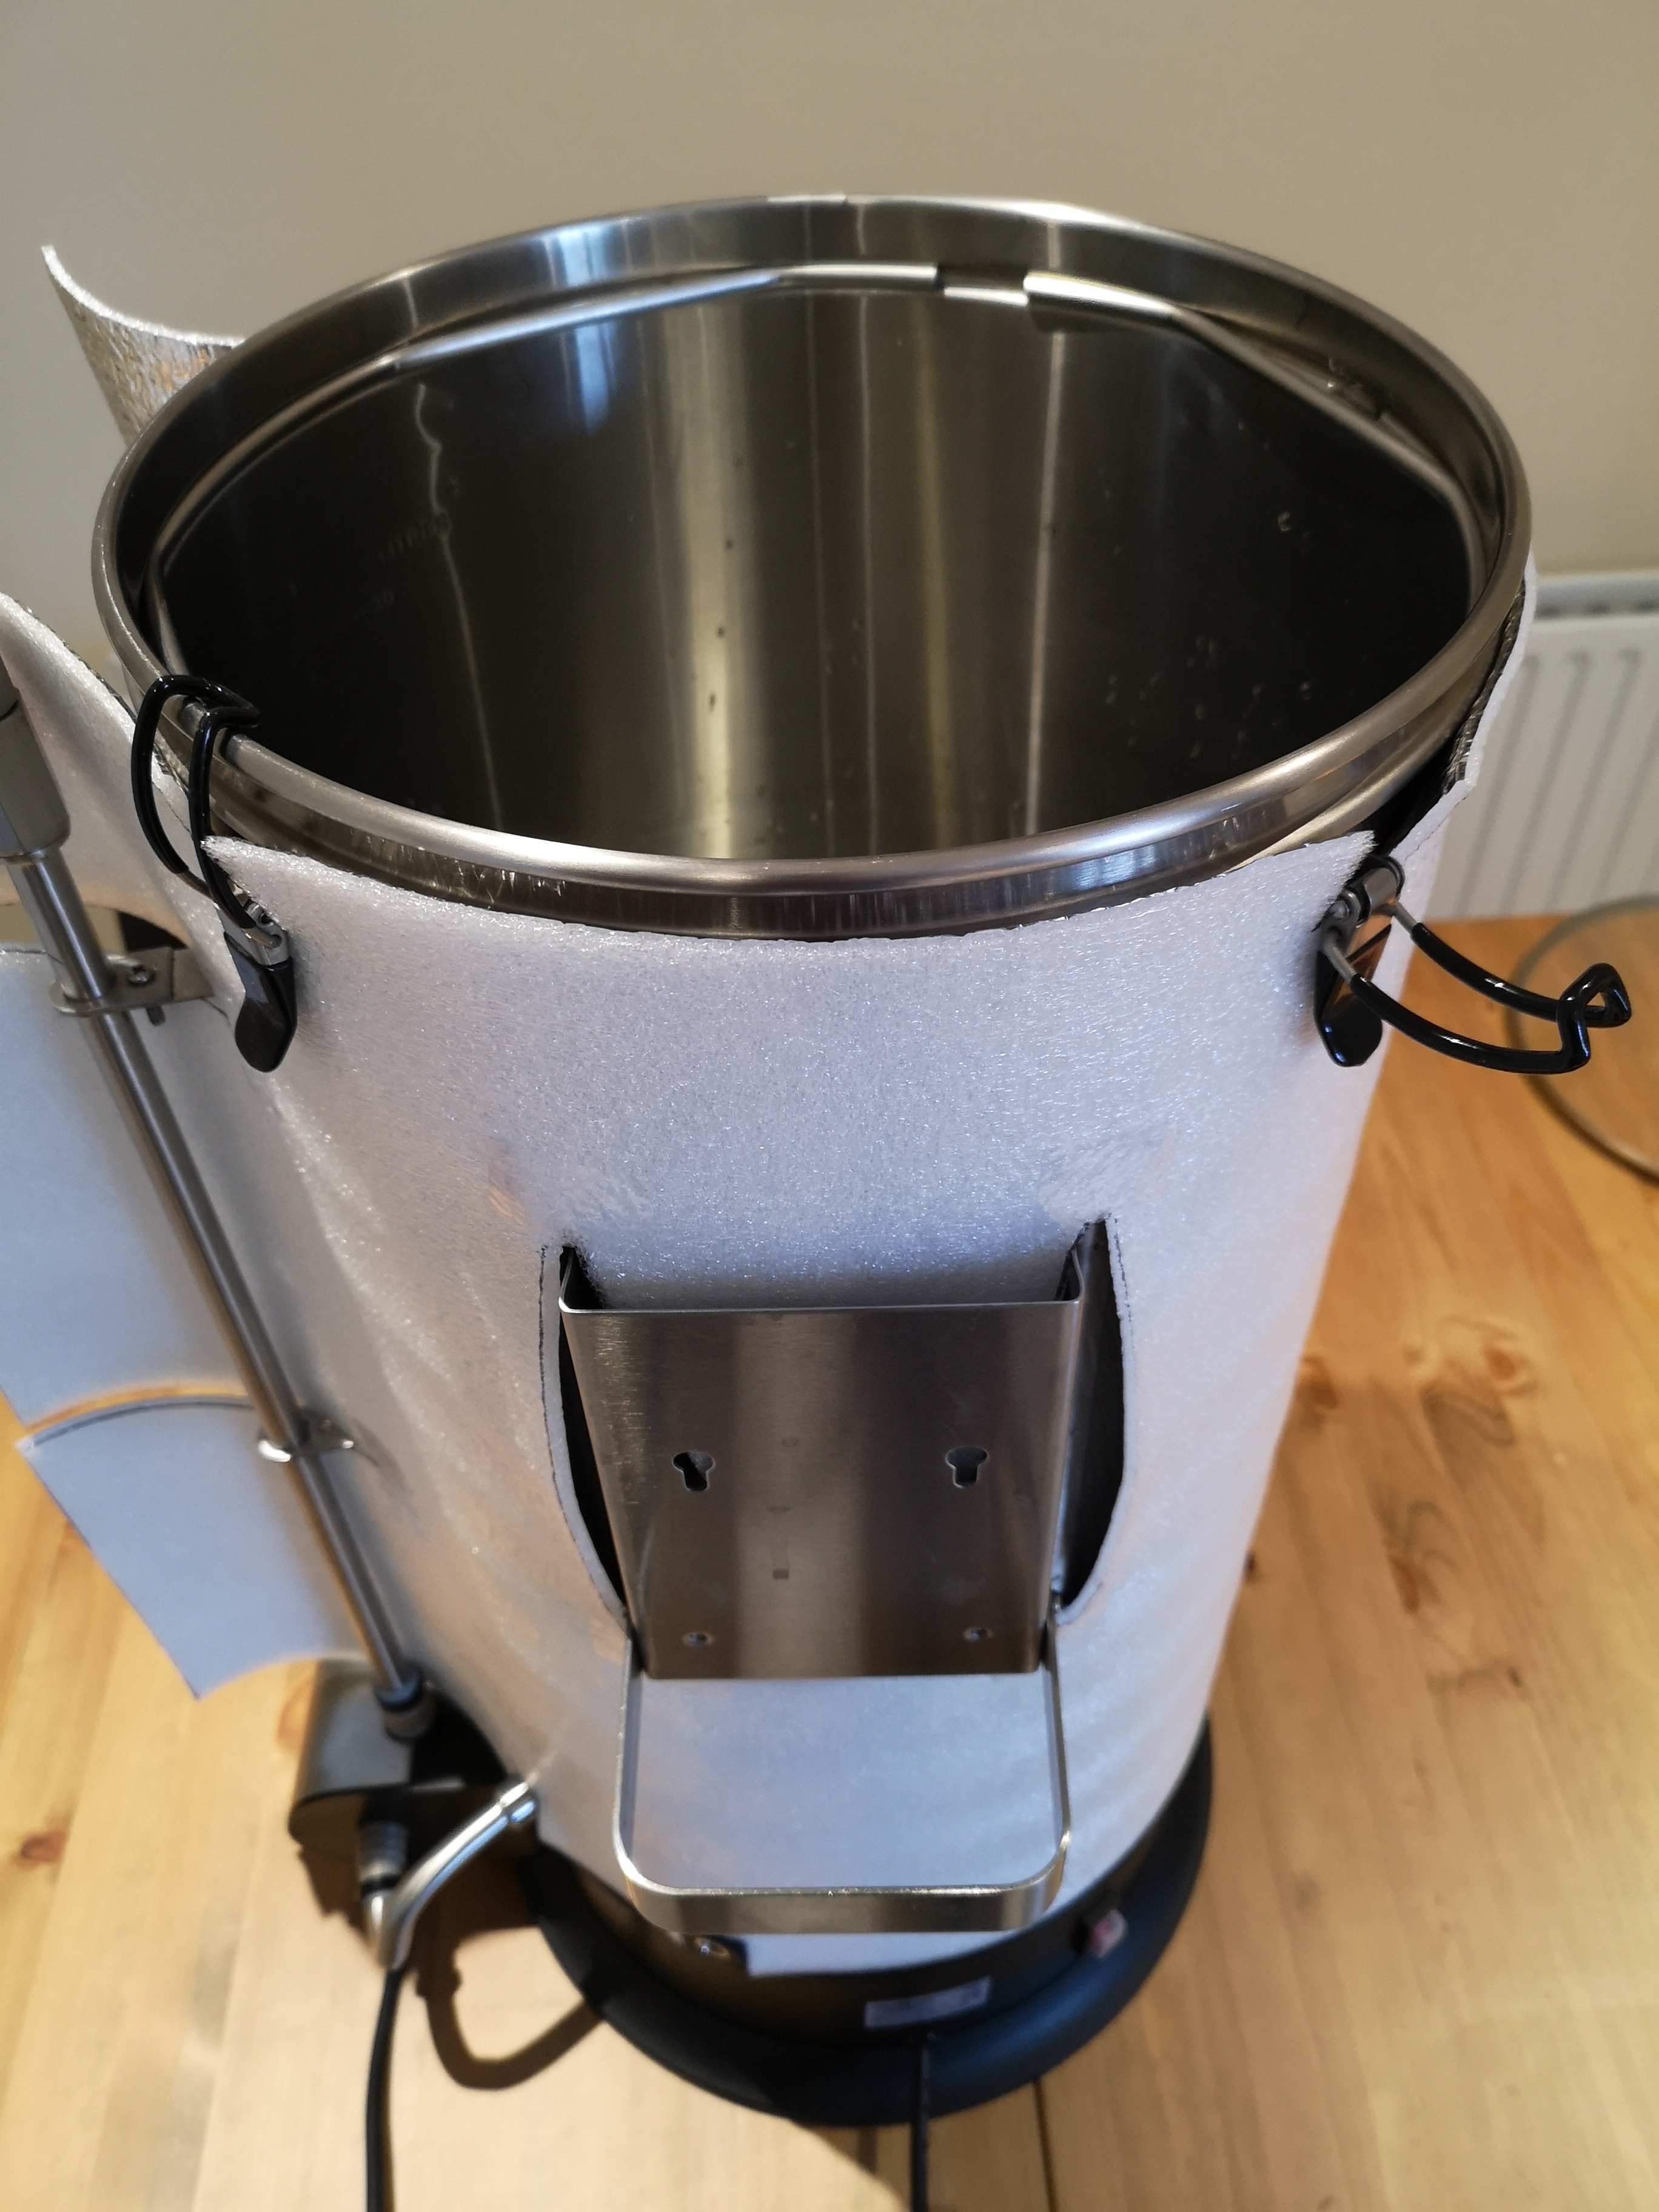
Then fold and slide the two flaps of the controller cutout behind the controller bracket from the top and bottom...
Wrap it around the GF and secure. I've used some string temporarily, but a couple of bungee cords will be ideal.
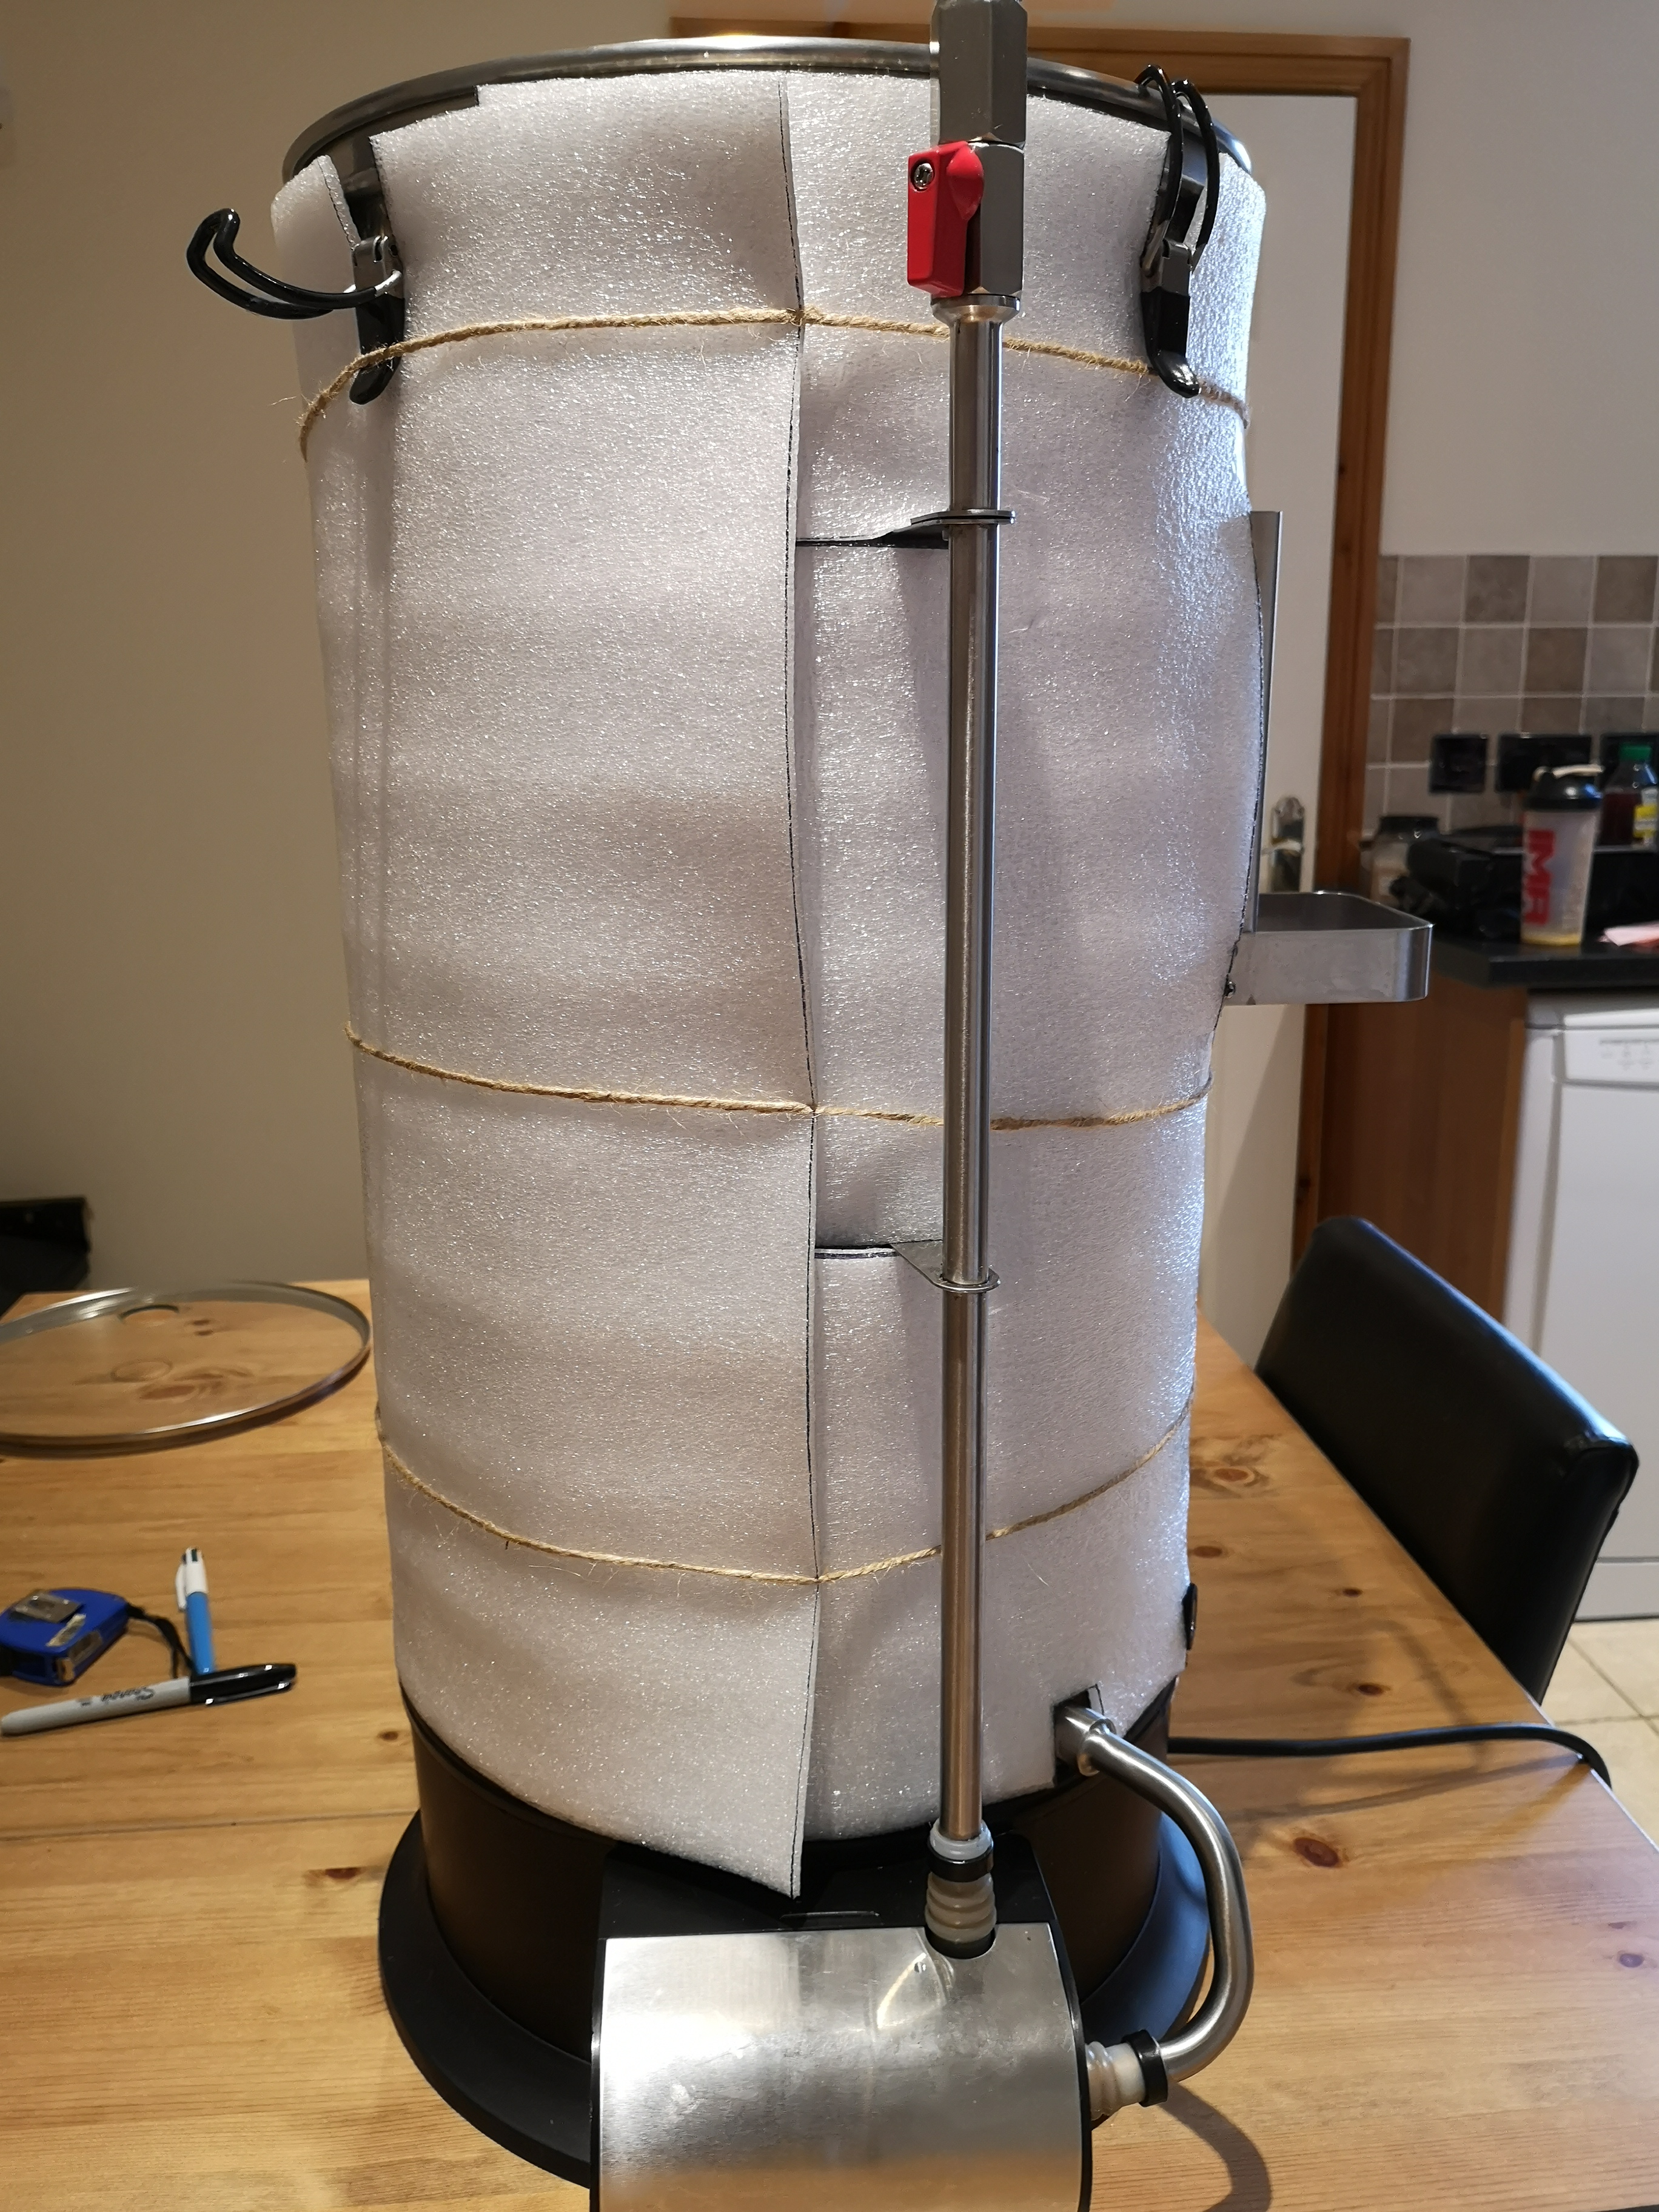
Next reattach the controller and you're done.
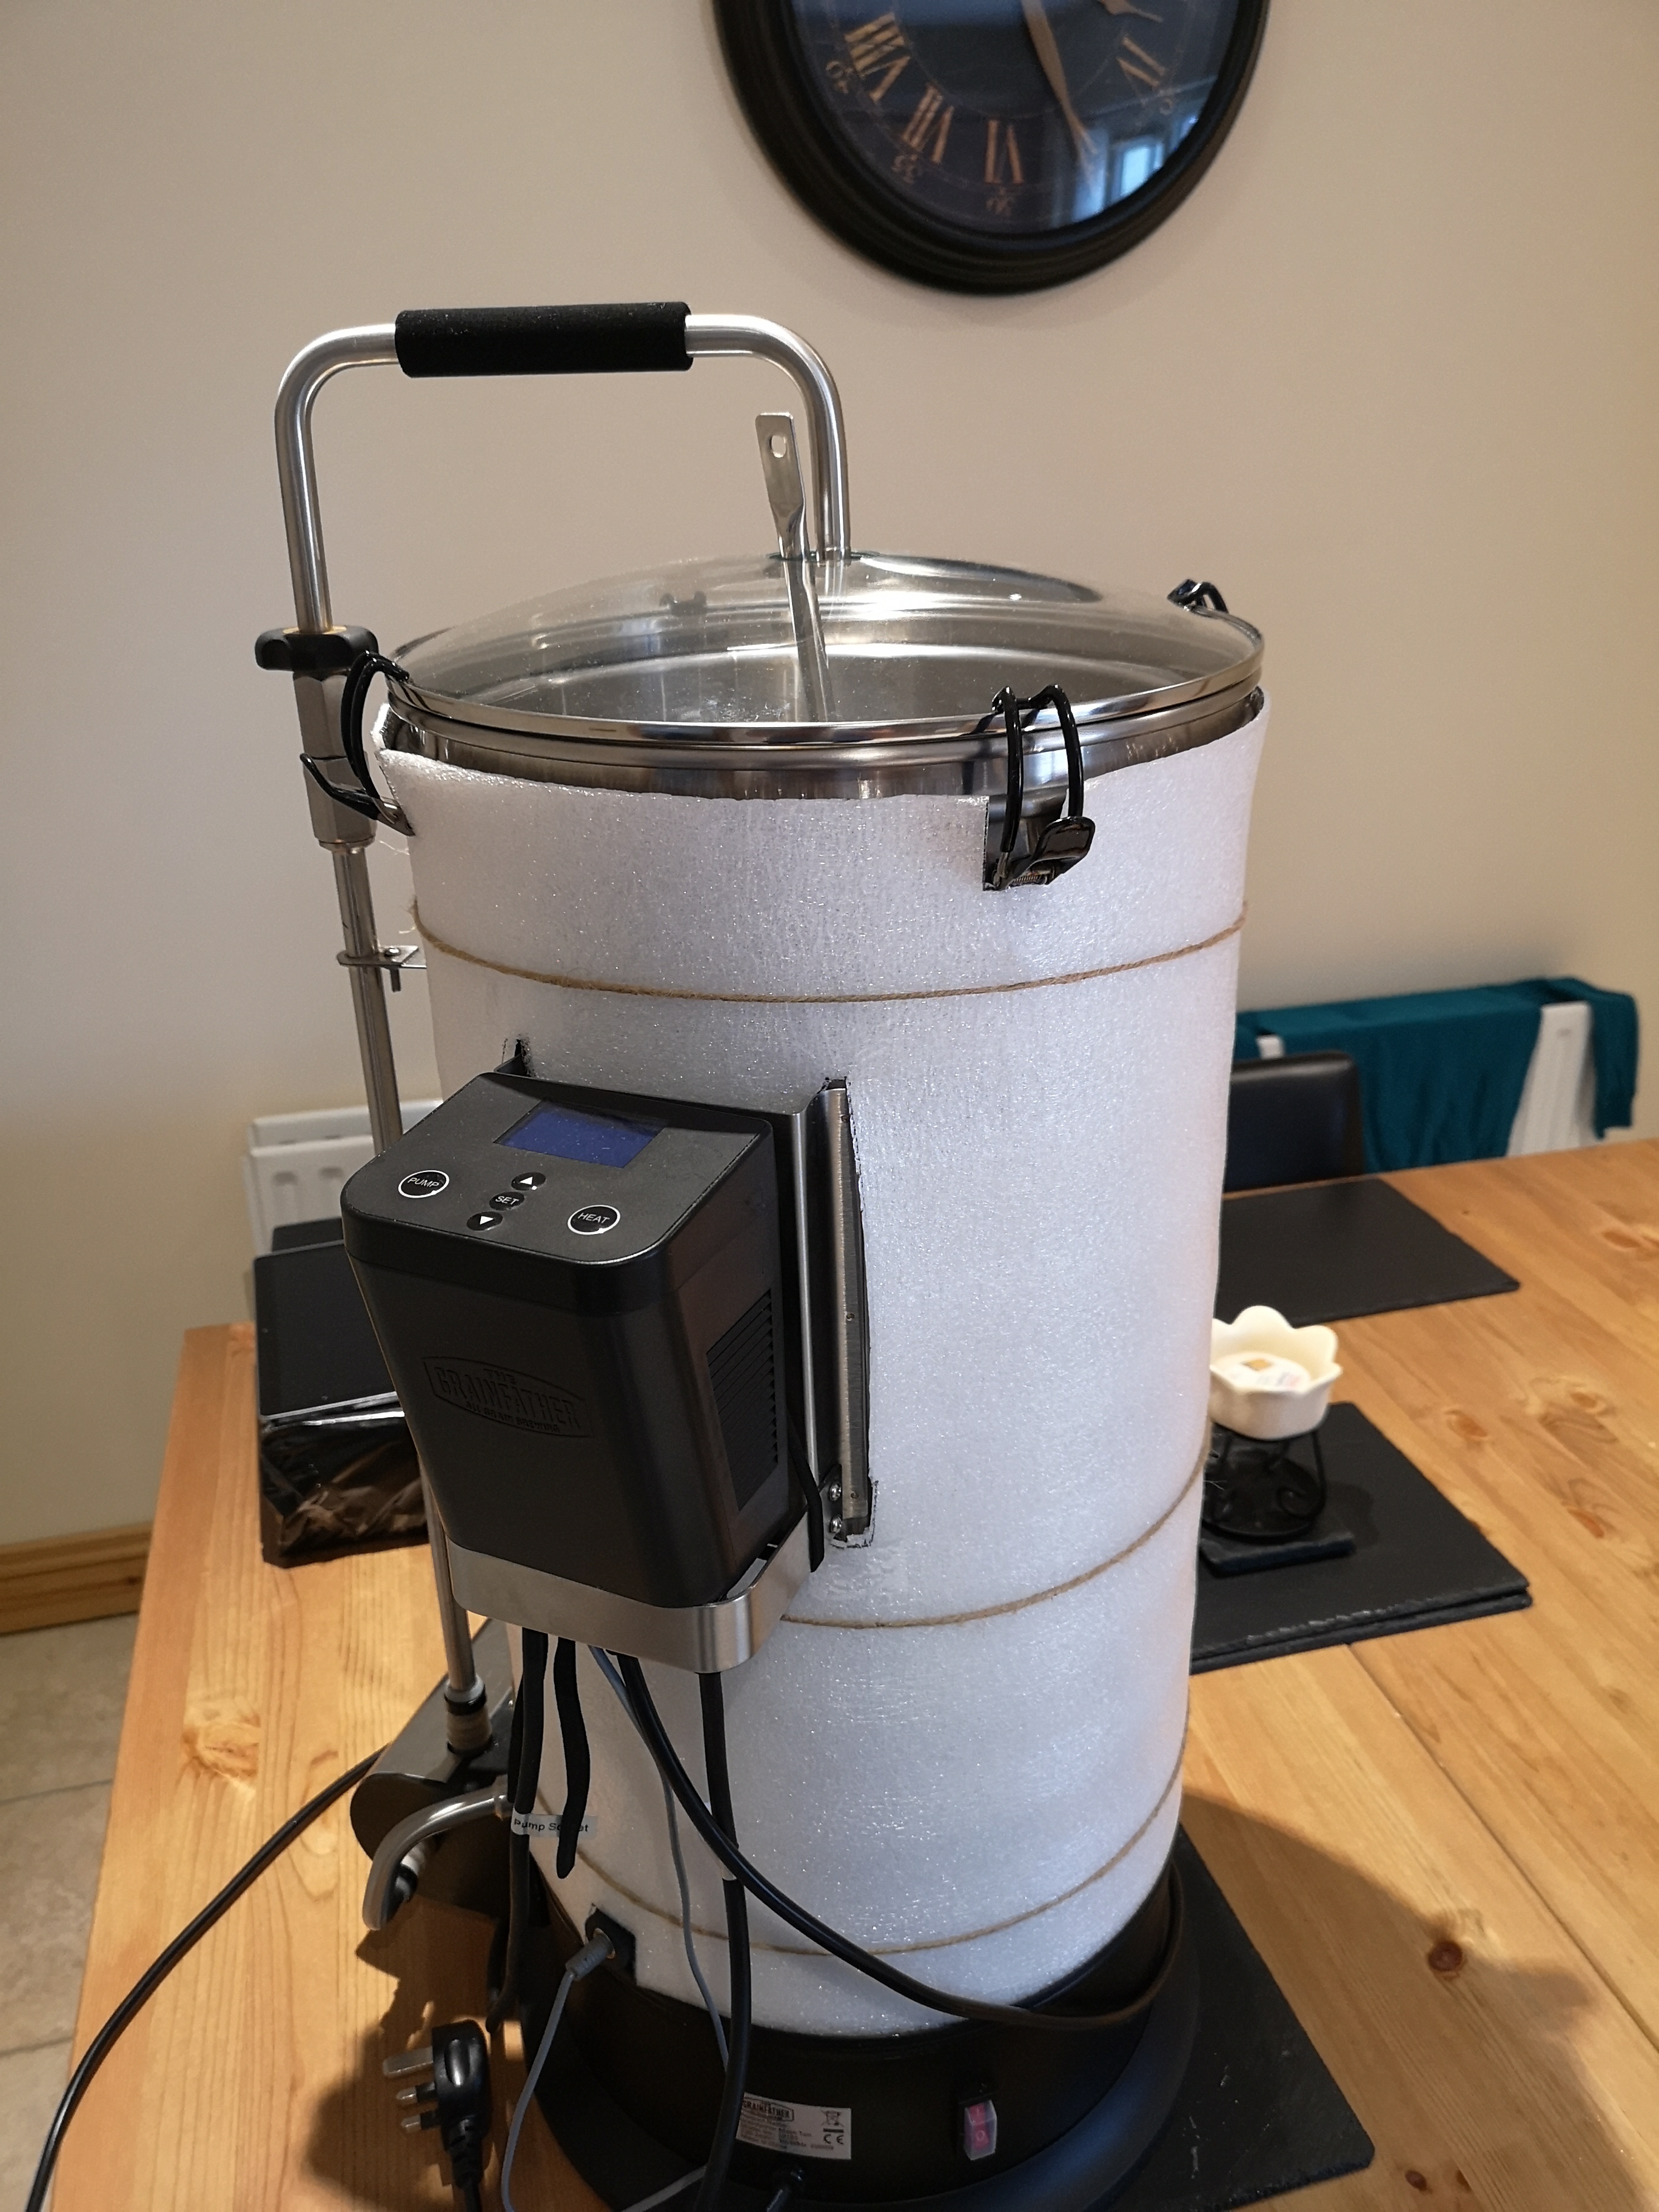
Is it pretty, not really but it does the job. I did a quick test and it definitely gets up to mash temperature a bit more quickly, I'll give it a proper test next brewday.
If anyone wants the measurements for the cutouts let me know and I'll see if I can upload them :hat:
You'll need scissors, Stanley knife or similar, measuring tape, sharpie pen and some tape.

First thing was to cut a piece at 1050mm which is enough to wrap around with a bit of overlap. The roll I had was 0.5m wide which is just about perfect for the height of the GF.

Next I measured and marked (on the white side) the cutouts for the lid clamps, controller etc. The reason for the oddly shaped box in the middle is to allow the flaps to push in behind the controller as you'll see later.

Use the scissors and knife to cutout and you then have this, ready to be attached. I put a little piece of tape at the ends of the 2 slots on the left to stop them tearing.

To fit to the GF, first remove the controller, then start by sliding the left hand side of the coat behind the recirc pipe...

Then fold and slide the two flaps of the controller cutout behind the controller bracket from the top and bottom...

Wrap it around the GF and secure. I've used some string temporarily, but a couple of bungee cords will be ideal.

Next reattach the controller and you're done.

Is it pretty, not really but it does the job. I did a quick test and it definitely gets up to mash temperature a bit more quickly, I'll give it a proper test next brewday.
If anyone wants the measurements for the cutouts let me know and I'll see if I can upload them :hat:




![BREWING THERMOMETER STICKERS ACCURATELY MONITOR FERMENTING BEER & WINE LIQUID TEMPERATURES 5PCS HOME BREW SPIRITS WINE LCD ADHESIVE [US]](https://m.media-amazon.com/images/I/311DDjo2X3L._SL500_.jpg)


