BlakenhallBrewer
Active Member
- Joined
- Sep 25, 2011
- Messages
- 53
- Reaction score
- 0
After I saw a bloke drinking out of a leather tankard at Shrewsbury Folk Festival last year I thought to myself "I wouldn't mind one of those..."
I looked around for one and found the Hidebound site which looked very tempting. But as ever, just buying one seemed too easy and I kept thinking "I wonder if I could make one of those...."
Now I'm no craftsman and have no previous leatherwork skills so everything is self taught but in the great "have a go yourself" ethos of this site, with a bit of of googling, some you-tubing, some time amalgamating of ideas, a couple of trials, quite a bit of swearing and some sore fingers This is what I came up with....
Mk3 Leather Tankard
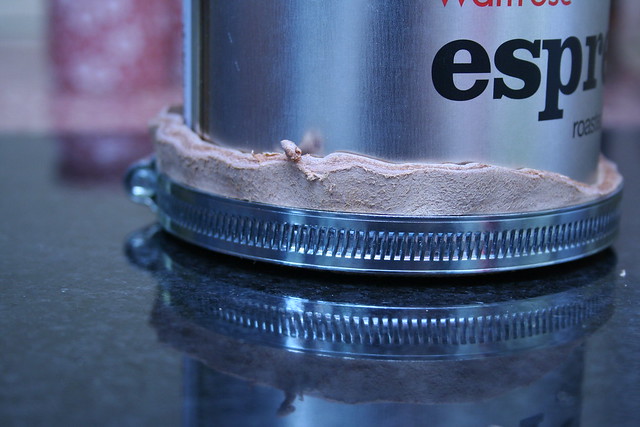
Firstly I made the base out of 3mm Veg Tan leather and a 4" Jubilee Clip
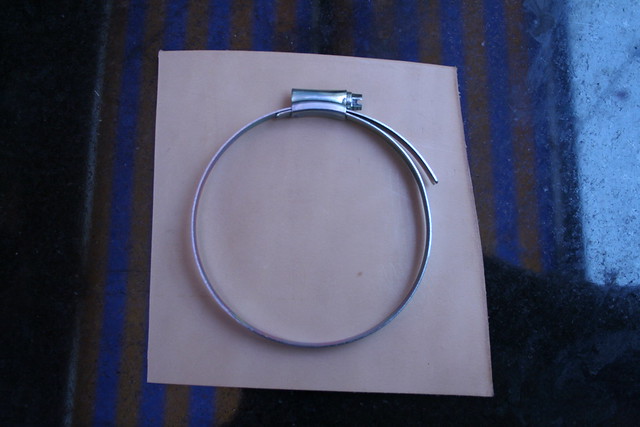
The leather was dunked in a bowl of water for 10 minutes until all the bubbles stop coming out) and then "wet formed" around an old empty coffee can, held in place with the jubilee clip and then left to dry for 24 hours
Using this base I made a conical template for the body of the tankard and a strip for the handle out of old wallpaper. I then used these to cut out the 3mm Veg Tan leather.
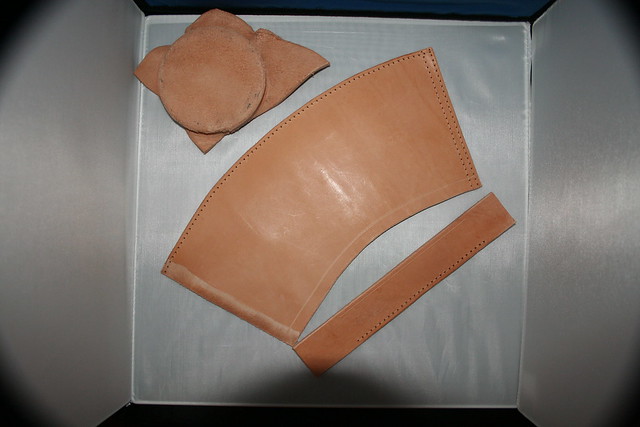
As I was making this tankard as a gift to a friend (and I'll be making more for Christmas presents) I wanted it to be as neat as possible so I used a stitch groover and a stitching wheel to mark out where the stitches were going to go and skived (thinned out to you and me - you learn a lot off the internet :) ) the edges to make stitching easier.
The lad I made this for wanted a design on it. He chose a stylized American Thunderbird as it's the logo of his motorbike club. I wasn't sure as I'd only tried carving leather once before (on tankard MK2) but I said I'd have a go as it didn't look too difficult.
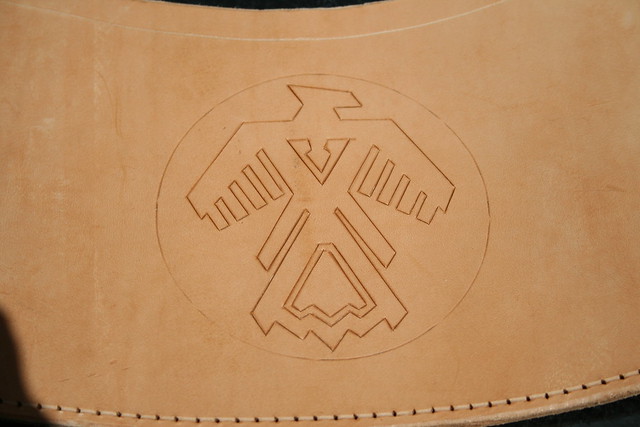
The image was drawn and then cut using a Stanley Knife. The edges of the cuts were "bevelled" on one side and I also added a background of dots to make the design stand out.
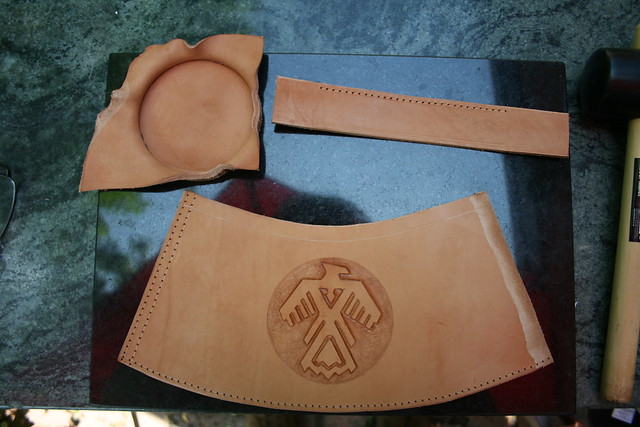
It was now time to start putting it all together.
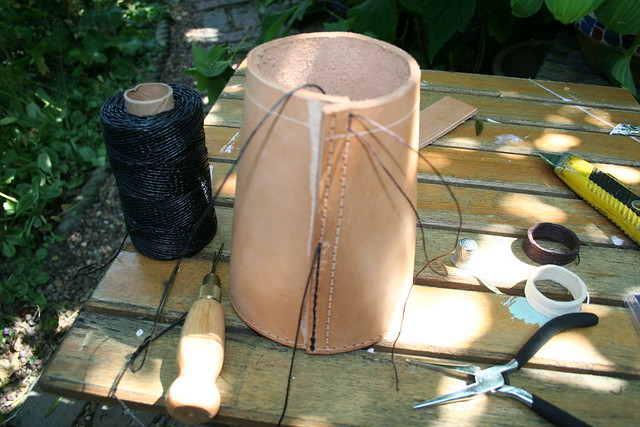
The tankard body was sewn using saddlestich and waxed thread. This isn't hard to learn (It can't be as I managed it...) but probably takes years practice to get is really neat. It's done by using two needles on the ends of the same thread and looping the stitches through the same hole (there's loads of You Tube videos on this technique if you are interested).
Once the body had been sewn it was time for the handle. This is soaked for 10 minutes and then wet formed into a tube in the middle
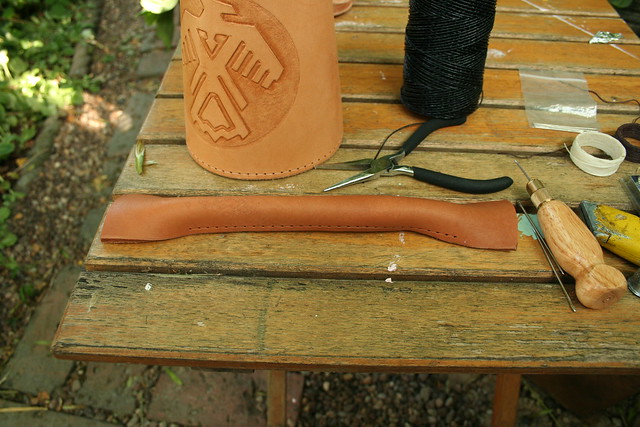
The handle is then sewn together (using saddlestitch) leaving two tabs at the ends. As it's stitched keep manipulating it into shape (N.B sewing wet leather is an absolute b*tch.....)
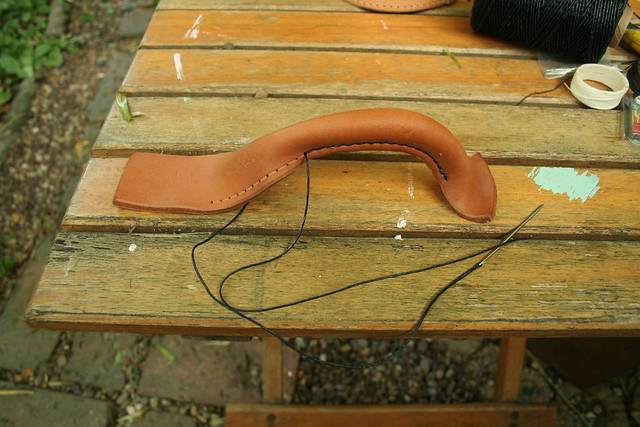
Eventually you end up with something like this...
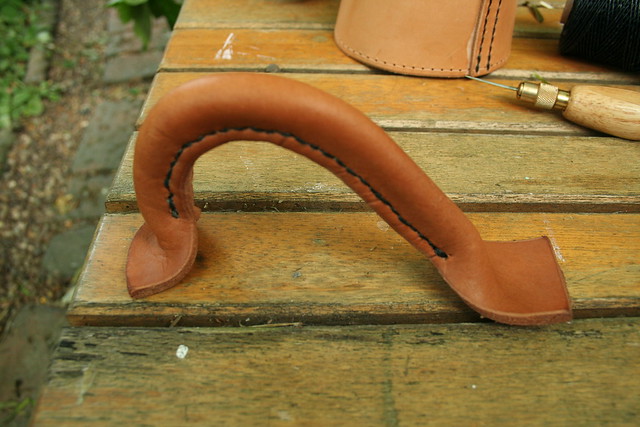
The handle can now be attached to the body (on tankard Mk1 I attached the base before the handle and sewing it at the bottom was almost impossible - but ho hum you live and learn :) )
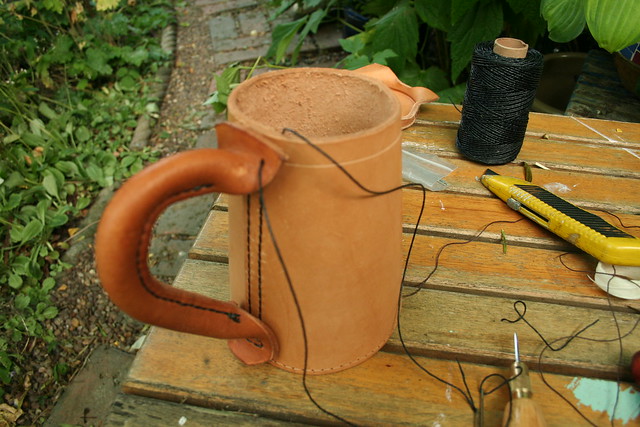
Finally the base can be inserted and sewn in place
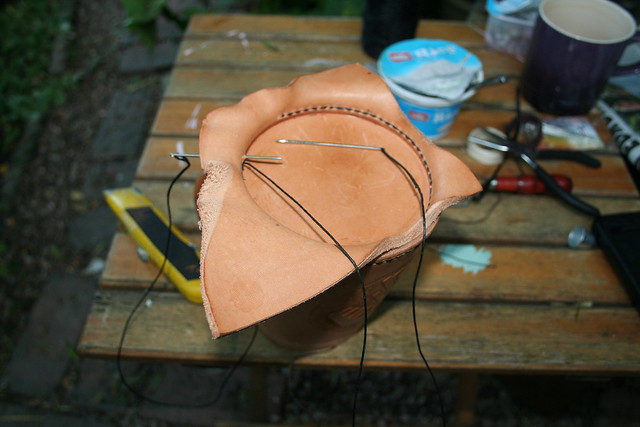
after 9 hours drawing, cutting, stitching etc and a quick trim of the base it's almost complete - just the waterproofing to do - oh and it's way beyond time for a pint of my latest (Sarah Hughes clone from GW's book)
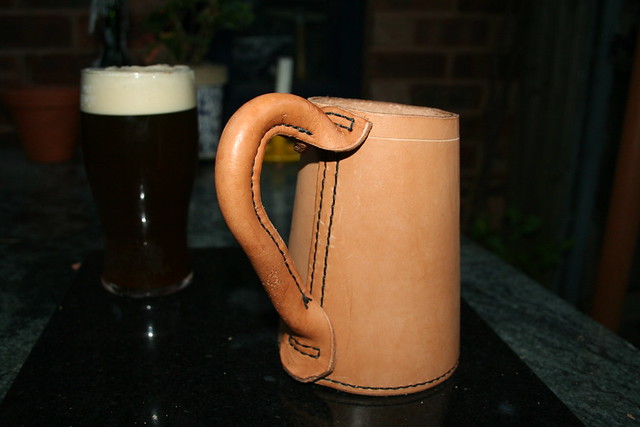
Waterproofing is done by heating up the tankard in the oven on a low heat and then painting the outside with 4 or 5 coats of melted pure beeswax (putting it back in the oven after each coat). Sorry no photo's as it was very messy but this time i'd put foil over the work surfaces, over the hob and inside the oven to catch the drips - as I said you live and learn :whistle: The leather soaks up the beeswax and changes colour to a lovely chocolate brown. A quick swill round the inside with some more melted beeswax will make it beer tight and when cooled the tankard goes rock hard.
N.B DO NOT heat the beeswax over an open flame as the flashpoint is very low and you could set yourself (or someone else) on fire. Use a Bain Marie type double vessel water boiler instead. You can make these out of old tins if you haven't got anything else
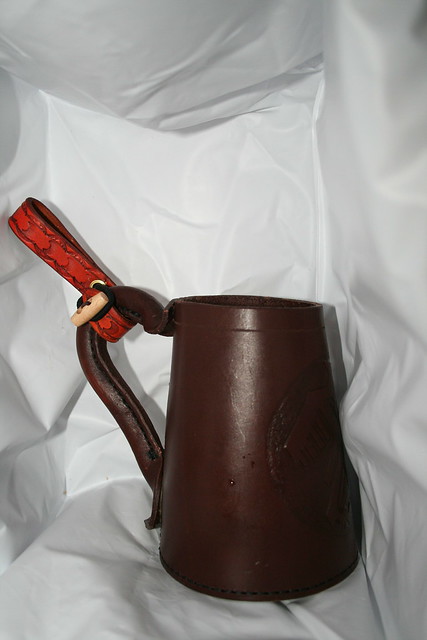
10 hours work and I ended up with this.....
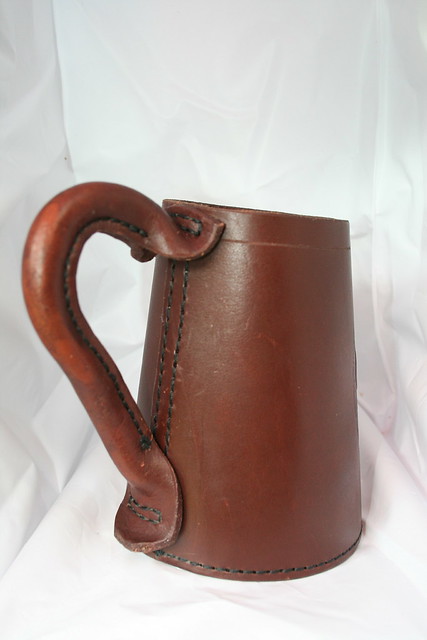
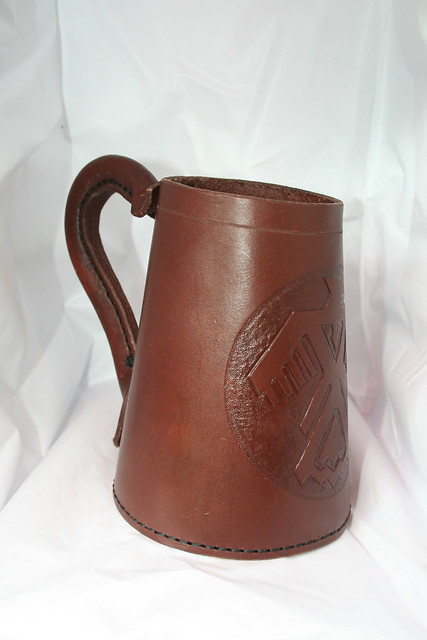
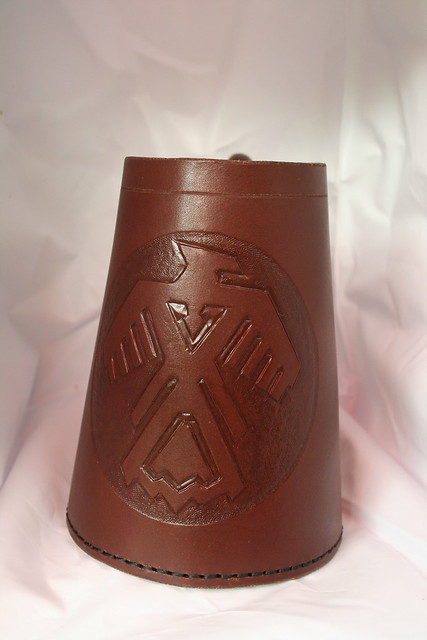
It holds a pint and a quarter to the brim :drink:
I just hope he likes it now....
Cheers
Chris
I looked around for one and found the Hidebound site which looked very tempting. But as ever, just buying one seemed too easy and I kept thinking "I wonder if I could make one of those...."
Now I'm no craftsman and have no previous leatherwork skills so everything is self taught but in the great "have a go yourself" ethos of this site, with a bit of of googling, some you-tubing, some time amalgamating of ideas, a couple of trials, quite a bit of swearing and some sore fingers This is what I came up with....
Mk3 Leather Tankard
Firstly I made the base out of 3mm Veg Tan leather and a 4" Jubilee Clip

The leather was dunked in a bowl of water for 10 minutes until all the bubbles stop coming out) and then "wet formed" around an old empty coffee can, held in place with the jubilee clip and then left to dry for 24 hours

Using this base I made a conical template for the body of the tankard and a strip for the handle out of old wallpaper. I then used these to cut out the 3mm Veg Tan leather.

As I was making this tankard as a gift to a friend (and I'll be making more for Christmas presents) I wanted it to be as neat as possible so I used a stitch groover and a stitching wheel to mark out where the stitches were going to go and skived (thinned out to you and me - you learn a lot off the internet :) ) the edges to make stitching easier.
The lad I made this for wanted a design on it. He chose a stylized American Thunderbird as it's the logo of his motorbike club. I wasn't sure as I'd only tried carving leather once before (on tankard MK2) but I said I'd have a go as it didn't look too difficult.

The image was drawn and then cut using a Stanley Knife. The edges of the cuts were "bevelled" on one side and I also added a background of dots to make the design stand out.

It was now time to start putting it all together.

The tankard body was sewn using saddlestich and waxed thread. This isn't hard to learn (It can't be as I managed it...) but probably takes years practice to get is really neat. It's done by using two needles on the ends of the same thread and looping the stitches through the same hole (there's loads of You Tube videos on this technique if you are interested).
Once the body had been sewn it was time for the handle. This is soaked for 10 minutes and then wet formed into a tube in the middle

The handle is then sewn together (using saddlestitch) leaving two tabs at the ends. As it's stitched keep manipulating it into shape (N.B sewing wet leather is an absolute b*tch.....)

Eventually you end up with something like this...

The handle can now be attached to the body (on tankard Mk1 I attached the base before the handle and sewing it at the bottom was almost impossible - but ho hum you live and learn :) )

Finally the base can be inserted and sewn in place

after 9 hours drawing, cutting, stitching etc and a quick trim of the base it's almost complete - just the waterproofing to do - oh and it's way beyond time for a pint of my latest (Sarah Hughes clone from GW's book)

Waterproofing is done by heating up the tankard in the oven on a low heat and then painting the outside with 4 or 5 coats of melted pure beeswax (putting it back in the oven after each coat). Sorry no photo's as it was very messy but this time i'd put foil over the work surfaces, over the hob and inside the oven to catch the drips - as I said you live and learn :whistle: The leather soaks up the beeswax and changes colour to a lovely chocolate brown. A quick swill round the inside with some more melted beeswax will make it beer tight and when cooled the tankard goes rock hard.
N.B DO NOT heat the beeswax over an open flame as the flashpoint is very low and you could set yourself (or someone else) on fire. Use a Bain Marie type double vessel water boiler instead. You can make these out of old tins if you haven't got anything else
10 hours work and I ended up with this.....


It holds a pint and a quarter to the brim :drink:
I just hope he likes it now....
Cheers
Chris


